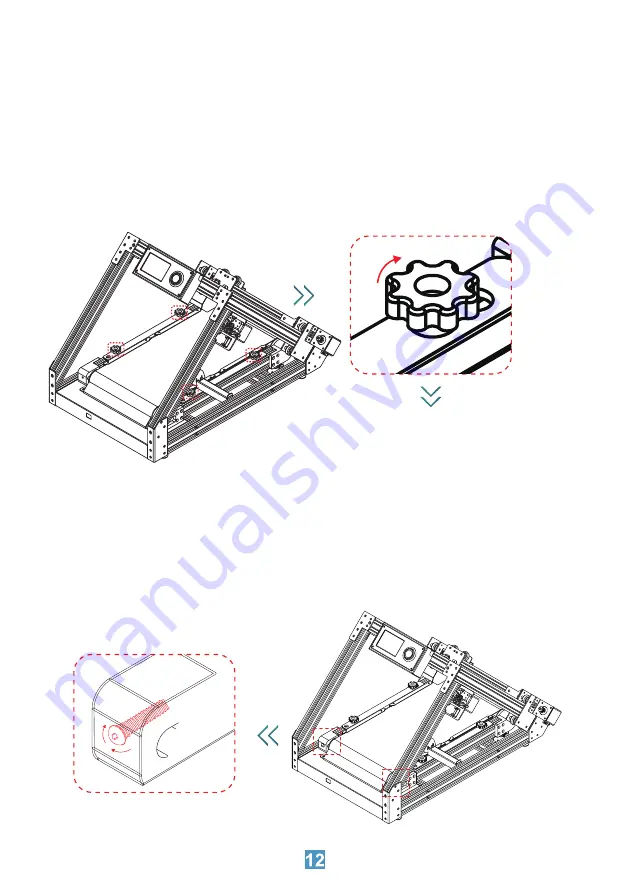
Pla�orm Adjustment Nuts
Counter Clockwise to “RAISE” the pla�orm.
Clockwise to “LOWER” the pla�orm.
2. Adjust the height of your belt.
Step 1. Navigate to the “Prepare” menu.
Step 2. Select “Layer test” func�on. A�er wai�ng for the nozzle to heat up,nozzle
will keep moving and extruding out filament to help you adjust the distance
between the nozzle and the belt.
Step 3. Adjust the height of your belt to make sure the filament is extruded fully
and evenly, so that your print can be well adhered to the pla�orm.
3. Press the belt with your hand and if you find that the belt has a bulge, �ghten
the belt tensioning screws clockwise on both sides to increase the belt tension.
You can observe the scales on both sides to make sure the le� and right side are
adjusted with the same amount.


