


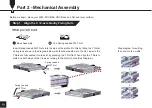

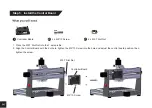


Step 2
:
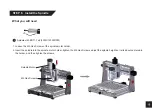
Install the X / Z-axis Gantry
X-axis/Z-axis
Gantry
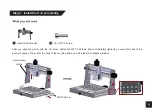
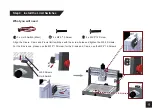
After you align the gantry with the nut holes, tighten the M5*16 Screws, before completely tightening, ensure the back of the
gantry is spaced 13mm from the back of the machine frame on both sides (See Diagram Below).
X-axis/Z-axis Gantry
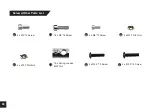
16 x M5*16 Screw
M5*16 Screw
24
1
2
Содержание Genmitsu 3020-PRO MAX
Страница 1: ...USER MANUAL Genmitsu 3020 PRO MAX CNC Router V1 0 Sept 2021...
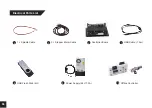
Страница 6: ...Base Assembly X axis Z axis Gantry Spindle with ER11 Tail 300W 12000RPM...
Страница 17: ...16 Completed View...
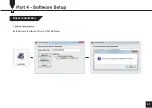
Страница 24: ...Driver Installation Install drivers software Driver CH340SER exe 23...
Страница 26: ...25...