background image

8

SAGEM F@st

TM

 1704

Installation of the Ethernet 
port

1.

You selected the 

Use the Ethernet cable

, click 

on 

Next

.

2.

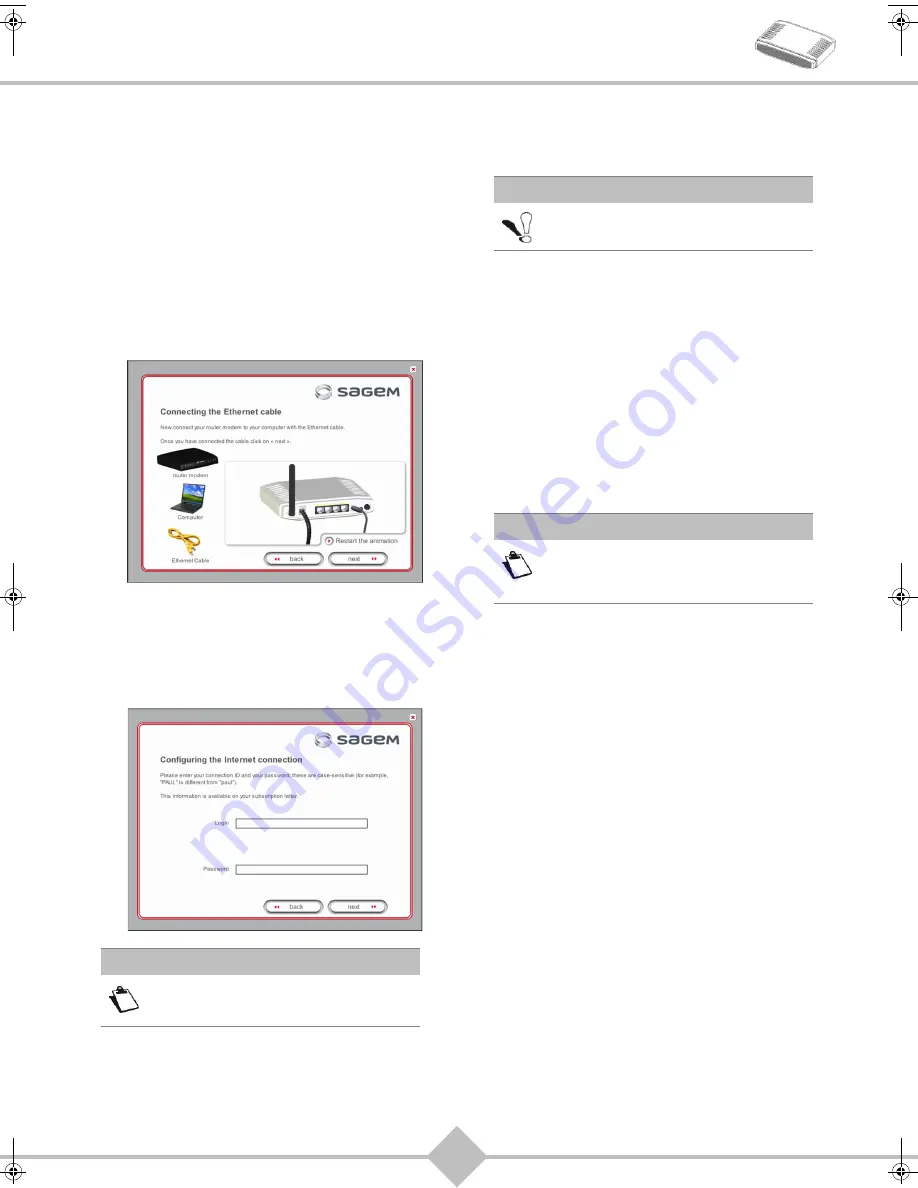
Follow the instructions displayed on screen by 
plugging in the router supply, switching it on and 
connecting the ADSL line, then connect your 
computer to one of the four Ethernet sockets 
(LAN1 to LAN4) of the router by using the 
Ethernet cable.

Once you have made the connections, click on 

Next

.

3.

The Internet connection screen appears.
Enter your connection ID and password, then 
click on 

Next

.

4.

A summary of the completed installation steps 
appear. Click on 

Finish

 to end the installation.

You may now use your Internet access.

Installation of an additional 
computer

1.

Insert the CD-ROM into the relevant drive of your 
computer.

2.

The welcome screen appears. Click on 

Next

.

3.

When asked for the installation type, select 

"You 

want to install an additional computer"

 then 

click on 

Next

.

4.

The interface selection screen appears.
Select the interface you want to use to install an 
additional computer in the local network (LAN) 
then click on 

Next

.

5.

Continue the installation as described in the case 
of a first-time installation.

Note

This information is provided by your 

I

nternet 

S

ervice 

P

rovider (ISP).

Important

Your router is already connected.

Note

Given that the router has already been 
installed once, you do not need to plug 
it in or connect the ADSL line.

QIG 253271827A Fast 1704_GB without WPS.book  Page 8  Mercredi, 7. octobre 2009  2:47 14

Содержание F@st 1704

Страница 1: ...Quick Installation Guide SAGEM F st 1704...

Страница 2: ...pment and of Directives 2006 95 EC concerning safety and 2004 108 EC concerning electromagnetic compatibility defined by the European Parliament and Council to reduce electromagnetic interferences and...

Страница 3: ...g additional telephones 5 4 Installation from the CD ROM 6 4 1 Installation by Wi Fi interface 6 4 2 Installation of the Ethernet port 8 4 3 Installation of an additional computer 8 5 Router supervisi...

Страница 4: ...ine cable used to connect your router to your telephone line 4 Ethernet cable used to connect your router to the Ethernet port of your computer 5 Quick Installation Guide 6 CD ROM 7 Filter Splitter us...

Страница 5: ...ion Connect the router to the mains via a readily accessible wall socket ensuring the electric cutting Location conditions By choosing an appropriate location you will preserve the longevity of the de...

Страница 6: ...m below Connecting additional telephones Make the connections as shown in the diagram below Important Make sure that the router is not connected to your computer before you start the installation from...

Страница 7: ...by Wi Fi interface 1 You selected the Wireless interface Wi Fi click on Next 2 Select the wireless connection mode Wi Fi The following connection modes are available by installing a Wi Fi USB adapter...

Страница 8: ...Next 2 The Internet connection screen appears Enter your connection ID and password then click on Next 3 A summary of the completed installation steps appear Click on Finish to end the installation Y...

Страница 9: ...nd the installation You may now use your Internet access Installation of an additional computer 1 Insert the CD ROM into the relevant drive of your computer 2 The welcome screen appears Click on Next...

Страница 10: ...Router in rescue mode ADSL Off ADSL Down Green steady ADSL Up Green blinking ADSL Synchronisation in progress Internet Off Power Off or The Internet account must be configured Green steady The Intern...

Страница 11: ...appears The router s activity status is always visible at the top right corner You can perform the following actions click on Refresh to update the data displayed click on Reboot to restart your rout...

Страница 12: ...Status Message Meaning Off Adsl Down ADSL line not connected or not activated Not configured The Internet account must be configured Router rebooting Router is rebooting Green Connected The Internet a...

Страница 13: ...F stTM 1704 6 Advanced router configuration Use the HTTP configuration tool to access advanced router settings and configure your equipment according to your needs Example of an advanced Wi Fi config...

Страница 14: ...Internet we recommend that you restart your router and eventually reset the factory configuration You will then need to re configure your router as a first time setup Diagnostics tool To access the Di...

Страница 15: ...n of the HTTP configuration tool see Router supervision page 10 Resetting factory configuration To reset the default settings and therefore restore the router to its factory configuration use one of t...

Страница 16: ...ations included are subject to change without prior notice Sagem Communications tries to ensure that all information in this document is correct but does not accept liability for error or omission Non...

Отзывы: