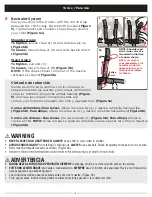
Safety 1st onBoard 35 LT Скачать руководство пользователя страница 28

Содержание onBoard 35 LT

Страница 1: ...base For more information go to safety1st com car seat base KEEP INSTRUCTIONS FOR FUTURE USE Read all instructions before using this child restraint 0721 004R1 1 30 18 Failure to follow the warnings o...

Страница 2: ......

Страница 3: ......

Страница 4: ...Head Rest...

Страница 5: ......

Страница 6: ...1 2 3...

Страница 7: ...1 2 3...

Страница 8: ...sewn end...

Страница 9: ...sewn end...

Страница 10: ......

Страница 11: ......

Страница 12: ......

Страница 13: ......

Страница 14: ......

Страница 15: ......

Страница 16: ...sewn end...

Страница 17: ......

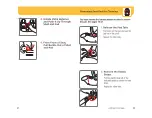
Страница 18: ...Head Rest To remove head rest unbuckle the harness Pull the buckle down through the slot in head rest Slide head rest out from behind the harness straps...

Страница 19: ......

Страница 20: ......

Страница 21: ......

Страница 22: ......

Страница 23: ......

Страница 24: ......

Страница 25: ......

Страница 26: ......

Страница 27: ......

Страница 28: ......

Страница 29: ...1 in 2 5 cm...

Страница 30: ......

Страница 31: ......

Страница 32: ......

Страница 33: ...ldren goods or accessories in or on this product except as recommended in the manufacturer s instructions NEVER place more than 2 lbs 0 91 kg in parent s tray to prevent tipping POR LA SEGURIDAD DE SU...

Страница 34: ...g en la NUNCA coloque m s de 10 lbs 4 5 kg en el cesto existir condiciones inestables peligrosas La carriola es s lo para ni os que pesen hasta 50 AL ESTAR SENTADOS punto medio de la cabeza del ni o e...

Страница 35: ...ano para abrir la cubierta Figura 1 y la otra mano para levantar el manillar Figura 1a Carriola har clic cuando est completamente abierta y trabada Front Wheel Slide front wheel onto frame tube as sho...

Страница 36: ...seras se encuentran en el eje Ruedas traseras Sugerencia til Para retirar y armar f cilmente el pasador de chaveta utilice la pinza de punta aguja Quite el pasador de chaveta y una arandela de metal d...

Страница 37: ...to make sure the canopy is fully snapped into place Instale la capota Deslice la cubierta de pl stico sobre los soportes de la capota en los espacios correspondientes en el armaz n de la carriola Figu...

Страница 38: ...S MUST BE LOCKED Unlock Brakes Lift up levers to unlock brakes Frenos Trabe los frenos Pise las palancas de los frenos en las dos ruedas traseras Figura 1 Para estacionar la carriola AMBOS FRENOS DEBE...

Страница 39: ...ate up or down as desired Figure 4 Manubrio Presione los botones a ambos lados del manubrio y g relo hacia arriba o hacia abajo Figura 4 4 Seat Position To lower seat back completely Lift the clamp le...

Страница 40: ...ea en A y deslice la hebilla hacia abajo Figura 5b Correa a la cinturas Para tensar tire del extremo C Figura 5b Para aflojar aflojar la correa en B NOTA Si las correas se salen de la hebilla vuelva a...

Страница 41: ...l stand on its own Para plegar la carriola Ponga los frenos traseros Saque al beb Ubique la agarradera LEVANTE PARA PLEGAR que se encuentra debajo del bolsillo del asiento Figura 6 Tire de la agarrade...

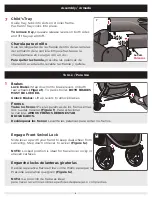
Страница 42: ...beb SIEMPRE use la charola para el ni o cuando el autoasiento est instalado NUNCA use el apoyavasos de la bandeja para ni os si el asiento para autom vil est colocado en la carriola La carriola puede...

Страница 43: ...7d Una vez instalado correctamente el autoasiento descansar sobre charola para el ni o y el armaz n de la carriola Figura 7c Tire del autoasiento hacia arriba para asegurarse de que est firmemente ins...

Страница 44: ...cleaners or bleach to clean stroller Restraint and crotch straps should be surface washed and air dried only Do not place in washing machine or dryer Periodically check for loose screws worn parts tor...

Страница 45: ...STATE TO STATE Garant a limitada de un a o Dorel Juvenile Group Inc garantiza al comprador original que este producto Sistema de viaje Dash estar libre de defectos de material y mano de obra cuando se...

Страница 46: ......
Отзывы: