

When the
Sabio Storage
login screen opens, type
admin
for both the
username and the
password, then click
Login
. The main menu
opens.
See the
User Guide
that came with
your system, or visit us online at
www.sabioproducts.com.
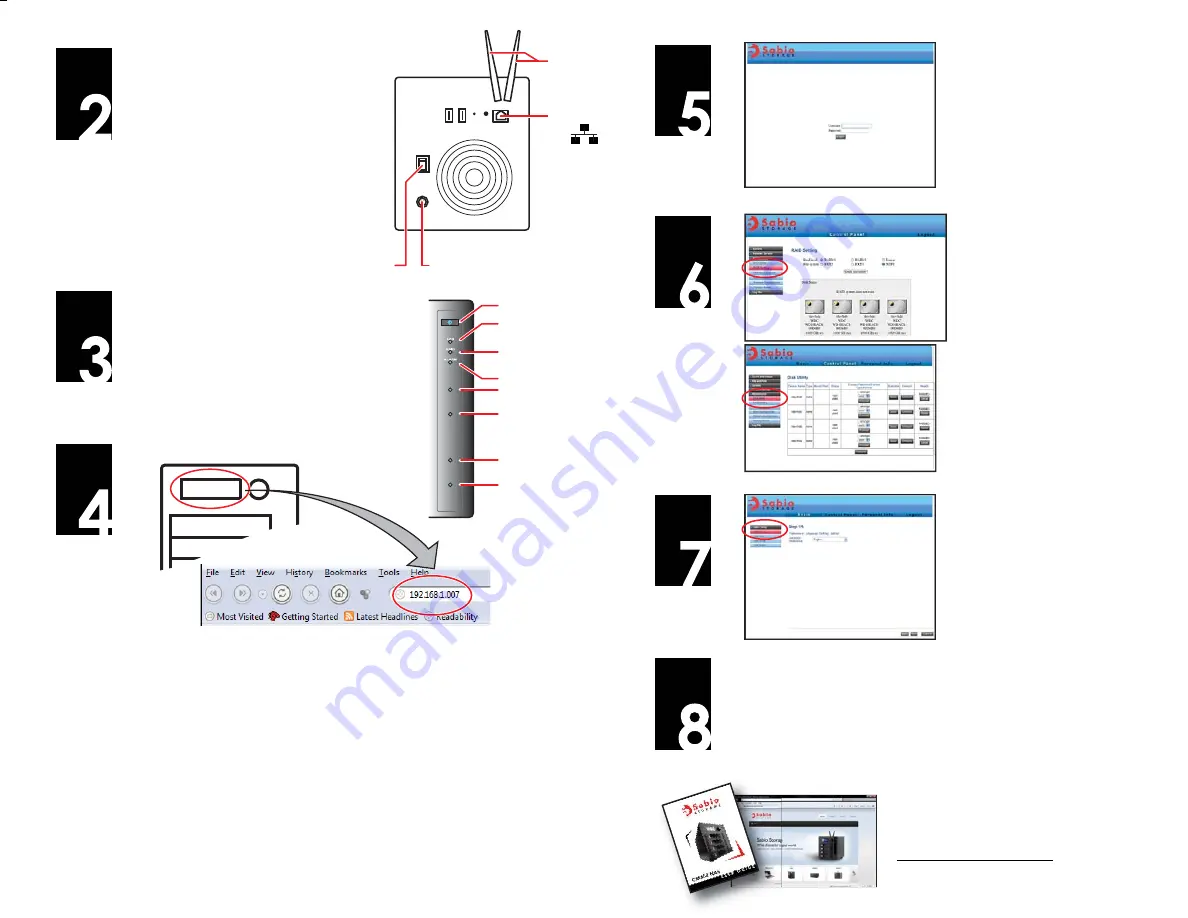
Connect the Ethernet cable to the
Ethernet jack on the back of the NAS,
then to any open port on your
network, switch, or router. Make sure
that all devices you want to have
access to the NAS are on the same
network.
●
The Ethernet cable is required for
first-time setup.
●
If you will use a wireless connection,
also attach the two antennas to the
back of the NAS.
Connect the DC power cable to the
DC IN
power connector on the back of the NAS,
press the top of the rear
POWER
switch to
the “I” (on) position, then press the front
power button. The power indicator turns on.
All contents © copyright 2009 Sabio Storage, Inc.
ZSD001Q
CM404-QSV1Z
When the display changes from “Booting” to “IP Address,”
enter the number that’s displayed into your Web browser’s
address line, then press
Enter
.
Note
: The computer that you use for this step must be
on the same network as the CM404.
Tip
: If the IP address doesn’t appear on the display,
rotate the display control knob until it does.
- OR -
192.168.1.007
Antennas
DC power connector
POWER switch
Ethernet jack
Front panel
indicators
Power button
LAN
RAID
Alarm
Drive 1 active
Drive 2 active
Drive 3 active
Drive 4 active
Log in as
admin
, click
Quick
Setup
, then click
Wizard
and
follow the on-screen
instructions to set up basic
configuration for your NAS.
To set up a the drives as
standard, standalone
drives, click
Maintenance
,
Disk Utility
, then change
settings as needed and
click
Format
for each drive
you want to use. Your NAS
reboots after each format.
To set up a RAID array, click
Maintenance
, then click
RAID Setting
. Change the
settings as needed, then
click
Create raid system
.
Your NAS reboots.
For More Information...
After the setup wizard is complete:
●
To set up wireless connectivity, click the
Control Panel
tab,
then click
System
, then
Wireless Settings
.
●
To format any of the installed drives, click the
Control Panel
tab, then click
Maintenance
, then
Disk Utility
.
●
To set up a RAID array, click the
Control Panel
tab, then click
Maintenance
, then
RAID Setting
.


