background image


SWING-MOUNT IR 


[email protected] 

18


Setting favorite position 

14. 

Movement  accuracy: 

Please  note  that,  due  to  many  external  reasons  the  accuracy  of 

movement might be within the tolerance of 2°-3°. 

Using the programmed remote control, you can set the maximum range of motion and the favorite 
position. To set the maximum position: 

To set the favorite position: 

a.  set the favorite position using 

(I) and (II) buttons


– preferred position 

should be set 

between the maximum position and complete closing of the mount


b.  save the position with the 

button (III)

 - you will hear a short "beep" signal. From now, 

the button assigned as (IV) will move the mount to the programmed position  

15. 

Angle  movement  limit:

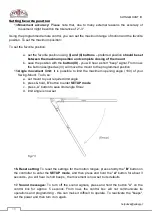
  It  is  possible  to  limit  the  maximum  opening  angle  (180)  of  your 

Swing-Mount. To do so: 

a.  set mount to your required limit angle 
b.  press & h

old „B” button to enter 

SETUP mode


c. 

p

ress „A” button to save limit angle 

Rmax 

d.  limit angle is now set 


16. Reset setting: 

To reset the settings for the motion ranges, press shortly the "

B

" button on 

the  controller to  enter  the 

SETUP  mode

,  and  then press and  hold  the  "

A

"  button  for  about  3 

seconds - you will hear 3 short beeps , the movement is now set to its defaults. 

17.  Sound  messages:

  To  turn  off  the  sound  signals,  press  and  hold  the  button  "A"  on  the 

control  box  for  approx.  5  seconds.  From  now,  the  control  box  will  not  communicate  its 
operations  and  programming  -  this  can  make  it  difficult  to  operate. To reactivate  the  "beeps", 
cut the power and then turn it on again. 

fig.13 

Содержание SM-L-180

Страница 1: ...SWING MOUNT IR Instrukcja monta u i obs ugi Assembly and operating manual Modele Models SM L 180 SM XL 180 YouTube link for installation manual...

Страница 2: ...3 Mounting the IR EYE receiver 15 Device operating 16 Features of the control box 16 Lift operating control 16 Setting favorite position 18 Przed zaplanowaniem monta u instalator musi okre li Rozmiar...

Страница 3: ...1 szt 3 Belka pionowa 2 szt 4 Odbiornik podczerwieni IR EYE 1 szt 5 Szablon do wiercenia otwor w 1 szt 6 Zasilacz 1 szt 7 ruby ISO 4762 1 kpl 8 ruby ISO 7380 1 kpl 9 Podk adki ISO 7089 1 kpl 10 ruba m...

Страница 4: ...okr t krzy akowy 2 Wkr tarka lub wiertarka 3 Wiert o odpowiednie do rub mocuj cych 4 Poziomica opcjonalnie Monta uchwytu 1 Zastosuj szablon str 3 wywier otwory i zamontuj ruby rys 1 Uwaga Pami taj o w...

Страница 5: ...z Swing Mount r cznie lub zaprogramuj sterownik Uwaga Sprawd dok adnie czy urz dzenie jest wypoziomowane za pomoc dostarczonej poziomicy rys 4 Monta telewizora do podno nika 5 Przykr pionowe belki do...

Страница 6: ...uchwycie rys 6 a nast pnie dokr ruby szczeg D Uwaga Pami taj e telewizor nie mo e wystawa poza o obrotu Swing Mount 7 Wyreguluj k t nachylenia telewizora tak aby wygodnie widzie ekran W tym celu poluz...

Страница 7: ...EYE do odpowiednich gniazd a nast pnie pod cz zasilacz do r d a zasilania rys 8 Przycisk A Tryb Setup Przycisk B ograniczenie ruchu maksymalnego Gniazdo RJ 45 Pod czenie odbiornika IR lub akcesori w G...

Страница 8: ...system bezpiecze stwa wykrywa przeszkody podczas poruszania si telewizora System dzia a automatycznie i nie wymaga dodatkowych ustawie Po wykryciu przeszkody podno nik zatrzymuje si i sygnalizuje d w...

Страница 9: ...y V powr t do pozycji wyj ciowej 5 sygna w sygna ci g y rys 11 Po wybrzmieniu ostatniego sygna u pilot jest zaprogramowany Uwaga Zaprogramowane przyciski pilota b d jednocze nie aktywne dla dotychczas...

Страница 10: ...rys 13 Aby to zrobi a ustaw rami w wybranej pozycji maksymalnej b wci nij i przytrzymaj przycisk B przez ok 3 sekundy us yszysz potwierdzenie wej cia w tryb SETUP ci g ym sygna em d wi kowym c wci nij...

Страница 11: ...Mount 1 pc 2 TV arm 1 pc 3 TV Bracket 2 pcs 4 IR EYE receiver 1 pc 5 Template for drilling 1 pc 6 AC adapter 1 pc 7 Screws ISO 4762 1 set 8 Screws ISO 7380 1 set 9 Pads ISO 7089 1 set 10 Mounting scre...

Страница 12: ...1 Cross screwdriver 2 Drill driver 3 Drill suitable for screws 4 Spirit level optional Mount assembly 1 Apply the template page 10 drill holes and mount the screw fig 1 NOTE Remember to level the dev...

Страница 13: ...ten the screws Open Swing Mount manually or program the control box NOTE Double check if the device is leveled using the provided spirit level fig 4 Mounting the TV to the mount 5 Mount the vertical b...

Страница 14: ...g 6 and then tighten the screws fig 6 detail D NOTE Remember the TV mustn t protrude beyond the Swing Mount axis of rotation 7 Adjust the angle of inclination to comfortable see the screen To do this...

Страница 15: ...adapter and IR receiver to corresponding sockets Then connect the adapter to a power source fig 8 Button A Setup Mode Button B Set movement limit RJ 45 Socket IR EYE or accessories Power Socket 12V AC...

Страница 16: ...age the control box and you will loose the warranty for doing so 12 Safety system operation The intelligent safety system detects the obstacles when the screen is moving It does not require any calibr...

Страница 17: ...mber of signals correspond to the button set I closing button 1 signal constant signal II opening 2 signals constant signal III setup button 3 signals constant signal IV preferred position button 4 si...

Страница 18: ...programmed position 15 Angle movement limit It is possible to limit the maximum opening angle 180 of your Swing Mount To do so a set mount to your required limit angle b press hold B button to enter S...

Отзывы: