background image

GB

3

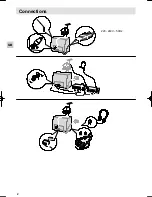
1. Aerial Socket

Enables connection of the aerial and, if required, a video recorder (see manual for latter).

To tune the channel reserved for your video recorder, start up the recorder then carry out
MANUAL CHANNEL SETTING operations.

Store at any programme ending with a 9 (9,19,29, etc.)

Each time you use the video recorder, switch to the channel assigned to it.

2. SCART Socket

This is used to connect:

– a VHS, 8 MM, S–VHS or Hi–8 video recorder or camcorder,

– a PAY TV decoder,

– a video games console.

To use the connected device, select the audiovisual programme by pressing the

button.

This selection is automatic for some devices.

AV is displayed at the bottom of the screen.

If you have an S-VIDEO device, press the

button again. S-VIDEO is then displayed at the bottom

of the screen for a few seconds.

When you switch off the device and if you have not changed channel during play, the TV set
automatically returns to the previous channel.

If the TV set has been switched on by the video recorder, it will be placed on stand–by when the
video recorder is switched off.

3. Audio / Video CINCH Sockets

These are used to connect a VHS or 8 mm camcorder.

Press the

button to select the audiovisual programme to view your recordings.

When you switch off the connected device, the TV set remains in audiovisual (AV) mode.

Call up the channel you wish to watch using the numerical keypad on the remote control.

In order to maintain the optimum sound and picture quality of your TV set, avoid connecting 2 devices
to the SCART socket and the AUDIO/VIDEO sockets simultaneously.

Содержание M 3610G

Страница 1: ...MANUEL D UTILISATION BEDIENUNGSANLEITUNG MANUALE DI UTILIZZAZIONE USER MANUAL MANUAL DE UTILIZACI N GEBRUIKSAANWIJZING BRUKSANVISNING BETJENINGSVEJLEDNING FOLHETO DE UTILIZA O M 3610G...

Страница 2: ...ng thunderstorms It is wise to disconnect the aerial plug too in this case 2 If you notice any odour or smoke coming from your set Additional information Your TV set is adequately shielded to prevent...

Страница 3: ...GB 2 Connections 220 240V 50Hz...

Страница 4: ...have an S VIDEO device press the button again S VIDEO is then displayed at the bottom of the screen for a few seconds When you switch off the device and if you have not changed channel during play the...

Страница 5: ...ent e g video recorder To leave a menu Sound mute Volume level Stand by Inactive Inactive Adjustment move to Right Left in menus and select one of the proposed options Move Up and Down in the menus To...

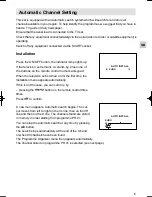
Страница 6: ...remains on stand by press one of the buttons on the remote control numerical keypad When the television set is turned on for the first time the Installation menu appears automatically If this is not t...

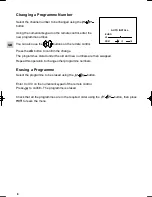
Страница 7: ...trol Press the button to confirm the change The programmes stored under the old and new numbers are then swapped Repeat this operation to change other programme numbers Erasing a Programme Select the...

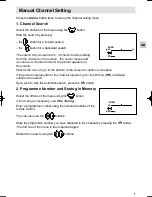
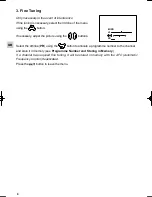
Страница 8: ...ait for the menu to go to the bottom of the screen for optimum reception If the picture corresponds to the channel required go to the 4th line PR otherwise continue the search If you wish to stop the...

Страница 9: ...necessary adjust the picture using the buttons Select the 4th line PR using the button to allocate a programme number to the channel and store it in memory see Programme Number and Storing in Memory...

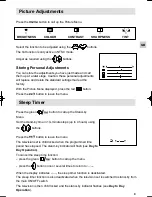
Страница 10: ...ave the menu Sleep Timer Press the green button to call up the Stand by Menu Set the stand by time in 10 minute steps up to 4 hours using the buttons Press the button to leave the menu The television...

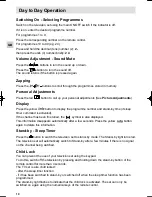
Страница 11: ...by time if sleep timer command is activated If the channel has been fine tuned the symbol is also displayed This information disappears automatically after a few seconds Press the yellow button again...

Страница 12: ...THOMSON multimedia 46 47 Quai A Le Gallo 92648 Boulogne Cedex France RCS Nanterre B 322019464 208 546 60...

Отзывы: