SAB SABIP1200 Скачать руководство пользователя страница 30

29

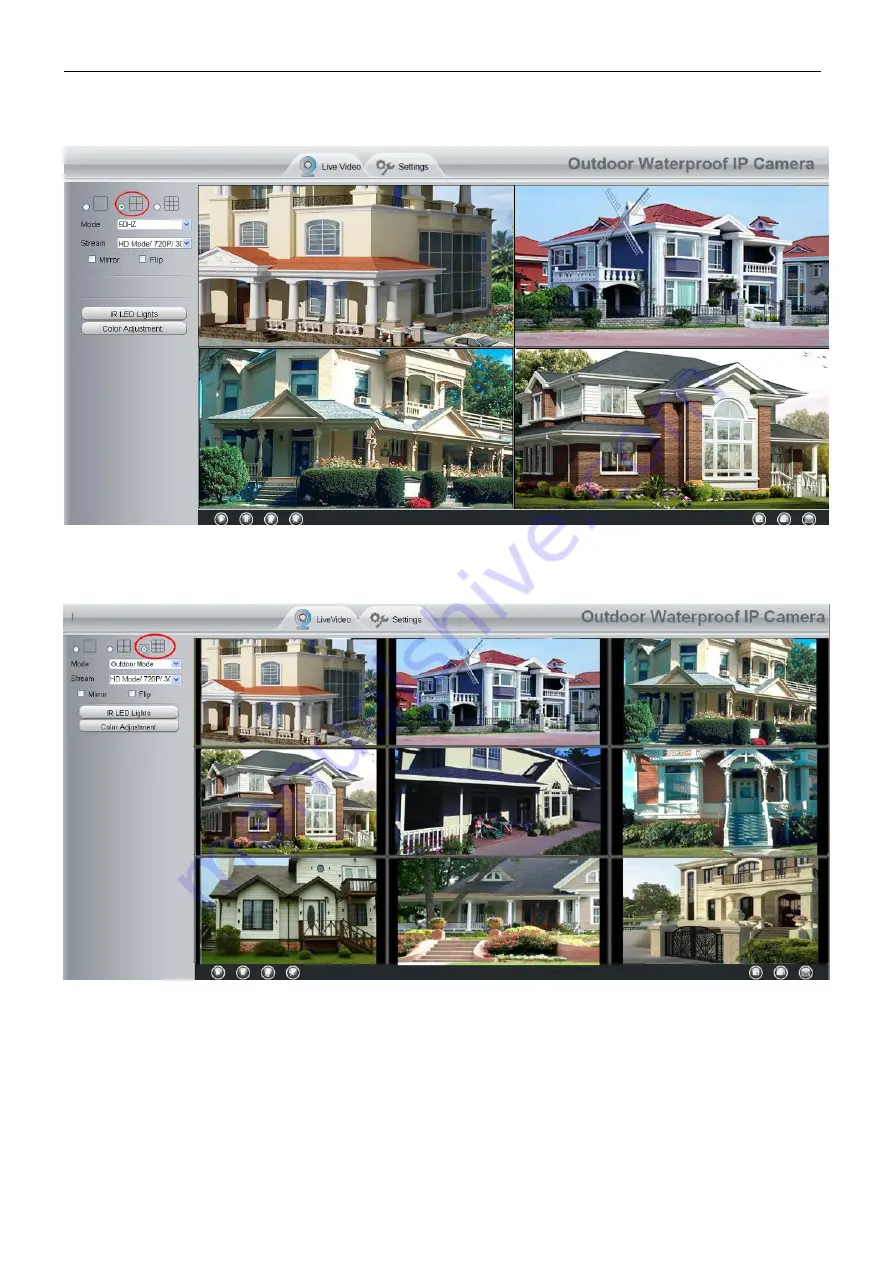
Back to Surveillance Windows, and click Four Windows option, you will see four cameras you added.

Figure 4.3

Figure 4.4

Add cameras in WAN

If you want to view all cameras via the internet(remote computer), you will need to add them using DDNS
domain name. Firstly, make sure all of the cameras you added can be accessed through the internet. (Read
How to configure DDNS settings in chapter 4.3.3)
Login to the first camera using a DDNS domain name and port.

Содержание SABIP1200

Страница 1: ...User User Manual Manual Outdoor HD Wireless IP Camera Model SABIP1200 V1 0...

Страница 2: ...AN 8 2 3 1 Static IP Addresses 8 2 3 2 Remote Access 8 2 4 Using the VLC player 11 2 5 IP camera connection to the server 13 3 Surveillance Software GUI 14 3 1 Login Window 14 3 2 Surveillance Window...

Страница 3: ...1 Back up Restore 52 4 9 2 System Upgrade 53 4 9 3 Patch Installation 54 4 9 4 Factory Reset 55 4 9 5 Reboot 55 5 Appendix 56 Install the add on of Firefox browser Google Chrome and IE Chrome 56 5 1 2...

Страница 4: ...and managing images are simplified by using the provided web interface across the network utilizing wireless connectivity 1 1 Key Features Standard H 264 video compression algorithm to satisfy the tr...

Страница 5: ...Installation Guide to avoid damage due to faulty assembly and installation This also ensures the product is used properly as intended 1 3 Packing Contents IPCAM 1 Network Cable 1 Wi Fi Antenna 1 CD 1...

Страница 6: ...min with no password 4 Audio output interface The jack is used to plug external output device such as loud speaker directly Here microphone cannot directly insert to the interface it must connect to a...

Страница 7: ...the rain will not wet out device through tail line 2 Accessing the Network Camera 2 1 Hardware Connection Software Installation Figure 2 1 1 Mount the antenna and make it stand vertically Only for the...

Страница 8: ...Tool icon to run and it should find the camera s IP address automatically after you plug in the network cable Figure 2 2 Double click the IP address of the camera the camera login page should be open...

Страница 9: ...the WAN IP address from a public website To obtain your WAN IP address enter the following URL in your browser http www whatismyip com The webpage at this address will show you the current WAN IP Fig...

Страница 10: ...ere If you want to set Remote Access for several cameras on the same network you will need to change the HTTPS port for each camera IP Address Set this in the same subnet as your computer or keep it a...

Страница 11: ...steps we will be using the TP LINK brand wireless router as an example If there is a UPnP function in your router Choose Forwarding UPnP make sure that the Current UPnP Status is Enabled Figure 2 10...

Страница 12: ...ort number videosream The part in the square brackets may be omitted user name password The user name and password to access the camera This part can be omitted IP WAN or LAN IP address Videostream He...

Страница 13: ...the VLC 1 rtsp admin 123 192 168 1 11 554 videoMain 2 rtsp 192 168 1 11 554 videoMain 3 rtsp 123 192 168 1 11 554 videoMain 4 rtsp admin 192 168 1 11 554 videoMain Open the VLC and go to Media Open N...

Страница 14: ...port mapping You can read Quick Installation Guide about How to configure port forwarding NOTE If you modify the camera s username or password you had better reboot the camera or else the new username...

Страница 15: ...t unauthorized users login the camera Section2 Stream The camera supports two stream modes Main stream and Sub stream If you want to access the camera form LAN here you can select Main stream If you w...

Страница 16: ...in the camera in the future Figure 3 2 After logging in for the first time you will go to Setup Wizard automatically Here you can set the basic parameters of camera such as camera name camera time wir...

Страница 17: ...networks Click Scan find the SSID of your wireless router select and enter the password Figure 3 6 IP Set IP address of the camera You could choose to obtain an IP automatically or set the IP address...

Страница 18: ...eds about 1 minute to connect the camera to your router 3 2 Surveillance Window Figure 3 8 Section1 Live Video Settings buttons Path to surveillance window Click this button and back to the surveillan...

Страница 19: ...to identify the stream type 2 Resolution The bigger the resolution the better of the image quality is If you are accessing the camera via internet and want to get more fluent video streaming please se...

Страница 20: ...amera time panel and adjust the device time Go to Settings Video On Screen Display panel you can add or no add OSD Section7 Play Stop Talk Audio Snap Record Full screen button 1 Play Click it to play...

Страница 21: ...Full Screen Click it to make full screen or you can double click the surveillance screen to make full screen Double click again and exit full screen Onscreen Mouse Control Right click the mouse and yo...

Страница 22: ...Camera Settings Click the button Settings goes to Administrator Control Panel to make advanced camera settings 4 1 Setup Wizard The way to set it you could refer to section 3 1 Figure 4 1 4 2 Device S...

Страница 23: ...ddress of your camera For example Device ID is 008414350787 the same MAC ID sticker is found at the bottom of the camera Camera Time The system time of the device Click Basic Settings and go to Camera...

Страница 24: ...e camera and clear the log records 4 3 Basic Settings This section allows you to configure your Camera Name Camera Time Mail User Accounts and Multi Device 4 3 1 Camera Name You can define a name for...

Страница 25: ...Network Time Protocol will synchronize your camera with an Internet time server Choose the one that is closest to your camera Sync with PC Select this option to synchronize the date and time of the Ne...

Страница 26: ...w to change the password Firstly select the account which you want to change the password then select Change password enter the old password and the new password lastly click modify to take effect Fig...

Страница 27: ...ount which you want to delete then click Delete button to take effect How to change the username Firstly select the account which you want to change the username then select Change username enter the...

Страница 28: ...n support a maximum of 9 devices monitoring all at the same time This page you can both add IPCAM MJPEG and H 264 series cameras to the first camera and view multi surveillance screen on one window Ad...

Страница 29: ...as MJPEG and H 264 Here will show you which series the camera belongs to Figure 4 2 2 Enter the User name and password of the 2nd camera 1 Click it camera model alias host and HTTP Port will be filled...

Страница 30: ...ameras in WAN If you want to view all cameras via the internet remote computer you will need to add them using DDNS domain name Firstly make sure all of the cameras you added can be accessed through t...

Страница 31: ...nd password and then choose Add Figure 4 6 1 The camera model MJ or H264 2 The 2nd camera s name 3 Fill in the 2nd camera s DDNS host not LAN IP 4 Enter the 2nd camera s user name and password 5 Click...

Страница 32: ...DNS domain name not its LAN IP Figure 4 7 Return to video window You will see all of the cameras accessible through the internet When you are away from home you can use the first camera s DDNS domain...

Страница 33: ...page Keep the camera in the same subnet of your router or computer Figure 4 13 Changing settings here is the same as using the IP Camera Tool It is recommended that you use the subnet mask gateway and...

Страница 34: ...f you don t know the DNS server you can use the same settings as the Default Gateway Set the same Subnet Mask and gateway of the camera with your PC There are two DNS servers You can set any of them S...

Страница 35: ...rg for example Go to option of DDNS on the Settings Network panel you can see the domain name Figure 4 9 Now you can use http Domain name HTTP Port to access the camera via internet Take hostname cp49...

Страница 36: ...reate a free hostname Firstly Login on www no ip com and click No IP Free to register Figure 4 10 Please register an account step by step according to instructions on www no ip com After registration...

Страница 37: ...NS Service Settings within the Camera Please set DDNS Settings within the camera by hostname a user name and password you ve got from www no ip com Take hostname ycxgwp no ip info user name test passw...

Страница 38: ...l take effect Do port forwarding within the router Example The camera s LAN IP address is http 192 168 8 100 2000 Firstly login the router goes to the menu of Port Forwarding or Port Trigger or named...

Страница 39: ...s with your routers security settings and sometimes may error We recommend you configure port forwarding manually on your router 4 4 5 Port This camera supports HTTP Port HTTPS Port ONVIF Port HTTP Po...

Страница 40: ...our example it was changed to 2000 so we see http 192 168 8 102 2000 in IP Camera Tool Also the LAN IP address is now fixed at a static IP address of http 192 168 8 102 2000 This IP address will not c...

Страница 41: ...ts HTTPS port The default port is 443 You can use the url to access the camera https IP HTTPS port RTSP port The default port is 554 Only some IP Cameras have RTSP port 4 4 6 Mail Settings If you want...

Страница 42: ...onfigured Figure 4 21 If the test success you can see the Success behind the Test at the same time the receivers will receive a test mail If the test fails with one of the following errors after click...

Страница 43: ...LAN you can set If you have an FTP server which you can access on the internet you can set Port Default is port 21 If changed external FTP client program must change the server connection port accord...

Страница 44: ...l you need to open the P2P function of the camera at Settings Network P2P Figure 4 24 4 5 Video This section allows you to configure Video stream settings On screen display and Snapshot settings 4 5 1...

Страница 45: ...andwidth When the bandwidth is very narrow and bit rate is large that will lead to video can not play well Frame rate The maximum frame rate is 30 fps You should lower frame rate when the bandwidth is...

Страница 46: ...le capture interval follow the steps below 1 Select Enable timing to capture 2 Capture interval The interval time between two captures 3 Select the capture time Capture anytime Click the black button...

Страница 47: ...t the distortion correction There are three options Low Medium High Figure 4 29 If you replace the lens the image has found distortion uneven and so on you can modify the Select The Distortion Correct...

Страница 48: ...between two motion detections Here supports 5s 6s 7s 8s 9s 10s 11s 12s 13s 14s 15s Select one interval time 4 Select the alarm indicators When the motion has been detected the alarm status will turn t...

Страница 49: ...as been detected the camera will recording and load it to the FTP server Make sure you have set FTP and set FTP as the storage path in Video Snapshot settings panel 5 Set detection area Click set dete...

Страница 50: ...For example click TUE the all column of TUE turns to red that means during Tuesday whole day when something moving in the detection area the camera will alarm Figure 4 34 Press the left mouse and drag...

Страница 51: ...ime 4 7 Record 4 7 1 Storage Location On this page you can change the manually recording storage path the default storage path is C IPCamRecord Figure 4 36 Recording Location FTP Local Recording Locat...

Страница 52: ...rop down You can set the store path of the recording file on the Storage Location page Click Save button to take effect 4 8 Firewall This section explains how to control the access permission by check...

Страница 53: ...e IP addresses are in the IP list cannot access the Network Camera Click Save to take effect 4 9 System In this panel you can back up restore your camera settings upgrade the firmware to the latest ve...

Страница 54: ...can see the upgrade result Figure 4 16 If you want to verify the firmware version of you camera please go to Device Status Device Information Page to check Upgrade Firmware by IP Camera Tool Double cl...

Страница 55: ...adme txt file If not please download the firmware again until the sizes are the same Your camera will not function correctly if a corrupt bin file is used 4 Normally only Device WEB UI need to be upgr...

Страница 56: ...and all parameters will return to factory settings if selected The default administrator username is admin with a blank password Figure 4 43 4 9 5 Reboot Click Reboot System to reboot the camera This...

Страница 57: ...56 5 Appendix Install the add on of Firefox browser Google Chrome and IE Chrome Figure 6 1 Figure 6 2...

Страница 58: ...57 Figure 6 3 Figure 6 4...

Страница 59: ...58 Figure 6 5 Figure 6 6...

Страница 60: ...59 5 1 2 Uninstall the add on of Firefox browser Google Chrome and IE Chrome Figure 6 7...

Страница 61: ...ord will turn to the factory default Default administrator username password admin with blank password 5 1 4 Subnet doesn t match Check whether your ip camera in the same subnet of your computer The s...

Страница 62: ...treaming is transmitted by the ActiveX controller If ActiveX controller isn t installed correctly you will see no video image You can resolve this problem by this way Download ActiveX controller and s...

Страница 63: ...it may be failed to do port forwarding automatically because of firewall or anti virus software It also has much relation with router s security settings So we recommend you do port forwarding manuall...

Страница 64: ...rast saturation sharpness are adjustable Flip image flip and mirror Infrared mode Automatic or manual Night visibility With 1 Infrared Lamp Array Night Vision Range up to 20m Network Ethernet One 10 1...

Страница 65: ...e FCC Rules These limits are designed to provide reasonable protection against harmful interference when the equipment is operated in a commercial environment This equipment generates uses and can rad...

Страница 66: ...65 This is a Class B product In a domestic environment this product may cause radio interference in which case the user may be required to take adequate measures...

Отзывы: