


NOTE
Ensure that the USB/SD device contains playable MP3 or WMA music files.
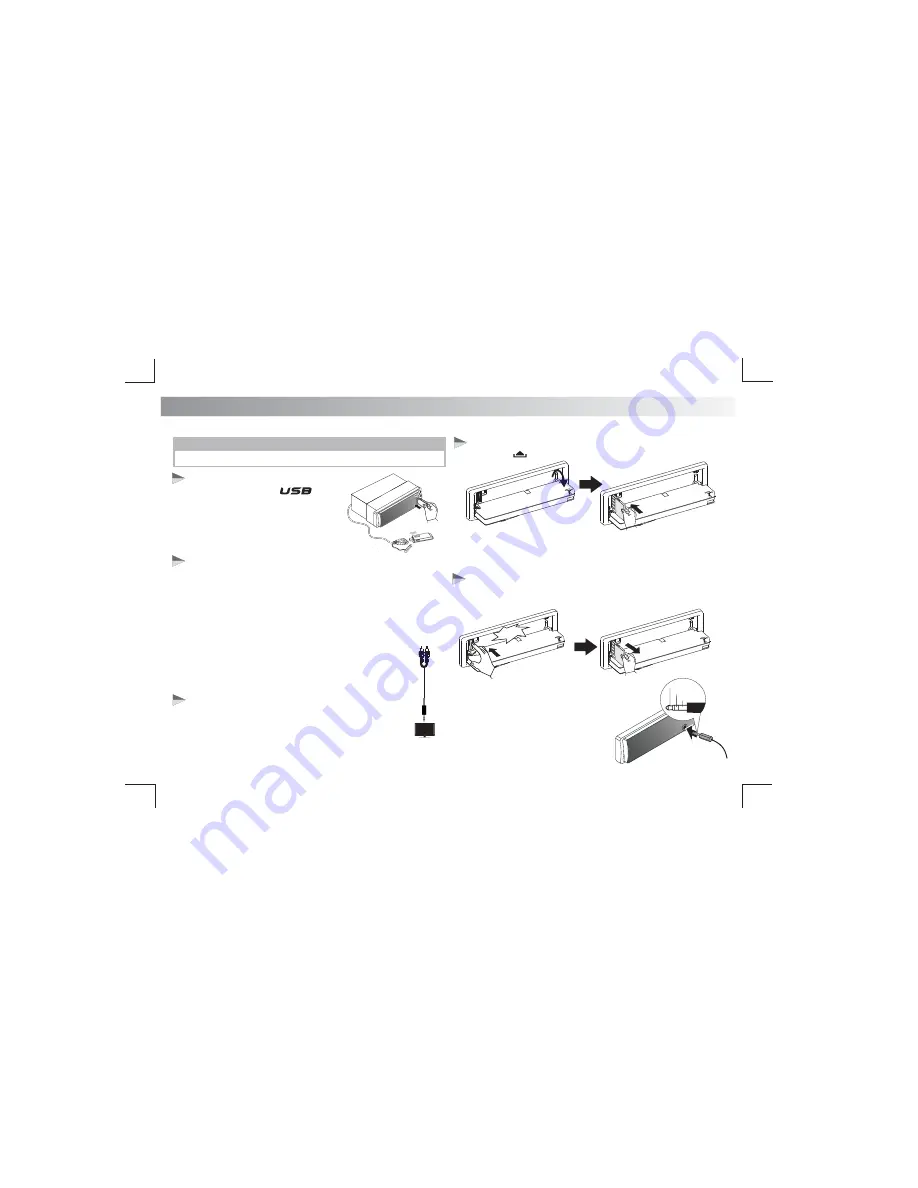
Inserting the USB Device
Removing the USB Device
1. Open the cover marked on
the front panel or open the lid of the
Before you remove the USB device from the front panel, always
remember to switch off the unit's power then remove the USB device.
Never try to remove the USB device while playing a music file as it
may damage the file and may cause the unit to freeze (if this happens,
please press the Reset button).
2. Insert the USB device into the USB
socket. The unit will start playing from
Inserting the Memory Card
1. Press panel button to open the front panel.
USB Device Operation
Connecting Front Aux-In
SD Card Operation
Removing the SD card.
Push on the end of the SD Card to eject it. Once the SD card is
removed, the unit will automatically switch to the previous mode.
2. Insert the SD Card into the card socket.
3. Press the centre of the front panel until a “click” sound is heard.
The unit will start playing from the SD card automatically.
Push in until
you hear a “click”
Click
Remove the
SD Card
E - 7
Ground
Left Track
Right Track
Connect the external signal to AUX in
jack located at the front of the panel,
then press the Source button to select
Aux mode. Press the Source Button
again to cancel the Aux mode and
return to the previous mode.
8. EXTERNAL CONNECTION AND MEDIA PLAYBACK
You can significantly improve the sound quality of your TV -
especially for movies & music if you direct your LCD TV’s
output through your RV’s Audio system. To do this, the TV
will need to have an audio output socket - which in most
cases is the headphone socket.
(NOT INCLUDED)
REAR TV IN
RCA TO 3.5mm CABLE
Using an optional 3.5mm to RCA cable, connect it between
the headphone socket of the TV and the Rear RCA TV Input.
Select “TV IN” via the source button to listen to your TV
through the RV’s Audio System
Connecting the TV’s Audio Output
USB cable at the rear of the unit.
the USB device automatically.
Connecting a TV Using Rear TV In


