background image

Finch Planter Seat


Rutland County Garden Furniture Ltd, Ashbourne House, 2 Dovecote Meadows, 

Aslackby, Sleaford, Lincs, NG34 0HZ. 

Company No: 7670072   VAT No: 151744027 


3


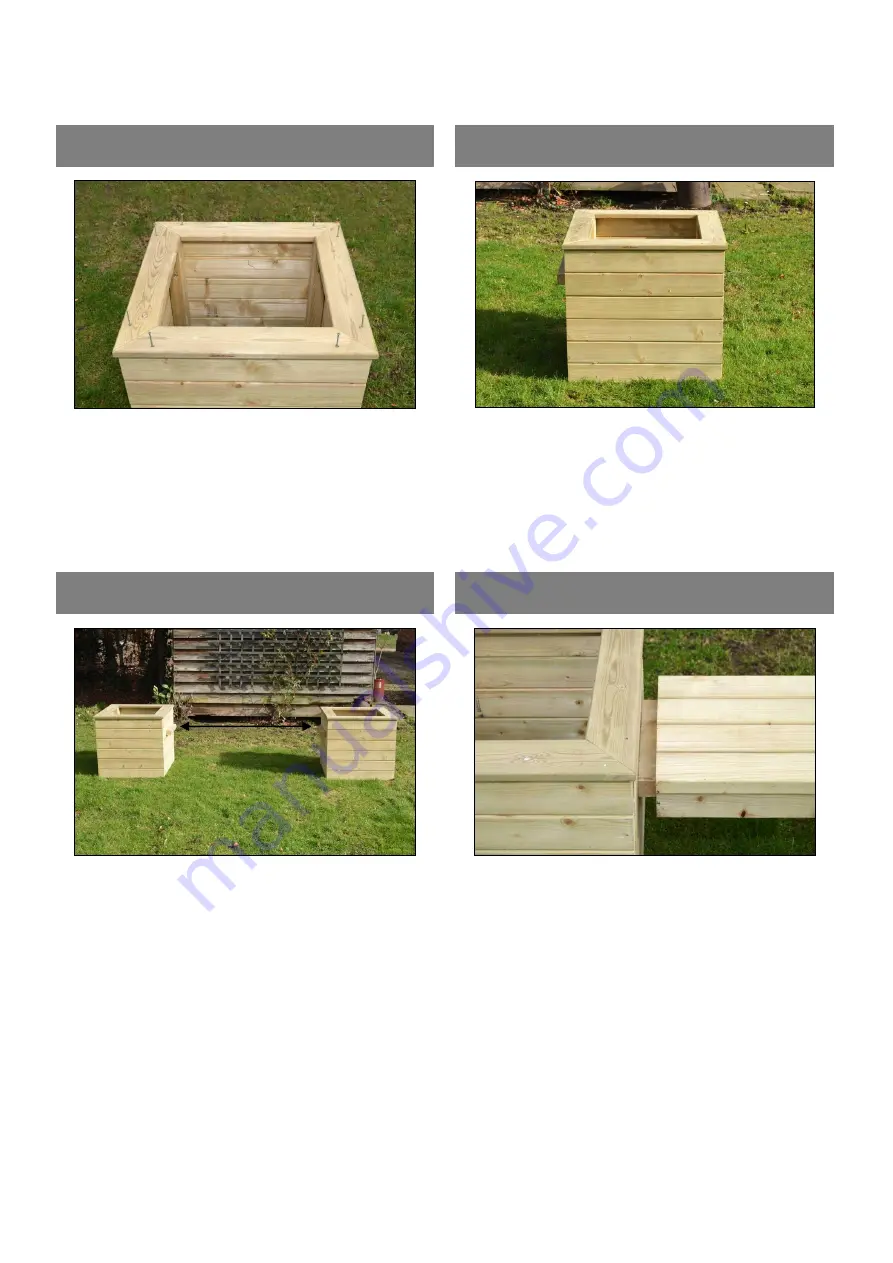
Step 5 


Step 6 


Now add four of the mitred finishing slats to the top 
of the planter and arrange them so that they form a 
square which is centred on the top of the assembly. 
Now secure in place using 8 woodscrews, 2 at each 
corner through the slat into the top edge of the 
planter. Repeat for second planter.  


Now take one of the planters and place it in the final 
location for the planter seat... 

Step 7 


Step 8 


...and arrange the second unit approximately the 
length of the seat panel away from the first unit, so 
that the lugs are parallel and directly facing each 
other. 


Now lower the seat panel onto the lug as shown at 
both ends, adjusting the position of the planters until 
the seat panel fully butts up to the side of the 
planter... 


Содержание FINCH

Страница 1: ...have the correct components If for any reason you need assistance you can find our contact details on the final page of these instructions Package contents Tools required 4 x Long side panels 2 x Short side panels 2 x Short side panels with lug 1 x Seat panel 8 x Finishing slats 20 x M8 Coach screws 16 x 65mm screws 10mm socket drive Electric screwdriver with No2 Pozidrive bit Or No2 Pozidrive Scr...

Страница 2: ...ace one of the long side panels adjacent to one of the short side panels as shown and fix them together with coach screws using the predrilled holes at the top and bottom of the short side panel Note that the fixing battens are flush with the TOP of the assembly Step 3 Step 4 Add the second short side this time with lug again fixing in place with 2 coach screws Now add the final long side panel an...

Страница 3: ...re in place using 8 woodscrews 2 at each corner through the slat into the top edge of the planter Repeat for second planter Now take one of the planters and place it in the final location for the planter seat Step 7 Step 8 and arrange the second unit approximately the length of the seat panel away from the first unit so that the lugs are parallel and directly facing each other Now lower the seat p...

Страница 4: ...in place with 2 coach screws at each end by working from under the seat panel as shown Your Finch Planter Seat is now complete We hope that you found your product quick and easy to assemble but if not and you require any further assistance or have any questions you can contact us by telephone on 01778 440803 Email info rutlandcountygardenfurniture co uk www rutlandcountygardenfurniture co uk ...

Отзывы: