3
AW4-LS-BR & AW6-LS-BR Product Manual
360
O
120°
AW4
150°
AW6
INSTALLING THE SPEAKER
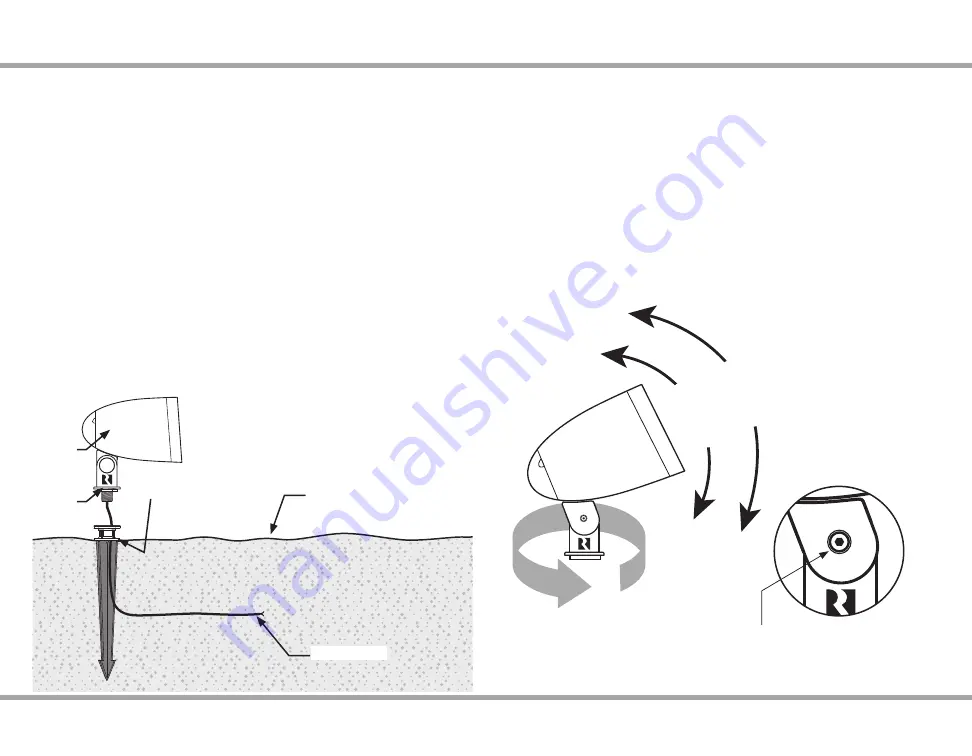
Ground Level
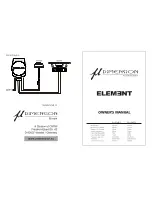
Hinge Bolt
Wire Opening
Speaker
Locknut
Stake mount
(included)
1) Determine the appropriate mounting position, making sure that it is not
near any buried utility, water, irrigation, or other lines/connections.
2) Using a rubber mallet or sledge, pound the stake into the ground leaving
enough clearance for the wire opening to be accessed.
3) Pass the speaker cable through the top of the stake and let it exit through
the wire opening.
4) Pound the stake the remaining distance needed into the ground, leaving
the top threaded section above ground level.
5) Attach the loudspeaker to the stake and turn the speaker clockwise until
it is securely mounted and facing the correct direction for your installation.
The speaker wire should be able to turn freely through the wire opening so
that it doesn’t twist excessively. Leaving some twists in the speaker wire is
okay.
6) Turn the locknut so that it tightens against the stake, fixing the
loudspeaker in the correct orientation.
Surface Mount, Tree Mount, or other Options
The speaker uses a standard ½” NPS thread so that it will work with common
landscape lighting mounting accessories such as those by Hadco®.
Philips Hadco Surface Mount Accessory, Model: MC1A
Philips Hadco Tree Mount Accessory, Model: TM1H
Angle Adjustment
Once the speaker has been oriented to the proper direction, the angle of the
speaker can be adjusted by loosening the hinge bolt adjusting the angle of
the speaker, and then tightening the hinge bolt, locking the speaker into the
desired angle.
Speaker Cable


