background image

19

20

Care and Cleaning

This appliance requires little maintenance. it contains no user-serviceable parts. Any 
servicing requiring disassembly other than cleaning must be performed by a qualified 
appliance repair technician.

Warning: Unplug from wall outlet before cleaning.

1.  Always make sure the coffeemaker is unplugged and the warming plate is cool 

before attempting to clean.

2.  After daily use, the removable filter basket, carafe and carafe lid should be washed 

in warm, soapy water.

3.  if necessary, wipe the outside of the coffeemaker with a soft, damp cloth and wipe 

dry. Do not use abrasive cleansers, scouring pads or steel wool. Never immerse the 
coffeemaker in water or any other liquid.

CARING FOR YOUR CARAFE

1.  Do not allow all liquid to evaporate from the carafe while on the warming plate, or 

heat the carafe when empty.

2.  Discard the carafe if damaged in any manner.
3.  Never use abrasive scouring pads or cleansers; they will scratch the glass.
4.  Avoid rough handling and sharp blows.

MINERAL DEPOSITS AND CLOGGING

Mineral deposits left by hard water can clog your coffeemaker. excessive steaming 
or a prolonged brewing cycle are signs that a cleaning is needed. Cleaning is 
recommended every 60 brewing cycles.
1.  Pour white into the carafe up to the 7-cup mark. Add cold water up to the  

12-cup mark. Pour the water/vinegar mixture into the water reservoir. 

2.  Place a permanent filter in the removable filter basket, then close the lid. Place the 

carafe on the warming plate. Press the ON/OFF button.

Note:

 During cleaning, more steam will occur than during normal brewing.

3.  kEEP ThE COFFEEMAkEr ON UNTiL hALF ThE WATEr hAS CYCLED ThrOUgh ThE 

COFFEEMAkEr, AS CAN bE ViEWED ThrOUgh ThE WATEr LEVEL iNDiCATOr. Press 
the ON/OFF button to turn the power off. When liquid stops dripping from the 
removable filter basket into the carafe, remove the carafe and allow the liquid to 
cool for 10 minutes. When cooled, pour liquid back into the water reservoir.

4.  return carafe to the warming plate.
5.  Turn the coffeemaker back on and repeat this procedure, allowing all the cleaning 

solution to empty into the carafe. After dripping has stopped, discard contents in 
the carafe.

6.  After allowing the coffeemaker to cool for 10 minutes, rinse it out by brewing 

a carafe full of cold water. Make sure to insert the permanent filter into the 
removable filter basket before brewing.

7.  At the end of the brew cycle, turn OFF the unit by pressing the ON/OFF button. 

Discard water in the carafe. remove the permanent filter and wash the carafe and 
removable filter basket in warm, soapy water. rinse and dry.

8.  When the coffeemaker has cooled, wipe exterior with a dry cloth. 

Содержание RHSCM 127V

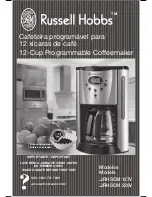
Страница 1: ...program vel para 12 x caras de caf 12 Cup Programmable Coffeemaker SAC 0800 701 7989 www saltonbrasil com br IMPORTANTE IMPORTANT LAVE BEM A JARRA DE VIDRO ANTES DO PRIMEIRO USO WASH CARAFE BEFORE FIR...

Страница 2: ...urante o uso As precau es apropriadas devem ser tomadas para impedir o risco de queimaduras inc ndios ou ferimentos pessoais e danos propriedade Todos os usu rios devem ler e compreender o Manual do P...

Страница 3: ...ia longos e destac veis ou extens es est o dispon veis e podem ser usados se forem tomados os cuidados necess rios c Se um fio de extens o longo for utilizado 1 A classifica o el trica marcada no fio...

Страница 4: ...aparelho c Pressionar a cesta do filtro para baixo at que fa a um clique 2 Limpe o interior da cafeteira fabricando duas jarras cheias de gua da torneira ver instru es de fabrica o N o coloque o filt...

Страница 5: ...o a hora desejada Certifique se de que o indicador AM as primeiras 12 horas do dia ou PM as ltimas 12 horas do dia esteja aparecendo no lado esquerdo do visor de LCD Pressione a tecla MINUTOS at que s...

Страница 6: ...e aquecimento pois esse procedimento superaquece a jarra quando est vazia 2 N o utilize a jarra de viro se ela estiver danificada de alguma 3 Nunca usar esponjas de limpeza ou limpadores abrasivos ris...

Страница 7: ...generates heat and escaping steam during use Proper precautions must be taken to prevent the risk of burns fires or other injury to persons or damage to property All users of this appliance must read...

Страница 8: ...ower supply cords or extension cords are available and may be used if care is exercised in their use c If a long detachable power supply cord or extension cord is used 1 The marked electrical rating o...

Страница 9: ...coffee in the removable filter basket for this initial cleaning Note At the end of the first brewing cycle turn the coffeemaker off and wait ten minutes for the appliance to cool Turn unit on and bre...

Страница 10: ...R and MIN Buttons until the desired brew time is reached Make sure the proper AM PM appears on the left side of the LCD display Press the AUTO ON button The green AUTO light will illuminate in the upp...

Страница 11: ...r white into the carafe up to the 7 cup mark Add cold water up to the 12 cup mark Pour the water vinegar mixture into the water reservoir 2 Place a permanent filter in the removable filter basket then...

Страница 12: ...clusivo da Salton Brasil quando for encaminhado Assit ncia T cnica autorizada da Salton Brasil ou o valor referente ao pre o de compra ser devolvido O produto reparado ou substitu do ter garantia pelo...

Страница 13: ...remove the cover of the coffeemaker There are no user serviceable parts inside Repair should be done by authorized service personnel only AVISO WARNING RISCO DE INC NDIO OU DE CHOQUE EL TRICO N O ABR...

Отзывы: