background image

Important: Please Read the below two points before using you Multi Processor.

TAMPER-RESISTANT SCREW

Warning: This appliance is equipped with a tamper-resistant screw to prevent removal of the 
outer cover. To reduce the risk of fire or electric shock, do not attempt to remove the outer cover. 
There are no user-serviceable parts inside. Repair should be done only by qualified service 
personnel.

ELECTRICAL CORD

The cord of this appliance was selected to reduce the possibility of tangling in or tripping over 
a longer cord. If more length is needed, use an extension cord rated no less than 10 amperes. 
When using an extension cord, do not let it drape over the working area or dangle where 
someone could accidentally trip over it. Handle cord carefully for longer life; avoid jerking or 
straining it at outlet and appliance connections. The maximum rating is based on the chopping 
blade; other attachments may draw significantly less power.

BEfORE fIRST uSE

CAUTION: Handle chopping blades and slice/grate disc carefully.


Remove all packaging material and any stickers from the product. Wash all removable parts 
as instructed in “care and cleaning” section of this manual. 


Select a level, dry countertop where the appliance is to be used, allowing air space on all 
sides to provide proper ventilation for the motor (50mm gap min).

ASSEMBLy Of ThE PROCESSOR BOWLS

hOW TO INSERT AND REMOvE ThE CENTRE POST


The centre post of the bowl is removable (2L processor bowl - White, 500ml mini processor 
bowl - Black):


Turn the bowl upside down.


Grasp the outer tabs and turn the centre post clockwise until the locking tabs are free. Lift 
the post out (A).


To return to its original position, place centre post into opening in bottom of workbowl and 
turn counter-clockwise until tabs snap into place.

NOTE: The 2L bowl and 500ml bowl centre posts are not interchangeable.

hOW TO LOCk ThE WORkBOWL IN POSITION:


Place the workbowl on the base with handle turned to the right of the locking mechanism 
(B) over the unlock symbol 


.


Hold handle and rotate workbowl clockwise toward the lock symbol   until it clicks firmly 
into place (C). Be sure to lock the workbowl in place before attaching the blades and cover.

hOW TO LOCk ThE COvER


Place cover over workbowl with the small latch to the right of the workbowl’s handle (D).


Hold workbowl cover and rotate clockwise until cover locks into place.

Important: For your protection this appliance has an interlock system. The processor will 
not operate unless the workbowl, cover and wide-mouth feed chute are properly locked in 
place.

Содержание RHMP750

Страница 1: ...2 YEAR WARRANTY INSTRUCTIONS WARRANTY RHMP750_IB_RB2_041111 Multi Processor RHMP750...

Страница 2: ...w Zealand and You means you the original end user purchaser of the Goods 1 Our goods come with guarantees that cannot be excluded under the Australian Consumer Law or the CGA You are entitled to a rep...

Страница 3: ...od accompanied with i the legible and unmodified original proof of purchase which clearly indicates the name and address of the Supplier the date and place of purchase the product name or other produc...

Страница 4: ...be followed 1 Food pusher 2 Wide mouth feed chute 3 2 Litre processing workbowl cover 4 Coarse slice grate disc 5 Disc stem 6 2 Litre processing workbowl 6A Centre Post White 7 Base 8 Storage lid 9 D...

Страница 5: ...18 Lid cap with measurement units 19 Lid 20 1 25 Litre glass blender jug 21 Handle 22 Gasket 23 Blade assembly 24 Jug base 18 20 19 22 21 23 24...

Страница 6: ...elect a level dry countertop where the appliance is to be used allowing air space on all sides to provide proper ventilation for the motor 50mm gap min Assembly of the processor bowls How to insert an...

Страница 7: ...irections below OFF PULSE Processor should be stored in OFF position and unplugged when not in use Use PULSE for short processing tasks This lets you control the size and uniformity of foods being cho...

Страница 8: ...ing blade has completely stopped spinning before removing cover from processor Press the OFF PULSE button and allow blades to stop revolving before removing cover Twist cover toward to remove Unlock w...

Страница 9: ...position see Illustrations B and C Place disc stem onto centre post in workbowl Carefully place slice grate disc on stem with appropriate side up depending on work to be done CAUTION The blade attach...

Страница 10: ...re for hard foods onions and potatoes Do not process foods that are so frozen or so hard that the tip of a knife cannot be inserted into the food When chopping dried fruits add a little flour to keep...

Страница 11: ...ngredients while the blender is running and drop ingredients through the opening K NOTE Do not remove the lid while the blender is running When finished press the OFF PULSE button To remove the jug us...

Страница 12: ...lid with a cloth to avoid splattering and only use low speed Do not blend more than 3 to 3 cups at a time N DO NOT place any of the following in the blender Large pieces of frozen foods Tough foods s...

Страница 13: ...le in the workbowl Fill with hot soapy water and allow to soak Remember to clean the internal shaft of the chopping blade use a baby bottle brush to remove any clogged food particles If you are having...

Страница 14: ...en applied to the food pusher during processing Cut pieces in even lengths just a little shorter than the length of the feed chute Pack the chute carefully and maintain even pressure on the food pushe...

Страница 15: ...or not in place correctly Check that jug is assembled correctly Appliance does not turn on Appliance is not plugged in jug is not in place Check that appliance is plugged into a working outlet Blende...

Страница 16: ...he processor and power cord away from the edge of benches and counter tops 11 Do not place on or near any heat surfaces 12 To disconnect press OFF Turn off the wall power outlet then grasp the plug an...

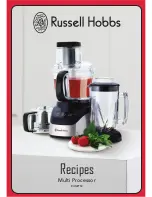
Страница 17: ...Recipes Multi Processor RHMP750...

Страница 18: ...junction with the Multi Processor by Russell Hobbs All rights reserved No part of this publication may be reproduced stored in a retrieval system or transmitted in any form or by any means electronic...

Страница 19: ...bsp sour cream Chopped mixed nuts toasted Savoury Cheese Balls Makes 20 1 Place broccoli stock and potatoes into a saucepan cover with stock and cook on medium heat until vegetables are tender 2 Trans...

Страница 20: ...minutes until yeast is dissolved 2 Position dough blade in workbowl of Food Processor 3 Add 3 cups flour salt and olive oil With processor running gradually add yeast mixture down food chute Add addit...

Страница 21: ...to small pieces 5 Add cooked sausage and process for several seconds Stir in parsley and stock 6 Melt the butter in a large bowl and toss mushroom caps until coated Arrange in single layer in shallow...

Страница 22: ...border Sprinkle mozzarella cheese evenly over pesto Arrange tomato slices over cheese 6 Sprinkle with Parmesan cheese and basil Season to taste 7 Bake in the oven for about 12 minutes or until crust...

Страница 23: ...r until golden brown then turn carefully flip with a plastic spatula and cook the second side 4 Remove carefully and transfer to a warmed plate cover with plastic film 5 Continue to cook the remaining...

Страница 24: ...just mixed Add the eggs and process until well combined Add the sour cream and vanilla and process until all ingredients are mixed thoroughly to a smooth consistency 6 Pour the cream cheese filling ov...

Страница 25: ...he stone and chop the flesh roughly 2 Put all ingredients into the Blender jug Blend at low speed for 10 seconds then high speed for 5 seconds INGREDIENTS 300ml apple juice 90g raspberries 12 strawber...

Страница 26: ...n 2 Put all ingredients into the Blender jug Blend at low speed for 10 seconds then high speed for 10 seconds NGREDIENTS 400ml milk 1 large banana roughly chopped 4 tsp honey 2 tsp vanilla essence 6 i...

Страница 27: ...ice cubes last Blend at low speed for 10 seconds then high speed for 10 seconds INGREDIENTS 300ml chocolate milk 50ml brandy 3 ice cubes INGREDIENTS 250ml pineapple juice 60ml Malibu White rum 60ml c...

Страница 28: ...to the Blender jug ice cubes last Blend at low speed for 10 seconds then high speed for 10 seconds INGREDIENTS 100ml lemonade 60ml gin 1 tsp lemon juice 6 strawberries 5 ice cubes INGREDIENTS 100ml mi...

Отзывы: