


RHMDF1211CH
Revision 2.0
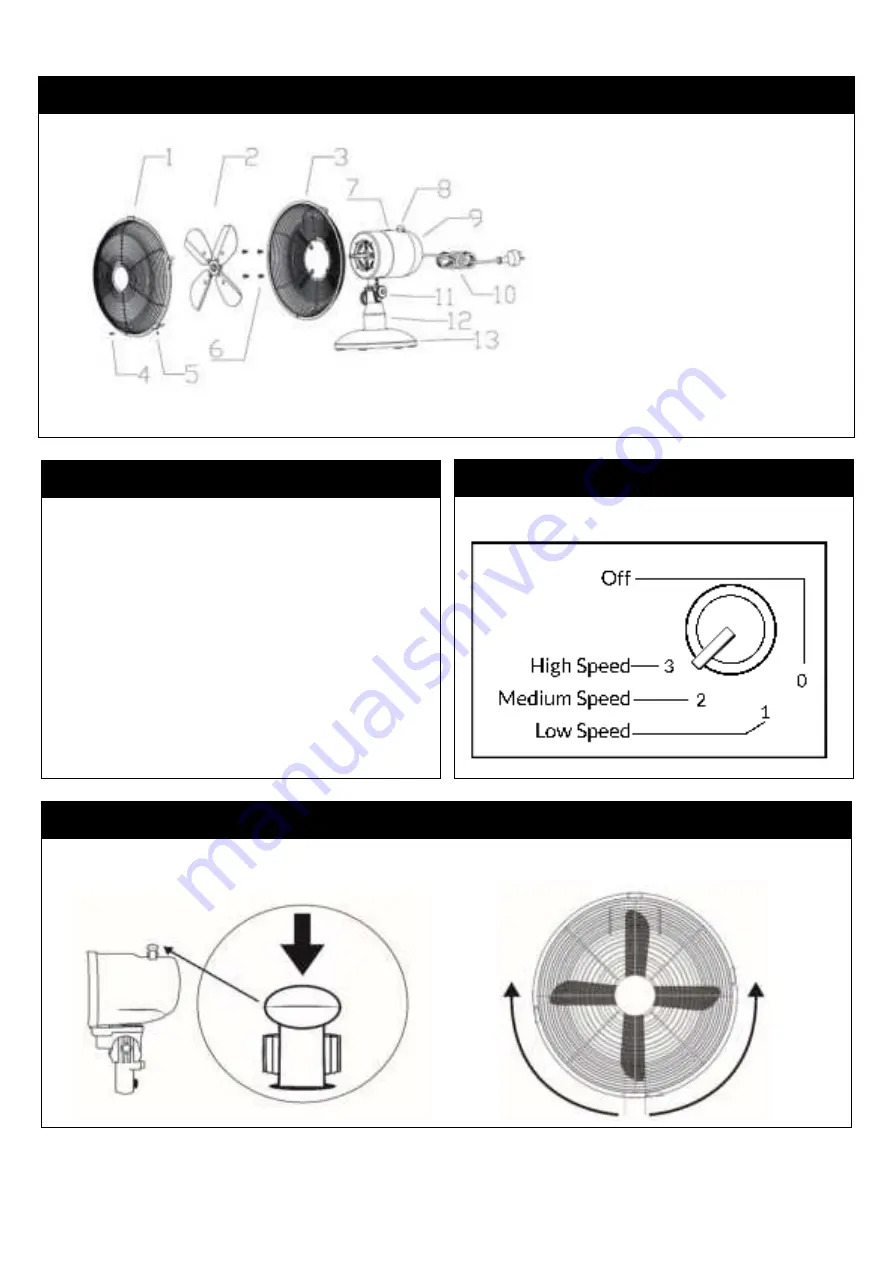
PARTS
ASSEMBLY
SETTINGS
OSCILLATION
Press the switch on the rear of the fan to engage the oscillation feature.
1.
Front Grille
2.
Fan Blade
3.
Rear Grille
4.
Front Securing Screw
5.
Grille Securing Nut
6.
Grille Securing Screws
7.
Speed Adjustment Dial
8.
Oscillation Switch
9.
Motor Housing
10.
Power Cord & Plug
11.
Tilt Adjustment Dial
12.
Stand Pole
13.
Base
1.
Remove the Grille Securing Screws [6] from the
Motor Housing [9].
2.
Place Rear Grille [3] on Motor Housing [9] and
attach with Grille Securing Screws [6].
3.
Remove plastic film from the Fixing Point.
4.
Attach Fan Blade [2] onto Fixing Point and secure
with screw [not shown] taking care not to over
tighten
5.
Clip Front Grille [1] onto Rear Grille [3] by
hanging top hook on front grille to the rear grille,
close the clasps around the grille, and attach
screw [4 & 5].