


22
Quick Set-up Guide
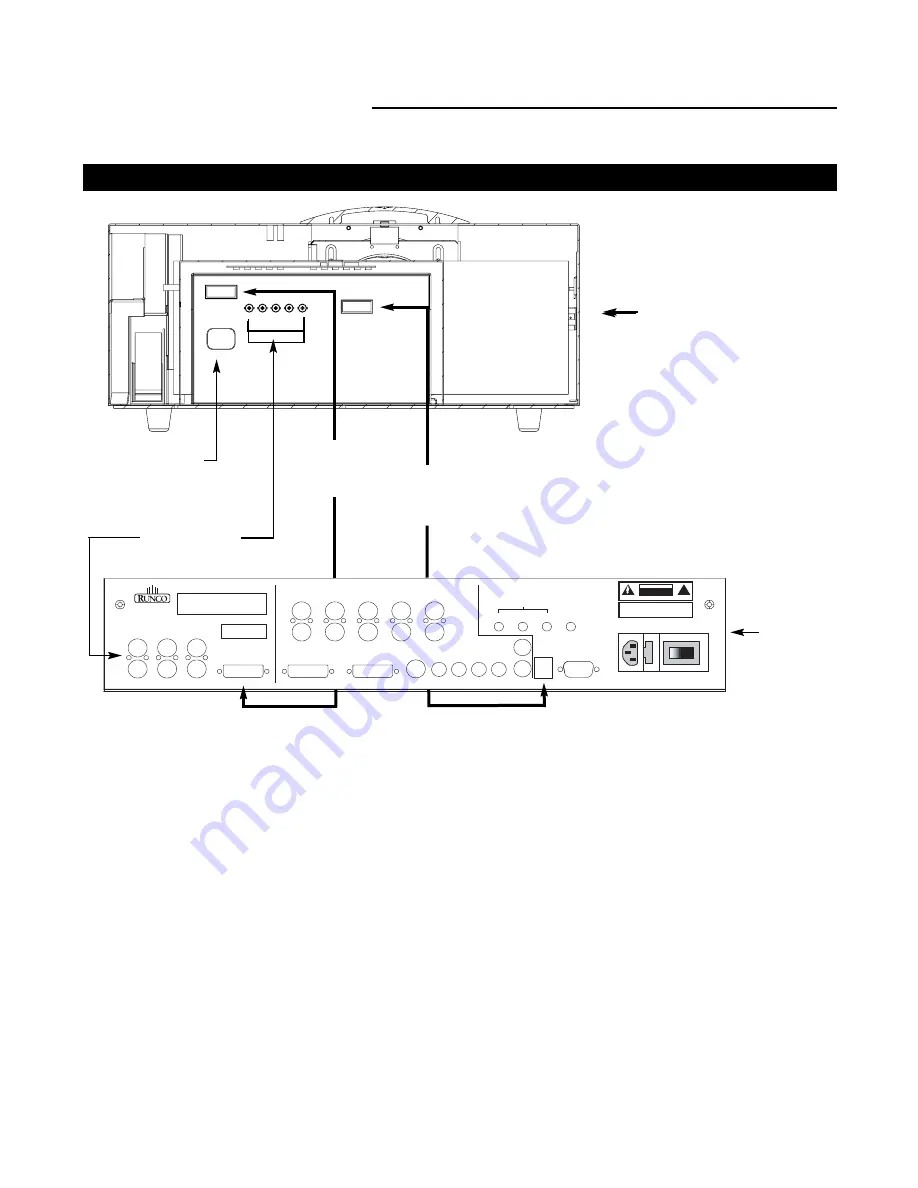
Connection Examples
While there are many different ways to connect your source equipment to your Controller, the examples shown above are the
most common and are recommended by Runco.
• COMPOSITE VIDEO INPUT:
Composite video is the most common type of signal used, but is also the lowest in picture qual-
ity. Many sources have outputs that are limited to Composite video, such as some VCR’s and camcorders. Others, such as
laser disc players, actually produce slightly better results when using Composite video. While the Controller has an excellent
decoder for Composite video, it is recommended that Composite video be used only if necessary.
• S-VIDEO INPUT:
S-Video is the second-best type of signal that can be used, but is MUCH better than Composite video. Using
such sources as satellite receivers, high-quality VCRs and DVD players (with no Component output) will produce a MUCH
cleaner and sharper signal. Decoder artifacts that are associated with Composite video (dot crawl and ‘rainbows’) are non-exis-
tent when using S-Video.
• COMPONENT INPUT:
Component video is the best type of signal that can be used. The most common sources that use
Component outputs are DVD players, and it is highly recommended that Component be used when possible. Component video
goes one step beyond S-Video in picture quality; chroma (color) information is more resolved and the overall picture appears
more well-defined.
• RGB/COMPONENT PASSTHRU:
This port is where all high-resolution signals (such as DTV decoders and progressive DVD
players) must be input. The signal type can be either RGBHV or Component and is not processed by the Controller. Computer
signals must be input directly to the Projector via the 15-pin VGA connector labeled ‘COMPUTER’.
VX-4000ci Projector
Pb
Pr
Y
Video
3
IR
RS-232 Control
S-Video 1
S-Video 2
HD1
HD2
1
2
Pr
R
Y
G
Pb
B
R
Pr
G
Y
B
Pb
H
V
DVI 1
DVI 2
DVI Out
H/V
V
H
Pr
R
Y
G
Pb
B
H
V
TRIGGERS
RS-232 Out
CAUTION:
TO REDUCE THE RISK OF ELECTRIC
SHOCK, DO NOT REMOVE COVER. NO USER-
SERVICEABLE PARTS INSIDE. REFER SERVICING
TO QUALIFIED SERVICE CENTER.
AVIS:
RISQUE DE CHOC ELECTRIQUE-NE PAS OUVRIR
CAUTION
RISK OF ELECTRIC SHOCK
DO NOT OPEN
!
WARNING:
TO REDUCE THE RISK OF FIRE
OR ELECTRIC SHOCK, DO NOT EXPOSE
THIS APPLIANCE TO RAIN OR MOISTURE.
100-230VAC 50-60 Hz, 165 Watts Max
OUTPUTS
INPUTS
SYSTEM CONTROL INTERFACE
Component Video
SDI
Option
Serial No
Video Processor / Controller
Model
Runco International
Union City, CA
Made In USA
AC Power In
(100-240 VAC)
RGB Input
(from DHD Controller
RGBHV output to
Projector RGBHV)
DVI-I IN
(from the DHD
Controller DVI Output to
Projector DVI Input)
ComLink
(from the DHD
Controller RJ-11 to
Projector RS-232)
DHD
Controller
Содержание Reflection VX-4000ci
Страница 2: ......
Страница 4: ...2...
Страница 40: ...DHD Controller Dimensions 38 17 5 3 5 11 Front Panel Top Panel...
Страница 43: ......


