background image


1-29 

Configuration Guide 

eWeb Configuration (Standalone Mode)   

1. 

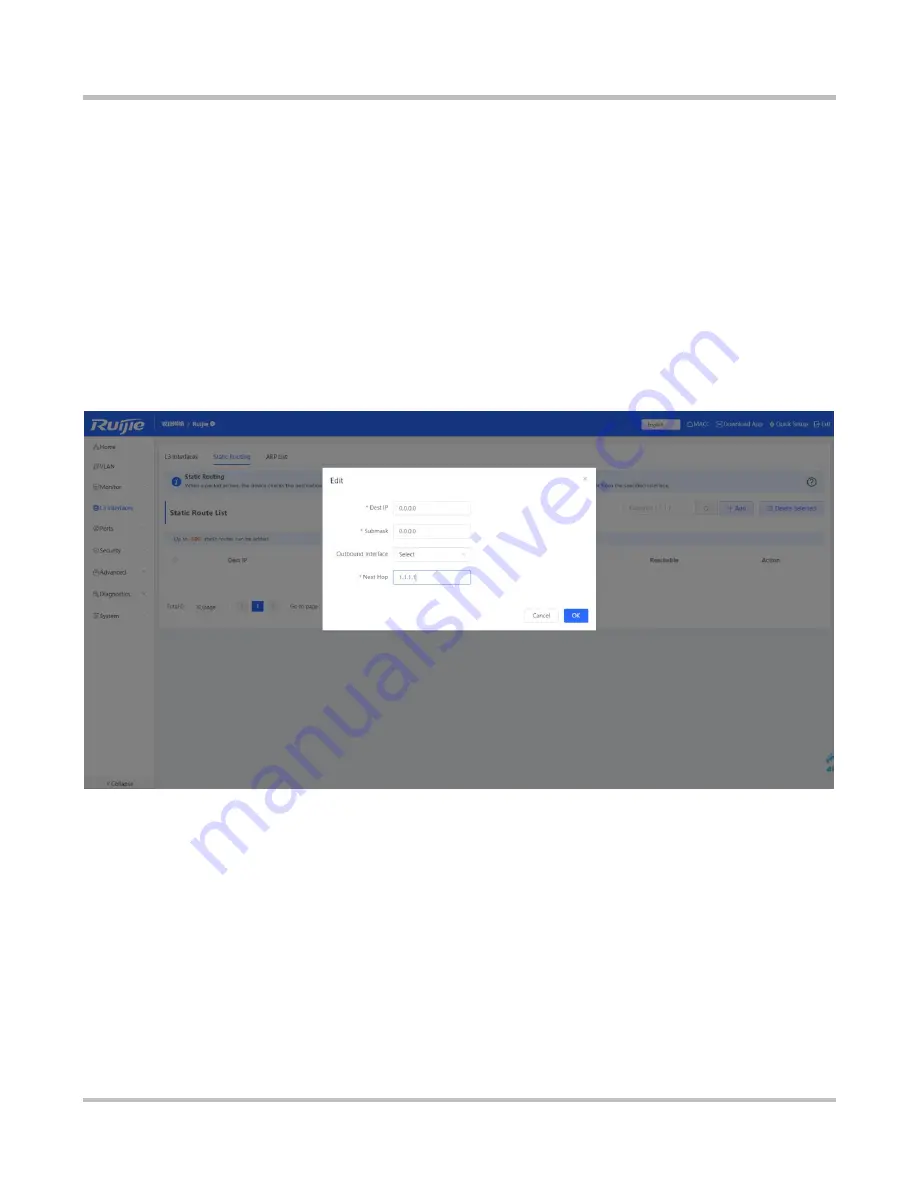
Specify a destination IP address and a subnet mask. 

2. 

Select an outbound interface from the 

Outbound Interface

 dropdown list. 

3. 

Set a next hop address. If the outbound interface is enabled with PPPoE, the next hop address is not required. 

4. 

Click 

Save

. The message "Operation succeeded." is displayed. 

3.4.2.2  Add a Default Static Route 

A default route is a route with the destination IP address set to all 0s. A manually configured default route is a default static 

route. If the destination address of a packet does not match any entries in the routing table, the device forwards the packet 

along the default route instead. The default static route can be configured on stub routers.   

Figure 3-4-7 Adding a Default Static Route 


1. 

Set both the destination IP address and the subnet mask to all 0s. 

2. 

Set a next hop address. 

3. 

Click 

Save

. The message "Operation succeeded." is displayed. 

3.4.2.3  Add a Static Blackhole Route 

Packets are routed over a blackhole route to a null interface. The null interface is a virtual interface which cannot be configured 

with an IP address. Therefore, the packets routed to this interface will be discarded.   

Figure 3-4-8 Adding a Default Blackhole Route 

Содержание RG-NBS Series

Страница 1: ...Ruijie RG NBS Series Switches Web Based Configuration Guide...

Страница 2: ...or by any means without the prior written consent of Ruijie Networks is prohibited Exemption Statement This document is provided as is The contents of this document are subject to change without any n...

Страница 3: ...ommunity ruijienetworks com Technical Support Email service_rj ruijienetworks com Skype service_rj ruijienetworks com Related Documents Documents Description Command Reference Describes the related co...

Страница 4: ...and keywords are in boldface italic font Arguments for which you supply values are in italics Elements in square brackets are optional x y z Alternative keywords are grouped in braces and separated by...

Страница 5: ...to the client The Web client usually refers to a browser such as Google Chrome IE or Firefox 1 1 Conventions In this document Texts in bold are names of buttons for example OK or other graphical user...

Страница 6: ...nment Requirements Client requirements An administrator can log into the eWeb management system from a Web browser to manage devices The client refers to a PC or some other mobile endpoints such as la...

Страница 7: ...d for the device the IP address is automatically obtained by default To log into the eWeb management system open the Google Chrome browser and enter 10 44 77 200 in the address bar and press Enter 2 2...

Страница 8: ...Network Connect for the device to automatically deliver and initialize device configuration Click Exit in the upper right corner A prompt is displayed and the device can skip the wizard to enter the...

Страница 9: ...witch including dynamic and static MAC addresses Static MAC Allows users to manually bind a MAC address to a port of the device If 802 1x authentication is enabled on a port a network device with its...

Страница 10: ...vice configuration file and provides the compressed file to the developer so that the developer can decrypt and decompress the file for fault locating Cable Diagnostics Displays the cable diagnostics...

Страница 11: ...e right Move the mouse to the device name area to display the basic information of the login device Move the mouse to Ruijie Cloud to display the link to enter Ruijie Cloud Move the mouse to Download...

Страница 12: ...el and the actual functions prevail Click a menu item to display corresponding configuration content in the main area on the right Click Collapse in the lower left corner to fold the navigation pane t...

Страница 13: ...ver Click in Work Mode and click the Ad Hoc Network Discovery button on the displayed dialog box Tips 1 The page will be refreshed after the work mode is switched over 2 The system menu varies with th...

Страница 14: ...1 10 Configuration Guide Configuration Guide Figure 2 4 3 Standalone Mode...

Страница 15: ...xample 3 1 Home The Home module displays the basic information about the device and the switch ports as shown in the figure below Figure 3 1 1 Home The Basic Info area allows you to configure the devi...

Страница 16: ...de Figure 3 1 2 Port Icons Move the mouse to the port icon on the port panel to display more information as shown in the figure below Figure 3 1 3 Port Panel Details Click Refresh above the port panel...

Страница 17: ...tion Guide eWeb Configuration Standalone Mode 3 2 VLAN The VLAN module includes VLAN List and Port List ports bound to VLANs Figure 3 2 1 VLAN Click next to VLAN List or next to Port List to fold or e...

Страница 18: ...n the Action column The message Are you sure you want to delete the VLAN is displayed In the displayed dialog box click OK The message Delete operation succeeded is displayed Editing a VLAN 1 Click Ed...

Страница 19: ...es or a single port Figure 3 2 3 Port List Batch editing ports Editing a single port 1 Click Batch Edit In the displayed dialog box select a port mode select the required port set the native VLAN or a...

Страница 20: ...mode if an access VLAN is configured only packets tagged with the corresponding access VLAN ID are permitted Untagged packets are automatically tagged with this VLAN ID 2 In Trunk Port mode if a nativ...

Страница 21: ...lear All to clear statistics of port traffic and other data Tips 1 Aggregate port flow will also be displayed Traffic of an aggregate port is the sum of traffic of all member ports 3 3 2 Endpoints The...

Страница 22: ...earch by VLAN or Search by Port enter the term to be searched for and click Search to filter MAC addresses that meet the search conditions Tips 1 The MAC address capacity varies with the device The MA...

Страница 23: ...OK A message indicating successful deletion is displayed and the MAC list is updated 2 Click Delete in the Action column The message Are you sure you want to delete the entry is displayed In the disp...

Страница 24: ...MAC Clear by Port or Clear by VLAN enter a search term and click Clear to clear MAC addresses that meet the clear conditions Refresh Click Refresh to display the latest dynamic MAC addresses 3 3 2 4 M...

Страница 25: ...essage Delete operation succeeded is displayed and the MAC list is updated 2 Click Delete in the Action column The message Are you sure you want to delete the entry is displayed In the displayed confi...

Страница 26: ...indicates that the MAC addresses do not age 3 3 2 6 ARP List The Address Resolution Protocol ARP is used to bind MAC addresses to IP addresses If you enter an IP address you can obtain the MAC addres...

Страница 27: ...1 23 Configuration Guide eWeb Configuration Standalone Mode Figure 3 3 7 ARP List...

Страница 28: ...r 3 aggregate port is a logical interface consisting of layer 3 physical interfaces of the same type It virtualizes physical links into one link so as to increase the link rate A layer 3 aggregate por...

Страница 29: ...ddress you can set the IP address and the subnet mask manually optional If you select DHCP the SVI will obtain a DHCP assigned IP address 3 If you want to configure an SVI for a VLAN please make sure...

Страница 30: ...you select Static IP Address you can set the IP address and the subnet mask manually optional If you select DHCP the routed port will obtain a DHCP assigned IP address 3 Select a physical port from th...

Страница 31: ...gate port and select its member ports from the panel Please configure its member ports as routed ports first 4 Click Save The message Operation succeeded is displayed 3 4 2 Static Routing The Static R...

Страница 32: ...1 28 Configuration Guide eWeb Configuration Standalone Mode 3 4 2 1 Add a Generic Static Route Figure 3 4 6 Adding a Generic Static Route...

Страница 33: ...tatic route If the destination address of a packet does not match any entries in the routing table the device forwards the packet along the default route instead The default static route can be config...

Страница 34: ...ecify a destination IP address and a subnet mask 2 Select Null from the Outbound Interface dropdown list 3 Click Save The message Operation succeeded is displayed 3 4 3 ARP List The ARP List module di...

Страница 35: ...The Ports module allows you to set basic port information port aggregation port mirroring port rate limit management IP address and PoE 3 5 1 Basic Settings The Basic Settings module allows you to con...

Страница 36: ...the target port set the port status speed and mode and click OK 2 Click Edit in the Action column In the displayed dialog box select the target port set the port status speed and mode and click OK Ti...

Страница 37: ...t in the Action column In the displayed dialog box set the EEE port mode and port description MTU value and click OK Tips 1 Configuration items for ports with different attributes vary 2 Only the SFP...

Страница 38: ...displayed The port panel displays the added aggregate port Batch deleting aggregate ports Deleting a single aggregate port In the aggregate port list click to select aggregate ports and click Delete S...

Страница 39: ...the source port destination port and monitoring type and click OK Deleting a port mirroring entry Click Delete in the Action column In the displayed confirmation box click OK Tips 1 You can select mul...

Страница 40: ...d and the port list is updated 2 Click Edit in the Action column In the displayed dialog box set the Rx speed or the Tx speed and click OK The message Operation succeeded is displayed and the port lis...

Страница 41: ...ask default gateway and DNS server and click Submit A message indicating successful configuration is then displayed Tips 1 VLAN 1 takes effect when the management VLAN is set to null or empty 2 The ma...

Страница 42: ...you to specify PoE settings The PoE module is available only for devices that support the PoE function Figure 3 5 7 PoE The PoE Overview area displays the PoE information of the entire device PoE set...

Страница 43: ...ick in Port List to display PoE port details 3 6 Security The Security module includes DHCP Snooping Storm Control ACL and Port Protection 3 6 1 DHCP Snooping The DHCP Snooping module allows snooping...

Страница 44: ...icast data flows in the LANs the network speed decreases and packet transmission timeout greatly increases This is called LAN storm which may be caused by topology protocol execution errors or incorre...

Страница 45: ...eded is displayed and the port list is updated Batch deleting ports Deleting a single port for storm control 1 Select multiple entries in Port List and click Delete Selected In the displayed confirmat...

Страница 46: ...lete in the Action column In the displayed confirmation box click OK Editing an ACL Click Edit in the Action column In the displayed dialog box edit the ACL name and click OK Displaying ACL details Cl...

Страница 47: ...and ports and click OK Batch unbinding ACLs Unbinding a single ACL Select multiple entries in ACL Binding and click Unbind Selected Alternatively click Unbind in the Action column In the displayed co...

Страница 48: ...port protection and select ports Alternatively click the toggle button in the Action column In the displayed confirmation box click OK 3 7 Advanced The Advanced module includes STP and LLDP 3 7 1 STP...

Страница 49: ...1 45 Configuration Guide eWeb Configuration Standalone Mode Figure 3 7 1 STP Settings Global STP settings Enable STP set global STP parameters and click Save Figure 3 7 2 STP Management STP management...

Страница 50: ...the port connected to a PC 3 7 2 LLDP The Link Layer Discovery Protocol LLDP is defined by IEEE 802 1AB LLDP can discover devices and detect topology changes With LLDP the eWeb management system can l...

Страница 51: ...ion Standalone Mode Figure 3 7 4 LLDP Management LLDP management Click Batch Edit select ports and configure parameters Alternatively click Edit in the Action column configure parameters and click OK...

Страница 52: ...rs of switches MED devices and NMS devices in the network topology 2 LLDP can be used to detect errors for example display incorrect configuration information if two switches are directly connected in...

Страница 53: ...Configuration Standalone Mode RLDP management Click Batch Edit select ports and configure parameters Alternatively click Edit in the Action column configure parameters and click OK Figure 3 7 8 RLDP...

Страница 54: ...lay neighbor details of this port 3 8 Diagnostics 3 8 1 Network Tools The Network Tools module provides the following network tools to detect the network status Ping Traceroute and DNS Lookup 1 Ping t...

Страница 55: ...iguration Standalone Mode Figure 3 8 2 Traceroute Traceroute test Enter the destination IP address and other information and click Start The test result is displayed in the text box 3 DNS lookup test...

Страница 56: ...ule allows you to collect faults by one click and download the fault information to the local device Figure 3 8 4 Fault Collection Fault collection Click Start to download the fault information 3 8 3...

Страница 57: ...ts support cable diagnostics while fiber ports and aggregate ports do not 2 If cable diagnostics is executed on a normally connected interface the connection is temporarily down and will be re establi...

Страница 58: ...Select a time zone and set at least one NTP server and click Save Tips The device has no RTC module and does not save the time after restart 3 9 2 Login Password The Login Password page allows you to...

Страница 59: ...re 3 9 2 Login Password Setting the password Enter the old and new passwords and click Save Please keep the login password carefully 3 9 3 Session Timeout The Session Timeout page allows you to set th...

Страница 60: ...eout period Enter the timeout period in seconds and click Save 3 9 4 Setup The Setup module includes Back Import and Restore 3 9 4 1 Backup Import The Backup Import page allows you to import a configu...

Страница 61: ...1 57 Configuration Guide eWeb Configuration Standalone Mode Figure 3 9 4 Backup Import...

Страница 62: ...tandalone Mode 3 9 4 2 Restore The Restore page allows you to restore the device to factory settings Figure 3 9 5 Restore Restoring factory settings Please exercise caution if you want to restore the...

Страница 63: ...the network environment is changed If you fail to access the eWeb management system check whether the endpoint is connected to the device by referring to Configuration Preparation 3 9 5 Upgrade The Up...

Страница 64: ...irmation Click OK to start the upgrade Tips 1 If the target version is much later than the current version it is recommended not to retain the settings uncheck Keep Setup 2 The upgrade takes a period...

Страница 65: ...ge from the network and upgrades the current version The upgrade operation retains configuration of the current device Alternatively you can select Download File to the local device and import the upg...

Страница 66: ...gure 3 9 9 Scheduled Reboot Scheduled reboot Enable Scheduled Reboot set the day and time when the system needs to be rebooted and click Save Tips When this function is enabled the system is rebooted...

Страница 67: ...eboot Click Reboot and click OK in the confirmation box The device is rebooted and you need to log into the eWeb management system again after the reboot Do not refresh the page or close the browser d...

Страница 68: ...4 Ad Hoc Network Discovery Mode 4 1 Network Setup Figure 4 1 1 Network Setup Discovering devices Click Rediscover to discover devices on the network again Starting setup Click Start Setup The system...

Страница 69: ...Mode Figure 4 1 2 Wizard Settings Enter the network name and management password select the IP assignment mode and click Create Network Connect After the network is successfully set up the following...

Страница 70: ...nter an account and the system will automatically jump to the Ruijie Cloud configuration page shown in the figure below Figure 4 1 4 Ruijie Cloud Configuration Select the project type and click Next T...

Страница 71: ...avigation bar or Setup The system automatically jumps to the Switch module for configuration For details see eWeb Configuration When different devices or new devices exist on the network a prompt is d...

Страница 72: ...d click Delete Offline Devices In the displayed confirmation box click OK Upgrading devices Select devices in Switch List and click Batch Upgrade In the displayed confirmation box click OK Configuring...

Страница 73: ...ord setting is the same as that in eWeb Configuration System Login Password 4 4 3 Scheduled Reboot Scheduled reboot setting is the same as that in eWeb Configuration System Scheduled Reboot 4 4 4 Rebo...

Страница 74: ...in different networks you need to manually add these devices to the current network for network management The following figure shows My Network Other Network and a list of new devices Figure 4 5 1 Ne...

Страница 75: ...restore the device to factory settings Q2 What can I do if I forget my username and password How to restore the factory settings A To restore the factory settings power on the device and press and ho...

Отзывы: