4. Basic Network Configuration
ROX™ v2.2 User Guide
75
RuggedBackbone™ RX1500
2.
From the WEB UI Navigate to ip/interface/ipv6.
3.
Click Add address. The Key settings form appears.
4.
In the IPaddress field, type an IPv6 address with a network prefix
5.
Click Commit.
6.
Click Exit Transaction.
7.
To delete an existing IPv6 address, click the delete icon under ip/interface/ipv6.
8.
Refer to steps 3 to 7 to configure a new IPv6 address
4.1.4. Simple Network Setup with IPv6 Addresses
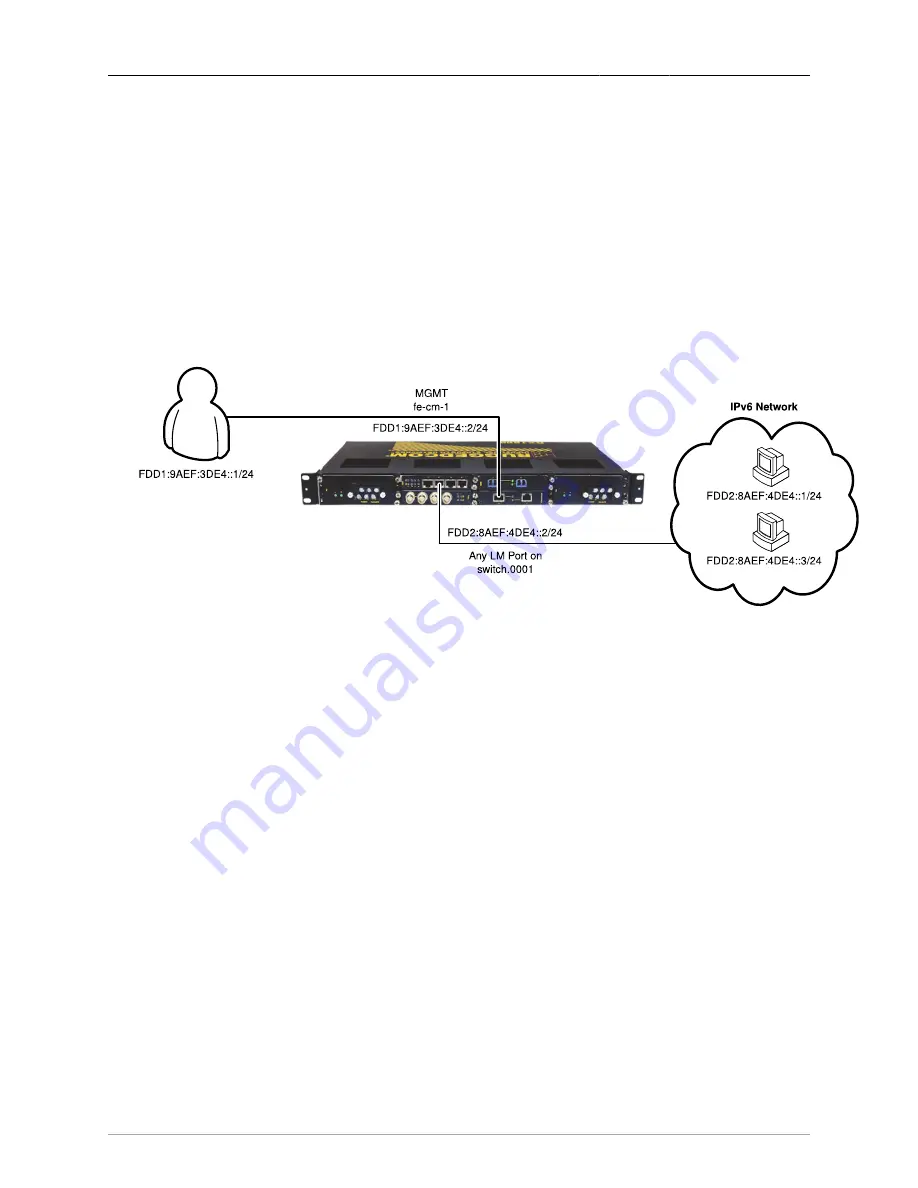
This section describes how to configure a simple network using the factory default IPv6 address.
Figure 4.4. Simple IPv6 Network Setup
Procedure 4.4. Simple IPv6 Network Setup
1.
Connect a user PC to Fast Ethernet port (fe-cm-1) of the RX1500 and configure the PC to be on
the same subnet as the port.
2.
Configure the S.PC with IPv6 address FDD1:9AEF:3DE4::1/24 and Default Gateway as
FDD1:9AEF:3DE4::2.
3.
Configure the fe-cm-1 and switch.0001 interfaces of the RX1500 with the IPv6 addresses shown
in
Figure 4.4, “Simple IPv6 Network Setup”
.
4.
Connect one of the switched ports from any available LMs to an IPv6 capable network.
5.
Configure the D.PCs on the IPv6 network to be on the same IP subnet as switch.0001 and configure
the Default Gateway address as FDD2:8AEF:4DE4::2/48.
6.
Enable IPv6 Neighbor Discovery under ip/{interface}/ipv6/nd. For more information on IPv6
neighbor discovery, see
Section 5.2, “IPv6 Neighbor Discovery”
7.
Confirm that you can reach the D.PCs from the S.PC.


