background image

10

11

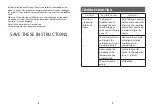
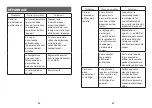
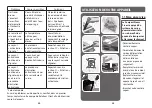
Problem

Possible Causes

Solutions

Water runs out 

of the holes of 

the soleplate.

You are using steam 

for the first time or 

you have not used it 

for some time.

Press the steam control 

button on, pointing the 

iron away from your 

ironing board until the 

iron produces steam.

The setting is not 

correct (1 dot / 

2 dots) and the 

soleplate is not hot 

enough to produce 

steam.

Set the iron at 3 dots 

(••• or MAX) and wait 

for the iron thermostat 

light to go out before 

activating the steam 

button again.

You are performing 

the Anti Calc 

procedure

It is normal that 

water runs out of 

the soleplate while 

performing the Anti 

Calc procedure

Water streaks 

appear on the 

linen.

Your ironing board is 

saturated with water 

because it is not 

suitable for use with 

an appliance. 

Check that your ironing 

board is suitable. We 

recommend that you 

use a vented/mesh 

type ironing board.

Brown streaks 

come through 

the holes in 

the soleplate 

and stain the 

linen.

You are using 

chemical descaling 

agents or additives 

in the water ironing.

Never add this type of 

product in the water 

tank (see “for what 

water may be used”). 

Contact an Approved 

Service Centre.

Problem

Possible Causes

Solutions

The soleplate is 

dirty or brown 

and may stain 

the linen.

You are ironing 

at too high a 

temperature.

See our 

recommendations 

regarding temperature 

control setting.

The “anti calc” 

indicator is 

flashing.*

The Anti Calc 

procedure must be 

performed.

See section 2.1 

"Maintenance"

The anti calc 

indicator is still 

flashing.

You have not 

pressed the Anti 

Calc button.

Press the Anti Calc 

button until the light 

stops flashing.

The anti calc 

indicator is still 

flashing after 

performing 

Anti calc 

procedure.

The anti calc 

procedure has not 

been correctly done.

See section 2.1 

"Maintenance" to 

perform correctly the 

anti calc procedure".

* Depending on the model
If you have any problems or queries please call our Customer 

Relations team first for expert help and advice

Содержание PRO COMPACT IB9100 VR8324U1

Страница 1: ...EN FR ES Compact Steam Pro ...

Страница 2: ...2 3 x3 STEAMBOOST www rowenta com www calor f ...

Страница 3: ...OUR APPLIANCE 12 1 1 Getting started 12 1 2 Filling the water tank 15 1 3 Transportation 16 1 4 Settings 17 1 5 Vertical steaming 19 1 6 Auto off 20 MAINTENANCE AND STORAGE 21 2 1 Descaling your generator 21 2 2 Cleaning 23 2 3 Storage 24 GUARANTEE CERTIFICATE 27 ...

Страница 4: ...L INSTRUCTIONS BEFORE USING For your safety this appliance conforms to the applicable standards and regulations Low Voltage Electromagnetic Compatibility Environmental Directives as applicable This product has been designed for domestic and indoor use only Your steam station is an electrical appliance it must be used in normal conditions of use It is fitted with 2 safety systems A pressure release...

Страница 5: ... not be opened during use SAVE THESE INSTRUCTIONS TROUBLESHOOTING Problem Possible Causes Solutions Your iron is producing little or no steam You have just filled the tank or changed the anti calc cartridge or you have just started using it Press the steam control button continuously for a few minutes pointing it away from your linen in order to prime the pump There is no anti calc cartridge in th...

Страница 6: ...board Brown streaks come through the holes in the soleplate and stain the linen You are using chemical descaling agents or additives in the water ironing Never add this type of product in the water tank see for what water may be used Contact an Approved Service Centre Problem Possible Causes Solutions The soleplate is dirty or brown and may stain the linen You are ironing at too high a temperature...

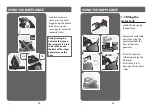
Страница 7: ...to the max indication Put the tank back into the appliance by pushing in until it locks into place USING YOUR APPLIANCE Press the ON OFF button on control panel The ON OFF button light remains flashing while the appliance is warming up OK To obtain steam press the steam trigger under the iron handle The steam will stop when you release the button The steam generator is ready for use The ECO mode c...

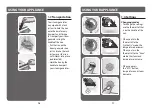
Страница 8: ...n on the soleplate It is safe to leave the iron on the base of the steam generator or on the heel OK OK NO 1 2 Filling the water tank CLICK Fill it with tap water without exceeding the MAX level Push it back into its housing until you hear a click Remove the removable water tank using the handle located at the front of the steam generator Switch off and unplug the appliance USING YOUR APPLIANCE ...

Страница 9: ...r the iron until it locks into place audible click Hold the iron by the handle to transport your steam generator USING YOUR APPLIANCE USING YOUR APPLIANCE Changing modes To change the settings use the thermostat that is on the handle of the iron When you turn the thermostat to the synthetic mode the temperature decreases When you turn the thermostat to the linen mode the steam and temperature incr...

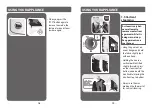
Страница 10: ...never attempt to remove creases from a garment while it is being worn always hang garments on a coat hanger Holding the iron in a vertical position tilted slightly forwards press on the steam control button underneath the iron handle moving the iron from top to bottom Always use the max mode on the thermostat for vertical steaming Hang the garment on a coat hanger and hold the fabric slightly taut...

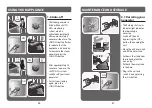
Страница 11: ...stem switches off your steam generator To start your ironing again press the ON OFF button 8 min ON OFF ON USING YOUR APPLIANCE 30 min Move the unit over a sink and fill the water tank Set down the stand near the sink and place the iron on top Put back the water tank in the base Plug in the unit and switch it on by pressing the On button CLICK MAINTENANCE AND STORAGE ON 2 1 Descaling your generato...

Страница 12: ...have the model with the removable stand then hold your iron above the sink MAINTENANCE AND STORAGE 3 sec 2 MIN MAINTENANCE AND STORAGE 2H NO NO 2 2 Cleaning Appliance has to be unplugged for at least 2 hours and has cooled down completely before being carried out Do not use detergent or descaling products for cleaning the soleplate Never hold the iron or the base unit under the tap Clean soleplate...

Страница 13: ...ol and unplugged for over an hour to unscrew the collector To perform this operation the product must be near a sink since some water may flow out when opening it Never operate the appliance without the scale collector Never fill the iron using the collector s opening Always iron on the same level as the appliance so as to not strain the cord Do not place the appliance on a lower level or on the f...

Страница 14: ...y product which is not accompanied by a valid proof of purchase The product can be taken directly in person or must be adequately packaged and returned by recorded delivery or equivalent methos of postage to a ROWENTA authorised service centre Full address details for each country s authorised service centres are listed on ROWENTA s website www rowenta com or by calling the appropriate consumer se...

Страница 15: ...le câble d alimentation et fixez le avec la bande Velcro lors du rangement 5 Débranchez toujours l appareil de la prise électrique avant de remplir ou de vider l eau ou lorsque vous ne l utilisez pas 6 N utilisez pas l appareil avec un câble endommagé ou si l appareil est tombé ou endommagé Pour réduire les risques de choc électrique ne démontez pas l appareil Contactez le Service Consommateurs ou...

Страница 16: ...soit L appareil ne doit pas être laissé sans surveillance lorsqu il est branché à la prise secteur La fiche doit être retirée de la prise avant de remplir le réservoir d eau L appareil doit être utilisé et posé sur une surface plane et stable Lorsque vous posez l appareil sur son support assurez vous que la surface sur laquelle vous le posez est stable L appareil ne doit pas être utilisé s il a ch...

Страница 17: ...l eau s écoule des orifices de la semelle Vous utilisez la vapeur pour la première fois ou ne l avez pas utilisée depuis un certain temps Appuyez sur la commande vapeur sans diriger le fer vers votre planche à repasser jusqu à ce qu il produise de la vapeur Le réglage n est pas correct 1 point 2 points et la semelle n est pas suffisamment chaude pour produire de la vapeur Réglez le fer sur 3 point...

Страница 18: ...au voir Quelle eau puis je utiliser Contactez un Centre de services agréé La semelle est sale ou brune et peut tacher le linge La température utilisée pour repasser est trop élevée Consultez nos recommandations concernant le réglage de la température Le voyant anticalcaire clignote La procédure d entretien anticalcaire doit être exécutée Reportez vous à la section 2 1 Entretien Le voyant anticalca...

Страница 19: ...est prête à l emploi Le mode ÉCO peut toujours être sélectionné même si le bouton MARCHE ARRÊT clignote Le voyant du mode ÉCO ou MARCHE ARRÊT reste allumé après 2 minutes MARCHE UTILISATION DE VOTRE APPAREIL Pour obtenir encore plus de vapeur appuyez rapidement à trois reprises sur la gâchette vapeur sous la poignée pour obtenir de la vapeur de manière séquentielle et automatique x3 Pendant le rep...

Страница 20: ... le UTILISATION DE VOTRE APPAREIL 1 3 Transport Votre Compact Steam Pro est équipé d un système de verrou pour maintenir le fer sur sa base afin de pouvoir le transporter et le ranger facilement Pour transporter votre centrale vapeur à l aide de la poignée du fer Posez le fer sur le repose fer de la centrale vapeur et rabattez le système de verrou sur le fer jusqu à ce qu il s enclenche vous devez...

Страница 21: ...ode synthétique la température diminue Lorsque vous tournez le thermostat sur le mode coton épais lin la vapeur et la température augmentent 1 4 Réglages Lorsque vous appuyez sur le bouton ÉCO la vapeur et la température diminuent UTILISATION DE VOTRE APPAREIL Lorsque vous appuyez une nouvelle fois sur le bouton ÉCO pour désactiver le mode la température et la vapeur augmentent à nouveau ...

Страница 22: ...issage vertical Suspendez le vêtement sur un cintre et tendez légèrement le tissu avec une main NON max 1 6 Arrêt automatique La centrale vapeur est équipée d un système de contrôle ARRÊT AUTOMATIQUE qui s active automatiquement au bout de 8 minutes de non utilisation environ Le bouton MARCHE ARRÊT clignote pour indiquer que l appareil est en veille Pour réactiver la centrale vapeur appuyez sur le...

Страница 23: ...re indique qu un détartrage est nécessaire Éteignez l appareil en appuyant sur le bouton Arrêt puis débranchez le L appareil s éteint automatiquement Vous devez ensuite le débrancher Maintenez le bouton Anticalcaire clignotant enfoncé pendant 3 secondes Lors du détartrage le fer à repasser produit de l eau et de la vapeur pendant 2 minutes Faites attention à la température du fer pendant le cycle ...

Страница 24: ...de Nettoyez de temps en temps les pièces en plastique de l appareil avec un chiffon doux 2 3 Rangement Éteignez l appareil et débranchez le Rangez le cordon vapeur dans son logement et faites de même pour le cordon électrique Laissez refroidir la centrale vapeur environ 1 h puis videz le réservoir d eau avant de le ranger si vous la stockez dans un placard ou un espace clos ARRÊT ENTRETIEN ET RANG...

Страница 25: ...peur vous ne devez pas utiliser d eau provenant d un sèche linge d eau parfumée ou contenant des adoucisseurs d eau provenant de réfrigérateurs de batteries de climatiseurs de pluie bouillie filtrée ou minérale N utilisez pas d eau pure distillée ou déminéralisée Tous les types d eau énumérés ci dessus peuvent contenir des déchets organiques minéraux ou chimiques susceptibles de provoquer des proj...

Страница 26: ...ment aux produits achetés et utilisés à des fins domestiques et ne couvre pas les dommages résultant d une mauvaise utilisation d une négligence du non respect des instructions d utilisation de ROWENTA d une modification ou d une réparation non autorisée du produit d un mauvais emballage de son propriétaire ou d une mauvaise manipulation du transporteur Elle n inclut également pas l usure normale ...

Страница 27: ...rolle el cable de alimentación y fíjelo con el velcro para almacenar 5 Siempre desconecte el aparato de la toma de corriente antes de llenar or vaciar el agua y cuando no lo utilice 6 No utilice el aparato con un cable de alimentación dañado o si el aparato se cayó o sufrió daños Para evitar el riesgo de descargas eléctricas no desarme el aparato Comuníquese con el Servicio de Atención al Cliente ...

Страница 28: ...muníquese con un electricista calificado para instalar la toma de corriente adecuada No altere el enchufe de ninguna manera El aparato no debe dejarse sin supervisión mientras esté conectado a la toma de corriente El enchufe debe desconectarse de la toma antes de llenar el depósito del agua El aparato debe situarse sobre una superficie estable incluso cuando no esté en uso Cuando coloque el aparat...

Страница 29: ...l agua sale por los orificios de base metálica de la plancha Está utilizando vapor por primera vez o no lo ha utilizado durante un tiempo Presione el botón de control de vapor y apunte la plancha lejos de la tabla de planchar hasta que esta genere vapor El ajuste no es correcto 1 punto 2 puntos y la base metálica de la plancha no está lo suficientemente caliente para producir vapor Ajuste la planc...

Страница 30: ... el depósito del agua consulte el apartado Qué agua se puede usar Comuníquese con un Centro de Servicio Autorizado La base metálica de la plancha está sucia o marrón y puede manchar la prenda Está planchando a una temperatura demasiado alta Consulte nuestras recomendaciones sobre el ajuste del control de la temperatura El indicador anti calc parpadea Debe llevar a cabo el proceso de descalcificaci...

Страница 31: ... forma puede seleccionar el modo ECO aunque la luz del botón ON OFF Encendido Apagado siga iluminándose de manera intermitente Después de dos minutos la luz del modo ECO u ON OFF Encendido Apagado permanecerá encendida ON CÓMO USAR SU APARATO Para liberar aún más vapor presione el gatillo de vapor situado debajo del mango tres veces seguidas Esto permitirá que se libere vapor automáticamente de ma...

Страница 32: ... Transporte El generador de vapor está equipado con un sistema de bloqueo para sostener la plancha sobre la base a fin de facilitar el transporte y almacenamiento Siga estos pasos para transportar el generador de vapor con el asa de la plancha Coloque la plancha sobre el soporte correspondiente en el generador de vapor y suba el sistema de bloqueo por encima de la plancha hasta que esté situado co...

Страница 33: ... el termostato al modo synthetic sintético la temperatura disminuirá Si gira el termostato al modo linen lino la temperatura y el vapor aumentarán 1 4 Ajustes Si presiona el botón ECO la temperatura y el vapor disminuirán CÓMO USAR SU APARATO Si vuelve a presionar el botón ECO para quitar el modo la temperatura y el vapor aumentarán nuevamente ...

Страница 34: ...vertical Cuelgue la prenda en una percha y estire la tela ligeramente con una mano NO max 1 6 Apagado automático El generador de vapor está equipado con un sistema de supervisión AUTO OFF Apagado automático que se activa de manera automática después de aproximadamente ocho minutos sin uso El botón ON OFF Encendido Apagado parpadeará para indicar que el aparato se encuentra en modo de espera Para v...

Страница 35: ...indica que es necesario iniciar la descalcificación Apague la unidad para ello presione el botón Off Apagado y luego desenchúfela La unidad se apagará automáticamente Posteriormente debe desconectarla Presione el botón intermitente Anti Calc Anticalcificación durante 3 segundos Se llevará a cabo el proceso de descalcificación durante el que la plancha emitirá agua y vapor por 2 minutos Tenga cuida...

Страница 36: ... las piezas de plástico del aparato esporádicamente con un paño suave 2 3 Almacenamiento Apague el aparato y desenchúfelo Guarde el cable de vapor en su compartimiento retráctil de almacenamiento y haga lo mismo con el cable eléctrico Deje que el generador de vapor se enfríe alrededor de 1 hora y luego vacíe el depósito del agua antes de guardarlo si lo guarda en un armario o en un espacio reducid...

Страница 37: ... agua de secadoras de ropa agua desmineralizada o con fragancia que contenga aditivos agua de refrigeradores baterías aires acondicionados agua de lluvia agua hervida filtrada o embotellada No utilice agua destilada pura ni desmineralizada pura Todos los tipos de agua indicados anteriormente pueden contener residuos orgánicos minerales o elementos químicos que pueden provocar derrames manchas marr...

Страница 38: ...orrespondiente indicado en la lista adjunta de países Esta garantía se aplica solo para productos adquiridos y usados con fines domésticos y no cubre ningún daño que pudiera producirse como resultado de uso indebido negligencia incumplimiento de las instrucciones de ROWENTA o a una modificación o reparación no autorizada del producto empaque defectuoso por parte del propietario o manejo incorrecto...

Страница 39: ...1820003771 03 20 ...

Отзывы: