background image

86

RR-1090

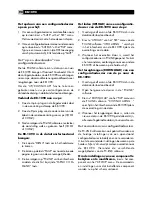
De herstelfunctie “RESET”

U kunt de RR-1090 weer terugbrengen in zijn “af
fabriek” toestand door gebruikmaking van de
“RESET”functie.

EXTRA


INFORMATIE

Als u de RESETfunctie wilt gebruiken

moet u zich realiseren dat u 

alle

 maar dan ook

alle

 geleerde functies, namen en configuraties wist.

Als u na onze waarschuwing toch wenst te “resetten”
dat doet u dat als volgt:

1. Druk op de toets “RESET” om in het hoofdmenu

terecht te komen.

2. Druk vervolgens op de toets “PAGE” om op de

tweede pagina van mogelijkheden terecht te
komen.

3. Kies nu “REMOTE SETTING” van het infoscherm

door op de menucommandotoets te drukken
boven de eerste letter van REMOTE SETTINGS.

4. Kies dan “RESET” van het infoscherm door op

de menucommandotoets te drukken onder de
eerste letter van het “RESET” label.

5. Kies nu “YES” OF “NO” om de opdracht al dan

niet te bevestigen. Kiest u ja (“YES”) dan wist
de RR-1090 al haar geleerde opdrachten en is
zij weer maagdelijk alsof ze zo van de fabriek
komt en toont tenslotte “DEFAULT SETTING” als
bewijs daarvan.

6. Druk nu op de “MENU”toets om terug te gaan

naar het hoofdmenu.

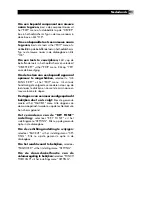
De dupliceerfunctie “DUPLICATE”

Met de dupliceerfunctie “DUPLICATE” kunt u het
gehele pakket geleerde informatie van de RR-1090
naar een andere RR-1090 overbrengen. U kunt kiezen
uit het overbrengen van de commando’s van slechts
één apparaat of van alle acht apparaten. Om de
data over te brengen legt u de beide RR-1090’s met
de infraroodvensters tegenover elkaar en handel dan
als volgt:

Op de ontvangende afstandsbediening:

1. Druk op de “MENU”toets om in het hoofdmenu

te komen.

2. Druk vervolgens op “PAGE” om naar de tweede

pagina te gaan.

3. Kies nu “DUPLICATE” van het infoscherm door

op de dichtst bijzijnde commandotoets te drukken.

4. Kies vervolgens “RECEIVE” van het infoscherm

door op de dichtst bijzijnde commandotoets te
drukken. In het scherm verschijnt nu “READY TO
RECEIVE INDICATOR”.

Op de verzendende afstandsbediening:

1. Druk op de “MENU”toets om in het hoofdmenu

te komen.

2. Druk vervolgens op “PAGE” om naar de tweede

pagina te gaan.

3. Kies nu “DUPLICATE” van het infoscherm door

op de dichtst bijzijnde commandotoets te drukken.

4.

Om de codes van alle apparatuur te
verzenden,

 kies de optie “COPY ALL DEVICES”.

Om slechts de codes van één apparaat
over te zenden, 

kies dan “COPY ONE DE-

VICE” en kies vervolgens het apparaat waarvan
u de data wenst te kopiëren. Het verzenden start
nu, het infoscherm laat “SENDING” zien.

Nadat de data-verzending gedaan is komt de
onderstaande informatie in het infoscherm te staan:

• Als de verzending succesvol is verlopen:

“FINISH SENDING”

• Als de verzending minder succesvol is

verlopen: 

“SENDING ERROR” . Het apparaat

gaat weer terug naar normale werking. Leg nu
de beide afstandsbedieningen weer tegenover
elkaar en probeer het nog eens.

EXTRA


INFORMATIE

Probeer de informatie van de

RR-1090 niet over te brengen naar een andere
afstandsbediening dan een andere RR-1090.

Содержание RR-1090

Страница 1: ...ruiksaanwijzing 78 RR 1090 Universal Remote Control Télécommande Universelle Universalfernbedienung Comando a Distanza Universale Mando a Distancia Universal Universele Afstandsbediening TV ENTER SELECT VCR SAT CD DVD AV1 AV2 AV3 M2 M4 M3 M1 MENU MUTE VOL CH PAGE AV1 CD AV1 TUNER AV2 POWER OFF TAPE1 AV4 TAPE2 AV5 PHONO AV3 ...

Страница 2: ...CT VCR SAT CD DVD AV1 AV2 AV3 M2 M4 M3 M1 MENU MUTE VOL CH PAGE AV1 CD AV1 TUNER AV2 POWER OFF TAPE1 AV4 TAPE2 AV5 PHONO AV3 1 2 3 4 5 8 6 7 9 10 11 1 Layout Vue générale Aufbau Disposizione Distribución de los Botones De Indeling ...

Страница 3: ...3 12 13 15 14 ...

Страница 4: ...e Ejemplo de Páginas de Dispositivo Apparaat voorbeeld pagina TV ENTER SELECT VCR SAT CD DVD AV1 AV2 AV3 M2 M4 M3 M1 MENU MUTE VOL CH PAGE AV1 CD AV1 TUNER AV2 POWER OFF TAPE1 AV4 TAPE2 AV5 PHONO AV3 AV1 CD AV1 TUNER AV2 POWER OFF TAPE1 AV4 TAPE2 AV5 PHONO AV3 AV1 1 7 2 8 0 6 4 10 5 BAND 3 9 AV1 CENTR ENTER SUBWF FORWD MENU BACK SUR ZONE UP DOWN REAR SHIFT AV1 TP DSPLY PRSET FILTR PTY TA AUTUN ON ...

Страница 5: ...5 4 PC Link Software Logiciel de programmation par PC PC Link Software Software PC Link Software para la Conexión a un Ordenador Personal Software voor verbinding met uw pc ...

Страница 6: ...mmand Codes 9 4 Digit Code Programming 10 Search Code by Brand Name 10 Auto Search Programming 10 Learning Commands 11 Macro Programming 11 Custom Device Page 12 Deleting Stored Commands 12 Volume Punch through 13 RESET Function 13 DUPLICATE Function 13 Custom Labels 14 Edit a DEVICE Name 14 Edit a COMMAND Name 14 Move a COMMAND Name 14 Auto arrange COMMAND Names 15 Other Configuration Options 15 ...

Страница 7: ...void the warranty Battery Installation and Recharging The RR 1090 includes 4 AA rechargeable nickel hy dride batteries and a 9V DC adaptor recharger When the batteries are weak and need to be re charged a LOW BATTERY indicator appears in the display To install the batteries turn the RR 1090 over and lift the cover off the battery compartment by pressing the release tab and lifting up Place the fou...

Страница 8: ... selected by a DEVICE button can have up to 48 menu commands These commands appear in the LCD display in groups or pages of twelve Press the PAGE button to advance to the next page of commands with new labels appearing in the LCD display Each press of the PAGE button jumps to the next group for that component eventually cy cling back to the original page MACRO Buttons Four buttons labeled M1 M2 M3...

Страница 9: ...el associated with that command replaces the DEVICE name in the center of the display 4 Press the PAGE button to see the next page of 12 available menu commands in the display Up to four pages of commands may be avail able for a particular component Press the PAGE button repeatedly to cycle through all available groups of commands for that component See Figure 3 NOTE The COMMAND buttons duplicate ...

Страница 10: ...D VCR AMP etc 4 Select BRAND NAME by pressing the MENU COMMAND key above that label 5 Select the first letter of your component s brand name If necessary press the M4 button for the next page of letters or the M3 button for the previous page of letters 6 Select your component s brand name from the list appearing in the display pressing M4 or M3 for additional listings The prompt press POWER key to...

Страница 11: ...program this component s codes 5 Select the RR 1090 COMMAND key where you wish to memorize the command You can choose one of the BASIC COMMAND buttons or one of the MENU COMMAND keys using the PAGE button to advance to a new page of MENU COMMANDS if necessary to find an unused key The LCD display will show LEARNING 6 Press and hold the corresponding command but ton on the original remote to send t...

Страница 12: ...ay 4 Press the DEVICE button where you wish to store the CUSTOM PAGE command set 5 Enter the new label for the device by pressing MENU COMMAND keys corresponding to the letters in the display using the M3 or M4 but tons to move to the next page of letters Labels can be up to 7 characters long After entering the label press the MENU button to store it 6 Press a DEVICE button to select the device wh...

Страница 13: ...e main menu RESET Function You can return the RR 1090 to its original factory programming at anytime by using the RESET func tion NOTE Using the RESET function erases all learned commands labels and configuration settings Make sure this is what you want to do To reset the RR 1090 1 Press the MENU button to reach the main menu 2 Press the PAGE button to advance to the second page of options 3 Selec...

Страница 14: ...ct EDIT from the LCD display 4 Select DEVICE NAME from the LCD display 5 Enter the new label for the device by pressing MENU COMMAND keys corresponding to the letters in the display using the M3 or M4 but tons to move to the next page of letters Labels can be up to 7 characters long After entering the label press the MENU button to store it Edit a COMMAND Name To change the name that appears in th...

Страница 15: ...om the LCD display Beep Sound The RR 1090 has a keytone feature that beeps to confirm each button press This feature can be en abled default or disabled To configure the beep sound 1 Press the MENU button to reach the main menu 2 Press the PAGE button to advance to the second page of menu options 3 Select REMOTE SETTINGS from the LCD display 4 Select BEEP SOUND from the LCD display 5 Select SOUND ...

Страница 16: ...ng to a number of RR 1090 remotes In addition many of the configuration options for the RR 1090 can be modified in the PC LINK soft ware a procedure that may be more convenient than using the RR 1090 s own setup menus Installing PC LINK Software To install and run the PC LINK software on a Win dows 95 98 computer 1 Insert DISK 1 in your disk drive 2 Run the program SETUP EXE either by double click...

Страница 17: ...ure the RR 1090 is in data transfer mode 2 Select UPLOAD from the FILE menu in the PC LINK software An UPLOADING prompt appears in the remote s LCD screen during the transfer 3 When the upload is complete the configuration file will be opened in the PC LINK software where it can be modified downloaded to another RR 1090 or saved to the computer disk To download a configuration file from the comput...

Страница 18: ...to a new location To view the steps in a MACRO selectthedesired macro from the MACRO menu The steps recorded in the macro are displayed down the right side of the main screen To change the KEY TONE setting select KEY TONE from the SETTING menu Click the desired option in the dialog box To change the BACKLIGHT setting select BACKLIT from the SETTING menu Click the desired option in the dialog box T...

Страница 19: ...ammation d un code par marque d appareil 23 Programmation par recherche automatique 24 Commandes d apprentissage 25 Programmation Macro 25 Personnalisation d une page 26 Effacement de commandes mémorisées 27 Généralisation du volume Punch through 27 Fonction de remise à zéro RESET 28 Fonction de copie DUPLICATE 28 Noms personnalisés 29 Editer le nom d une source DEVICE 29 Editer le nom d une comma...

Страница 20: ...ws 95 98 Précautions La RR 1090 est très solide mais pas indestructible Maniez la tout de même avec un minimum de précautions N exposez pas la RR 1090 à l humidité Pour la nettoyer n utilisez qu un chiffon doux propre et sec Evitez tous les nettoyants liquides avec solvant ou non N essayez pas d ouvrir le coffret de la RR 1090 Cela annule définitivement la garantie Installation et recharge de la b...

Страница 21: ...t et bas lecteur avanceetretourrapide pause etc Lesfonctionsréelles de chaque touche varient suivant la source DEVICE préalablement sélectionnée Touches du menu Command et afficheur LCD Sur le dessus de la RR 1090 se trouve un groupe de 12 touches rectangulaires entourant l afficheur LCD Ces touches baptisées MENU COMMAND commandes Menu permettent d accéder à des fonctions supplémentaires directem...

Страница 22: ...bout de 60 secondes si elle est restée totalement inactive pendant cette période Une pression sur n importe laquelle de ses touches la remet automatiquement en fonctionnement les indications réapparaissent alors dans l afficheur LCD Envoi des commandes IR Comme sur la plupart des commandes il suffit d appuyer sur une touche pour piloter la commande correspondante sur l appareil voulu qu il s agiss...

Страница 23: ...mporte quel moment de ce paramétrage vous pouvez revenir aux conditions normales de fonctionnement de la télécommande en pressant à nouveau cette touche MENU deux fois de suite Programmation d un code à 4 chiffres Trouvez le type et la marque de l appareil désiré dans les listes présentes à la fin de ce manuel Notez le code à 4 chiffres correspondant 1 Pressez la touche MENU pour accéder au menu d...

Страница 24: ...à 4 chiffres suivant réservé à la même marque d appareil ce nouveau code apparaissant dans l afficheur Continuez ainsi à presser la touche POWER et à essayer différents codes jusqu à trouver celui qui fonctionne Pressez alors la touche DEVICE pour le sauvegarder Si aucun des codes disponibles pour la marque concernée ne fonctionne il vous sera proposé de chercher parmi tous les codes correspondant...

Страница 25: ...icheur doit faire apparaître le mot LEARNING 6 Pressez et maintenez la pression sur la touche correspondante de la télécommande originale pour envoyer le code IR devant être appris par la RR 1090 Si la procédure d apprentissage échoue la RR 1090 affiche le mot ERROR et revient automatiquement à l étape 5 de la procédure ci dessus Repositionnez les deux télécommandes et recommencez en pressant et m...

Страница 26: ...ent parlant Cependant il est possible de concevoir une page personnalisée appelée CUSTOM PAGE qui inclura des fonctions indépendantes copiées à partir d autres appareils Par exemple vous pouvez construire une page CUSTOM PAGE personnalisée contenant toutes les fonctions communes à tous les appareils de l installation afin d avoir rapidement à portée de la main toutes les fonctions les plus couramm...

Страница 27: ... une commande appelée VOLUME PUNCH THROUGH qui copie le code de commande de réglage du volume du téléviseur ou du processeur numérique à votre convenance pour tous les autres maillons du système commandés via les autres touches DEVICE lecteurs de CD et de DVD magnétoscopes VCR récepteurs satellite etc Après avoir activé cette fonction le réglage de volume du téléviseur ou du processeur numérique e...

Страница 28: ...areils 8 touches DEVICE simultanément Pour effectuer cette copie commencez par placer les deux télécommandes RR 1090 face à face sur le même plan puis procédez comme suit Sur la télécommande qui recevra les données 1 Pressez la touche MENU pour atteindre le menu principal 2 Pressez la touche PAGE pour activer la deuxième page des options 3 Choisissez DUPLICATE dans l afficheur LCD en pressant la t...

Страница 29: ...afficheur LCD près de celles ci 1 Pressez la touche DEVICE concernant l appareil dont vous souhaitez changer le nom des touches COMMAND 2 Pressez la touche MENU pour atteindre le menu principal 3 Choisissez EDIT dans l afficheur 4 Choisissez l option KEY NAME dans l afficheur LCD 5 Pressez la touche BASIC COMMAND ou MENU COMMAND en utilisant éventuellement la touche PAGE pour les choix supplémenta...

Страница 30: ...ès qu une touche est pressée Jamais Le rétroéclairage est complètement désactivé Pour configurer le rétroéclairage 1 Pressez la touche MENU pour atteindre le menu principal 2 Pressez la touche PAGE pour activer la deuxième page des options 3 Choisissez REMOTE SETTINGS dans l afficheur LCD 4 Choisissez l option BACKLIT dans l afficheur en pressant la touche MENU COMMAND placée au dessous de la prem...

Страница 31: ... quelle combinaison Pressez la touche MENU 8 Ré entrez le nouveau mot de passe pour confirmer et pressez la touche MENU L indication PASSWORD SET de confirmation apparaît Vous pouvez ensuite l activer ENABLE ou le désactiver DISABLE NOTE Une fois le mot de passe changé vous ne pourrez plus accéder aux menus de réglage si vous oubliez ce nouveau mot de passe A moins d avoir vraiment besoin d une pr...

Страница 32: ...nom dans la boîte de dialogue L extension HTR sera ajoutée automatiquement Cliquez sur le bouton SAVE Retrouver ou stocker des fichiers de configuration En utilisant le logiciel PC LINK et le câble série fournis vous pouvez à tout moment sauvegarder ou charger unfichierdeconfiguration delatélécommandeRR 1090 audisquedurdel ordinateuretvice versa Parexemple vous pouvez charger la configuration actu...

Страница 33: ...CE choisissez l option DEVICE NAME nom d appareil dans le menu EDIT ou double cliquez sur la boîte DEVICE sur l écran principal Tapez simplement le nouveau nom dans la boîte de dialogue puis cliquez sur OK Pour renommer une touche KEY cliquez sur la touche désirée dans l écran principal et choisissez l option KEY NAME nom de touche dans le menu EDIT ou double cliquez sur la touche désirée Tapez le...

Страница 34: ... Vierzifferncodierung 38 Suche eines Codes durch Eingabe des Markennamens 38 Auto Search Verfahren 39 Lernen von Befehlen 39 Macroprogrammierung 40 Custom Page 41 Löschen gespeicherter Befehle 41 Volume Punch through 42 RESET Funktion 42 DUPLICATE Funktion 42 Tastenbezeichnungen 43 Ändern einer GERÄTEBEZEICHNUNG 43 Ändern einer BEFEHLSBEZEICHNUNG 43 Positionsänderung einer BEFEHLSBEZEICHNUNG 44 Au...

Страница 35: ...m Lieferumfang enthalten sind Akkus Ladegerät ein serielles Kabel und Software zur Programmierung der RR 1090 über jeden Win dows 95 98 Computer Einige Vorsichtsmaßnahmen Die RR 1090 ist zwar ausgesprochen widerstandsfähig jedoch auch nicht unzerstörbar Bitte nicht fallen lassen Setzen Sie die RR 1090 keiner Feuchtigkeit aus Benutzen Sie zum Reinigen ein weiches fusselfreies Tuch Verwenden Sie kei...

Страница 36: ...endeten Befehle ändern sich abhängig von der gewählten GERÄTETASTE Menübefehlstasten und LCD Display Im oberen Bereich der RR 1090 sind rund um das LCD Display 12 rechteckige Tasten angeordnet Diese MENUBEFEHLSTASTEN bieten zusätzliche Funktionen die über Menübezeichnungen im LCD Display für jede Taste angezeigt werden Die Funktion dieser Tasten ändert sich abhängig von der gewählten GERÄTETASTE u...

Страница 37: ...ine GERÄTETASTE um die Befehle für das gewünschte Gerät zu aktivieren Für einen Rotel Surround Prozessor beispielweise drücken Sie die AV1 Taste In der Mitte des Dis plays erscheint eine entsprechende Anzeige 3 Drücken Sie eine BEFEHLSTASTE so senden Sie einen Infrarotbefehl zu dem von Ihnen ausgewählten Gerät Drücken Sie beispielsweise die Befehlstaste VOL um die Lautstärke eines Rotel Surround P...

Страница 38: ...n 5 Geben Sie den Vierzifferncode ein indem Sie die MENUBEFEHLSTASTEN im LCD Display drücken die dem Code entsprechen Ist dieser Vorgang abgeschlossen wird der erfolgreich eingegebene Code im Display bestätigt 6 Ist der Code einmal eingegeben haben Sie zwei Möglichkeiten Zum einen können Sie eine andere GERÄTETASTE drücken um zusätzliche Codes zu programmieren Sie können aber auch die MENU Taste d...

Страница 39: ...em ersten Buchstaben des Wortes SETUP drücken 3 Drücken Sie die GERÄTETASTE unter der Sie die Codes dieses Gerätes speichern möchten Entscheiden Sie sich für AV1 AV2 oder AV3 werden Sie darüber hinaus aufgefordert den Gerätetyp auszuwählen CD Videorecorder VCR Verstärker AMP usw 4 Wählen Sie SEARCH indem Sie die MENUBEFEHLSTASTE unterdiesemWortdrücken Im Display erscheint press POWER key to test 5...

Страница 40: ...annten Schritte ab Schritt 5 Um zum Hauptmenü zurückzukehren drücken Sie die MENU Taste HINWEIS Die RR 1090 kann bis zu 240 Befehle speichern Ist diese Grenze erreicht erscheint COMMAND FULL Jetzt ist das Speichern weiterer Befehle nicht mehr möglich Siehe Abschnitt Löschen gespeicherter Befehle um Platz für weitere Befehle zu schaffen Macroprogrammierung Unter jeder der vier mit M1 M2 M3 und M4 g...

Страница 41: ...m das Gerät auszuwählen unter dem der erste Befehl zu finden ist den Sie der CUSTOM PAGE hinzufügen möchten 7 Drücken Sie die BEFEHLSTASTE für den ersten Befehl den Sie der CUSTOM PAGE hinzufügen möchten 8 Weisen Sie dem Befehl durch Drücken einer MENUBEFEHLSTASTE Ihrer Wahl seinen Platz auf derCUSTOMPAGEzu DieBezeichnungfürdiesen Befehl erscheint an der ausgewählten Position 9 Wiederholen Sie die...

Страница 42: ...ignete Gerätetaste passiert nichts Haben Sie sich für eine geeignete GERÄTETASTE entschieden so erscheint die Bestätigung PUNCH THROUGH OK im Display 6 Drücken Sie die MENU Taste um in das Hauptmenü zurückzukehren RESET Funktion Über die RESET Funktion können Sie die RR 1090 jederzeit wieder in die Original Werksprogram mierung zurücksetzen HINWEIS Die RESET Funktion löscht alle gelernten Befehle ...

Страница 43: ... einmal HINWEIS Nutzen Sie die DUPLICATE Funktion ausschließlich zur Signalübertragung zwischen zwei RR 1090 Tastenbezeichnungen Die Bezeichnungen der GERÄTE und BEFEHLS TASTEN können umbenannt werden Ferner kann die Position der MENUBEFEHLSTASTEN für ein Gerät im LCD Display geändert werden Ändern einer GERÄTEBEZEICHNUNG 1 Drücken Sie die GERÄTETASTE die Sie umbenennen möchten 2 Drücken Sie die M...

Страница 44: ...ählen Sie im LCD Display EDIT 4 Wählen Sie im LCD Display AUTO ARRANGE Konfigurationsmöglichkeiten Zusätzliche Ausstattungsmerkmale der RR 1090 sind die Hintergrund Beleuchtung und ein Signalton bei Tastendruck Darüber hinaus kann ein Passwortschutz aktiviert werden um den Zugriff auf die Setup Fea tures zu verhindern Hintergrund Beleuchtung Bei schlechten Lichtbedingungen leuchtet das LCD Display...

Страница 45: ...ie Tasten M3 bzw M4 um zur nächsten Buchstabenseite zu gehen Nach Eingabe des Passwortes drücken Sie die MENU Taste 7 Geben Sie das neue Passwort durch Drücken der MENUBEFEHLSTASTEN entsprechend den Buchstaben im LCD Display ein verwenden Sie die Tasten M3 bzw M4 um zur nächsten Buchstabenseite zu gehen Passwörter können bis zu 4 Zeichen lang sein und aus beliebigen Buchstaben und Zahlenkombinatio...

Страница 46: ...uter aus 1 Wählen Sie im Dateimenü Öffnen 2 Verwenden Sie das Dialogfeld um die DEFAULT HTR Konfigurationsdatei oder die Datei Ihrer Wahl zu finden 3 Klicken Sie auf Öffnen So speichern Sie eine Konfigurationsdatei im Computer 1 Um eine Konfigurationsdatei mit demselben Namen zu speichern wählen Sie im Dateimenü Speichern Die alte Datei wird von der neuen überschrieben 2 Um eine Konfigurationsdate...

Страница 47: ...ü Die Tastenbezeichnungen und sonstige Einstellungen für dieses Gerät erscheinen im PC LINK Bildschirm Zur Umbenennung eines GERÄTESwählen Sie im EDIT Menü oder durch Doppelklick auf das DEVICE Feld im Hauptbildschirm den DEVICE GERÄTE NAMEN aus Geben Sie den neuen Namen in das Dialogfeld ein und klicken Sie auf OK Möchten Sie eine TASTE umbenennen klicken Sie auf die gewünschte Taste im Hauptbild...

Страница 48: ...cifre 52 Ricerca del codice per nome del costruttore 52 Programmazione di auto ricerca 53 Comandi intelligenti learning 53 Programmazione MACRO 54 Pagina personalizzata dell apparecchio 54 Eliminazione dei comandi memorizzati 55 Volume Punch through 55 Funzione RESET 56 Funzione DUPLICATE 56 Etichette Personalizzate 57 Creazione di un nome di un componente DEVICE 57 Creazione di un nome COMMAND 57...

Страница 49: ...nvaliderà la garanzia Installazione delle pile e sostituzione L RR 1090 comprende 4 pile al nichel ricaricabili AA e un adattatore caricatore da 9V Quando le pile sono scariche o hanno bisogno di essere ricaricate un indicatore LOW BATTERY appare sul display Per installare le pile rivoltate l RR 1090 e sollevate il coperchio dell alloggiamento per le pile premendo la linguetta e sollevandolo Collo...

Страница 50: ...ino a 48 comandi di menu Questi comandi appaiono sul display LCD in gruppi o pagine di dodici Premete il pulsante PAGE per andare alla pagina successiva di comandi con nuove etichette che appaiono sul display LCD Ogni pressione del pulsante PAGE salta al gruppo successivo per quel componente per poi ritornare di nuovo alla pagina iniziale Pulsanti MACRO Quattro pulsanti contrassegnati M1 M2 M3 e M...

Страница 51: ...do a distanza corrispondenti alle etichette di comando visibili sul display LCD Mentre un pulsante COMMAND viene premuto l etichetta abbinata a quel comando sostituisce il nome DEVICE al centro del display 4 Premete il pulsante PAGE per vedere la pagina successiva dei 12 comandi menu disponibili sul display Possono essere disponibili per un particolare componente fino a quattro pagine di comandi P...

Страница 52: ...tore Potete anche utilizzare il seguente metodo di ricerca per trovare e verificare i numeri di codice disponibili per il marchio del vostro componente 1 Premete il pulsante MENU per raggiungere il menu principale 2 Scegliete SETUP dal dispaly LCD premendo il tasto MENU COMMAND sopra la prima lettera dell etichetta SETUP 3 Premete uno dei pulsanti DEVICE per scegliere dove desiderate programmare i...

Страница 53: ...nziato sul display Continuate a premere il pulsante POWER e a verificare i codici fino a che avete trovato un codice che funziona memorizzandolo con la pressione del pulsante DEVICE Se nessuno dei codici disponibili funziona un suggerimento vi dirà che avete verificato tutti i codici disponibili Premete il pulsante MENU per tornare al menu principale Comandi intelligenti learning Se le serie di co...

Страница 54: ...ghe fino a 5 caratteri Dopo aver inserito l etichetta premete il pulsante MENU per memorizzarlo 6 Memorizzate il primo passo nel macro Premete un pulsante DEVICE per passare all apparecchio desiderato e singoli tasti COMMAND per memorizzare i comandi dall apparecchio selezionato premete il pulsante PAGE per vedere altre pagine di comandi disponibili 7 Per memorizzare altri comandi premete il pulsa...

Страница 55: ...iminare altri comandi Se desiderato premere il pulsante M4 per organizzare automaticamente i nuovi comandi sul display 8 Premete il pulsante MENU per tornare al menu principale Volume Punch through Inmoltiimpianti ilVOLUMEvieneregolatosultelevisore o sul processore A V Per comodità l RR 1090 è provvisto di una caratteristica VOLUME PUNCH THROUGH che copia i comandi del volume o dall apparecchio TV...

Страница 56: ... a distanza RR 1090 con le finestre a raggi infrarossi rivolte l una verso l altra poi continuate nel seguente modo Sul comando a distanza che riceverà i dati 1 Premete il pulsante MENU per raggiungere il menu principale 2 Premete il pulsante PAGE per avanzare alla seconda pagina di opzioni 3 Scegliete DUPLICATE dal display LCD premendo il tasto vicino MENU COMMAND 4 Scegliete RECEIVE dal display ...

Страница 57: ...ND o il tasto MENU COMMAND usando il pulsante PAGE per altre scelte che desiderate rinominare 6 Inserite la nuova etichetta per l apparecchio premendo i tasti MENU COMMAND corrispondenti alle lettere sul display usando i pulsanti M3 o M4 per passare alla pagina di lettere successiva Le etichette possono essere lunghe fino a 5 caratteri Dopo aver inoltrato l etichetta premete il pulsante MENU per m...

Страница 58: ...2 Premere il pulsante PAGE per avanzare alla seconda pagina delle opzioni di menu 3 Scegliere REMOTE SETTINGS dal display LCD 4 Scegliere BEEP SOUND dal display LCD 5 Scegliere SOUND ENABLE o SOUND DISABLE Password Una parola d ordine può essere definita e abilitata per impedire l accesso ai menu di installazione Una volta definita e abilitata la password verrà richiesta prima di consentire l acce...

Страница 59: ...che potrebbe essere più comoda dell uso dei menu d installazione propri dell RR 1090 Installazione del software PC LINK Per installare e utilizzare il software PC LINK su un computer Windows 95 98 1 Inserite il DISK 1 nel vostro disk drive 2 Avviate il programma SETUP EXE o facendo clic due volte sul file in Wondows Explorer o cliccando RUN dal menu del pulsante START e scrivendo SETUP EXE 3 Segui...

Страница 60: ...nda pagina di opzioni 3 Scegliete PC LINK dal display LCD premendo il tasto vicino MENU COMMAND Per caricare un file di configurazione dall RR 1090 al computer 1 Assicuratevi che l RR 1090 sia in modalità di trasferimento dei dati 2 Scegliete UPLOAD dal menu FILE nel software PC LINK L informazione UPLOADING apparirà sullo schermo LCD del comando a distanza durante il trasferimento 3 Quando il car...

Страница 61: ...o in uso scegliete ARRANGE KEY da EDIT Potete anche spostare manualmente i tasti della pagina in un altra posizione facendo un clic sul nome del tasto tenendo il tasto del mouse e trascinando l etichetta in una nuova posizione Per vedere i passaggi in una MACRO scegliete la macro desiderata dal menu MACRO I passaggi memorizzati nella macro sono evidenziati sul lato destro dello schermo principale ...

Страница 62: ...ogramación por Búsqueda Automática 69 Aprendizaje de Instrucciones de Control 70 Programación de Macros 70 Página de Dispositivo Personalizado Custom Device Page 71 Borrado de Instrucciones Memorizadas 72 Función de Transferencia del Control de Volumen Volume Punch Through 72 Función RESET REINICIALIZACION 73 Función DUPLICATE DUPLICAR 73 Etiquetas Personalizadas Custom Labels 74 Edición de un Nom...

Страница 63: ...uctible Por lo tanto le rogamos que no lo tire de cualguier manera ni lo deje caer al suelo No exponga el RR 1090 a la humedad Para limpiarlo utilice una gamuza suave libre de gasa Evite el uso de productos de limpieza agresivos No intente desmontar el RR 1090 ya que ello invalidará la garantía Instalación y Recarga de las Baterías El RR 1090 incluye 4 pilas AA recargables de hidruro de níquel y u...

Страница 64: ...ha ajuste del nivel de volumen paso al canal anterior siguiente lectura avance rápido pausa etc de los componentes de su equipo Las órdenes de control correspondientes a cada botón variarán en función de cual sea el botón DEVICE seleccionado Teclas de Gestión por Menús y Visualizador de Funciones LCD En la parte superior del RR 1090 hay un grupo de 12 botones rectangulares que rodean el visualizad...

Страница 65: ...de las baterías el RR 1090 se desactiva automáticamente modo sleep al cabo de 60 segundos de inactividad Pulse cualquier botón para activarlo Las diferentes etiquetas aparecerán en el visualizador de funciones LCD inmediatamente después de activar el RR 1090 Envío de Ordenes de Control por Rayos Infrarrojos IR En vez de utilizar varios mandos a distancia para manejar su equipo le bastará simplemen...

Страница 66: ...Si alguno de sus componentes no está en la lista existen métodos de búsqueda alternativos para encontrar el grupo de órdenes de control correcto para los mismos NOTA La programación del RR 1090 se lleva a cabo en un modo de ajuste gobernado por menús al que se accede pulsando el botón MENU En cualquier momento del proceso usted puede salir del modo de ajuste y regresar al modo de funcionamiento no...

Страница 67: ...COMMAND correspondientes a órdenes de control para ese código de 4 dígitos mostrado en el visualizador de funciones Si tiene éxito pulse el botón DEVICE para memorizar el código Si la orden de control POWER no funciona pulseelbotónPOWERparaprobarelsiguientecódigo disponible para esa marca el nuevo código de 4 dígitos en curso de evaluación aparecerá en el visualizador de funciones Continúe pulsand...

Страница 68: ...onente 5 Seleccione la tecla COMMAND del RR 1090 en la que desee memorizar la instrucción Puede optar entre uno de los botones BASIC COMMAND o una de las teclas MENU COMMAND utilizando en caso de que sea necesario el botón PAGE para pasar a una nueva página de MENU COMMAND y encontrar una tecla no utilizada El visualizador de funciones LCD mostrará LEARNING 6 Pulse y mantenga pulsado el botón corr...

Страница 69: ...DEVICE Página de Dispositivo Personalizado Custom Device Page Por lo general todas las instrucciones almacenadas en un botón DEVICE gobiernan un único componente No obstante es posible construir un conjunto de instrucciones especial denominado CUSTOM PAGE PAGINA PERSONALIZADA que incluye instrucciones individuales copiadas de otros dispositivos Por ejemplo usted podría construir un conjunto de ins...

Страница 70: ... sistemas el NIVEL DE VOLUMEN es ajustado en el televisor o el procesador de A V Por comodidad el RR 1090 incorpora una función de TRANSFERENCIA DEL CONTROL DE VOLUMEN que copia las instrucciones de control del nivel de volumen tanto del televisor como de cualquier dispositivo de A V programado a las teclas de dispositivo correspondientes a otros componentes del equipo como por ejemplo un reproduc...

Страница 71: ... para volver al menú principal Función DUPLICATE DUPLICAR La función DUPLICATE transfiere la programación incluyendo las instrucciones de control y las etiquetas memorizadas desde un RR 1090 a otro Usted tiene la opción de transferir datos tanto desde una sola de las teclas DEVICE como desde las ocho disponibles Para transferir la programación coloque dos mandos a distancia RR 1090 con sus ventana...

Страница 72: ...isualizador de funciones utilizando los botones M3 o M4 para ir a la siguiente página de letras Las etiquetas pueden tener una longitud de hasta 7 caracteres Una vez introducida la etiqueta pulse el botón MENU para memorizarla Edición del Nombre de una ORDEN DE CONTROL Para cambiar el nombre que aparece en el visualizador de funciones LCD junto a una tecla MENU COMMAND 1 Pulse el botón DEVICE que ...

Страница 73: ...Detecta el nivel de iluminación de la habitación y activa la retroiluminación durante 5 segundos con la pulsación de cualquier tecla cuando la habitación está oscura ajuste por defecto Always On Siempre Activada La retroiluminación se activará durante 5 segundos con la pulsación de cualquier tecla independientemente de cual sea la iluminación de la habitación Always Off Siempre Desactivada La retr...

Страница 74: ...olosbotonesM3yM4paradesplazarse a la siguiente página de caracteres Una vez introducida la contraseña pulse el botón MENU 7 Introduzca la nueva contraseña pulsando las teclas MENU COMMAND pulsando las teclas MENU COMMAND correspondientes a los caracteres mostrados en el visualizador de funciones utilizando los botones M3 y M4 para desplazarse a la siguiente página de caracteres Las contraseñas pue...

Страница 75: ... archivo de configuración por defecto DEFAULT HTR está instalado en el subdirectorio DEFAULT del directorio de instalación del HT200 Para abrir un archivo de configuración desde un disco de ordenador 1 Seleccione ABRIR en el menú ARCHIVO 2 Utilice la caja de diálogos para encontrar el archivo de configuración DEFAULT HTR o el archivo que a usted le interese 3 Haga clic en el botón ABRIR Para guard...

Страница 76: ...hivo de configuración abierto y modificar muchos de ellos El archivo de configuración modificado puede entonces ser guardado en un disco o descargado en un RR 1090 Estas son las opciones disponibles en el software PC LINK Para seleccionar el DISPOSITIVO a revisar o modificar elija el dispositivo en el menú DEVICE Los nombres de las teclas y otros ajustes correspondientes a dicho dispositivo son vi...

Страница 77: ...ú SETTING Haga clic sobre la opción deseada en la caja de diálogos Para cambiar el ajuste correspondiente a la CONTRASEÑA seleccione PASSWORD en el menú SETTING Para cambiar el ajuste correspondiente a la TRANSFERENCIA DEL CONTROL DE VOLUMEN seleccione PUNCH THROUGH en el menú SETTING Español ...

Страница 78: ...81 Het programmeren met de vier cijferige code 82 Het zoeken van de code d m v de merknaam 82 Programmeren d m v automatisch zoeken 83 De leercommando s 83 Het programmeren van macro s 84 Een pagina op maat maken 84 Het verwijderen van ingebrachte commando s 85 Het doorschakelen van de volumeregeling 85 De herstelfunctie RESET 86 De dupliceerfunctie DUPLICATE 86 Het aanpassen van de labels 87 Het ...

Страница 79: ... te halen Uw garantie vervalt dan automatisch Het plaatsen van de accu s en het opladen De RR 1090 heeft 4 AA oplaadbare accu s en een 9 volts adapter oplader Wanneer LOW BATTERY in hetinfoschermverschijntmoetudeaccu sweeropladen Het plaatsen Leg de afstandsbediening op z n kop en verwijder het batterijcompartimentklepje Plaats de vier batterijen zoals staat aangegeven en doe het klepje weer op zi...

Страница 80: ...daarop de tv ingang kiezen Mettweemacrotoetsen M3enM4 kunnenookgebruikt worden om de RR 1090 naar uw hand te zetten De menutoets Met deze toets activeert u de verschillende schermen van het LCD display waarmee u uw RR 1090 naar uw hand kunt zetten De MENU toets wordt niet gebruikt tijdens het normaal bedienen De aan uittoets POWER Naast de eigenlijke functie van deze toets wordt deze ook gebruikt ...

Страница 81: ...verzendt Het zenden van macro commando s De vier toetsen op de RR 1090 genaamd M1 M2 M3 en M4 zijn om macrocommando s in onder te brengen Eenmacroiseenserievanlossecommando s die geactiveerd wordt door het indrukken van één toets Macro s kunnen het bedienen van een complexe installatie heel wat vereenvoudigen Voorbeeldje Wat moet u niet allemaal doen om een videobandje af te spelen de TV aanzetten...

Страница 82: ...e drukken 3 Druk op één van de apparaattoetsen waaronder u een bepaald component ondergebracht wenst te hebben Als u één van de ingangen AV1 AV2 of AV3 kiest zal u verder gevraagd worden wat voor type apparaat het is b v cd vcr enz 4 Kies nu BRANDNAME door op de toets boven deze naam te drukken 5 Kies nu de eerste letter van uw merk in de lijst die verschijnt op het infoscherm Indien nodig druk da...

Страница 83: ...heden van de RR 1090 bepaalde functies mist dan kan de RR 1090 deze opdrachten geleerd worden d m v de bestaande afstands bediening van dat betreffende apparaat 1 Leg de beide afstandsbedieningen tegenover elkaar zoals getoond in figuur 2 voorin in deze gebruiksaanwijzing Het infraroodsignaal dat uitgezonden wordt van eigenlijke afstands bediening moet ontvangen kunnen worden door het oog van de R...

Страница 84: ...zetten drukt u eerst op de gekozen MACRO toetsomhet voorgaandecommandotebevestigen en vervolgens bevestigt u het volgende com mando Herhaal deze stappen tot u de hele reeks heeft vastgelegd 8 Wanneer u de hele reeks heeft ingebracht drukt u op de MENU om de commandostreng in het geheugen vast te leggen EXTRA INFORMATIE Een meervoudige opdracht kan 10 commando s bevatten de apparaattoets niet meege...

Страница 85: ...volumeregeling In de meeste audio visuele systemen wordt het geluidsniveau bepaald door de tv of de A V pro cessor voorversterker Om ten alle tijden de volumeregeling ter beschikking te hebben ook als één van de andere bronnen aanstaat hebben we een mogelijkheid gecreëerd de volumeregeling van of de tv of de processor voorversterker naar de andere apparaatfuncties door te schakelen Zo heeft u alti...

Страница 86: ...ht apparaten Om de data over te brengen legt u de beide RR 1090 s met de infraroodvensters tegenover elkaar en handel dan als volgt Op de ontvangende afstandsbediening 1 Druk op de MENU toets om in het hoofdmenu te komen 2 Druk vervolgens op PAGE om naar de tweede pagina te gaan 3 Kies nu DUPLICATE van het infoscherm door op de dichtst bijzijnde commandotoets te drukken 4 Kies vervolgens RECEIVE v...

Страница 87: ...te verandering van de commandonaam te realiseren 6 Gebruik nu de diverse commandotoetsen om het commando van een nieuwe naam te voorzien gebruik de M3 en M4 toetsen om eventueel op de pagina s met andere letters te komen U kunt een naam met maximaal 5 karakters geven Nadat u klaar bent met de naam drukt u op de toets MENU om de naam vast te leggen 7 Herhaal de stappen 5 en 6 om andere commandotoet...

Страница 88: ...an de menumogelijkheden 3 Druk vervolgens op REMOTE SETTINGS van het infoscherm 4 Kies dan BEEP SOUND van het infoscherm 5 Kies dan SOUND ENABLE of SOUND DIS ABLE Het wachtwoord U kunt een wachtwoord verzinnen en inbrengen om te voorkomen dat ingestelde menu s ongewild door anderen veranderd worden Als een wachtwoord eenmaal is ingebracht dan wordt bij iedere verandering in de instellingsmenu s om...

Страница 89: ...oorzien Daarbij kunnen vele configuratie mogelijkheden voor de RR 1090 veranderd worden in de PC LINK soft ware een procedure die wellicht makkelijker is dan het werken met zijn eigen set up menu s Het installeren van de PC LINK software Het installeren en werken met de PC LINK software op een Windows 95 98 computer 1 Doe het eerste schijfje DISK 1 in de drive 2 Start nu het programma SETUP EXE do...

Страница 90: ...bijzijnde MENU COM MAND toets Het laden UPLOAD van een configuratie dossier van de RR 1090 naar de pc 1 Overtuig uzelf ervan of de RR 1090 zich in de datatransfertoestand bevindt 2 Kies nu UPLOAD van het FILE menu van de PC LINK software UPLOADING verschijnt in het infoscherm van de RR 1090 tijdens de overzetting van de data 3 Wanneer het overzetten klaar is wordt het configuratiedossier in PC LIN...

Страница 91: ... uit het EDIT menu U kunt ook handmatig de volgorde veranderen door op de toetsnaam te drukken en ze met de muis naar een nieuwe locatie te slepen De stappen van een meervoudige opdracht bekijken doet u als volgt Kies de gewenste macro uit het MACRO menu Alle stappen van de macro opdracht worden nu op de rechterkant van het scherm getoond Het veranderen van de KEY TONE instelling selecteer KEY TON...

Страница 92: ...0361 0561 0571 MITSUBISHI 0221 0321 0561 0571 MONTGOMERY 0351 MTC 0351 0361 NAD 0551 NEC 0241 0351 0361 NIKKAI 0271 0431 NIKKO 0031 OPTIMUS 0551 OPTONICA 0541 OSAKI 0271 PANASONIC 0191 0251 PENNY 0161 0351 0361 0521 0531 PHILCO 0361 0581 0591 0601 PHILIPS 0401 PIONEER 0511 0551 PROTON 0351 0501 PULSER 0351 QUASAR 0251 RADIO SHACK 0541 RCA 0051 0141 0151 0181 0411 0491 0531 REALISTIC 0541 SAISHO 03...

Страница 93: ...IPS 0282 0342 0420 0492 PIONEER 0442 0542 PULSAR 0512 QUARTZ 0272 QUASAR 0382 0932 RADIO SHACK 0472 RCA 0112 0382 0392 0482 0592 0602 REALISTIC 0402 0472 RICOH 0352 0362 SAISHO 0212 0582 SAMSUNG 0212 0312 SANKY 0472 0512 SANSUI 0292 0542 SANYO 0242 SBR 0282 SCOTT 0342 SEARS 0302 0342 0592 0602 SHARP 0402 0472 SONY 0032 0332 0352 0362 STS 0602 SUNPAK 0352 SYLVANIA 0492 0502 TEKNIKA 0322 TELEFUNKEN ...

Страница 94: ...606 0896 REVOX 1226 ROTEL 0006 0016 0026 0036 0046 0266 SABA TELECOMMANDER 0556 SAE 0266 SAMSUNG 1336 SANSUI 0266 0676 1026 1076 1156 SANYO 0196 0606 0686 0816 SCOTT 0376 1156 SEARS 0396 SHARP 0286 0716 0946 1116 1126 SHERWOOD 0166 0286 0446 0526 SIEMENS GARRARD 1296 SIGNATURE 0226 SONTEC 1216 SONY 0116 0616 0916 1196 STARON 1286 STS 0076 SYLVANIA 0266 SYMPHONIC 0386 TANDY 0356 TANGBERG 1246 TEAC ...

Страница 95: ... DIGITAL 0903 PANASONIC 0443 0453 0463 0473 PARAGON 0383 PHILPS 0003 0033 0213 0303 0313 0323 0333 0343 0413 0423 0913 PIONEER 0083 0553 0693 PRIMESTAR 0803 0823 PULSAR 0383 RCA DSS 0393 0403 0833 REALISTIC 0133 REGENCY EASTERN 0683 RUNCO 0383 SAMSUNG 0273 SCIENTIFIC ATLANTA 0363 0563 0573 0583 SIGNAL 0273 SKY 0893 SL MARX 0273 SONY 0843 SPECTAVISION 0233 STANDARD COMP 0183 STARCOM V 0253 STARGATE...

Страница 96: ...MA 01864 2699 USA Phone 1 978 664 3820 Fax 1 978 664 4109 Rotel Europe Meadow Road Worthing West Sussex BN11 2RX England Phone 44 0 1903 524 813 Fax 44 0 1903 524 831 Rotel Deutschland Kleine Heide 12 D 33790 Halle Westf Germany Phone 49 05201 87170 Fax 49 05201 73370 www rotel com 082 OM RR 1090 012100 English Français Deutsch Italiano Español Nederlands ...

Отзывы: