16 • Hardware Overview
DSS-8224 User Guide (v6.0)
Use
JP7
to enable or disable the reclocking feature of the DSS-8224. This jumper also impacts the ACO feature of
the card. Refer to “
” on page 25 for more information.
Use
JP8
to select whether the DSS-8224 is remotely configured using DashBoard or SNMP, or using the
card-edge controls.
9. Output 2 Control Mode Jumper (JP9)
Use
JP9
to configure the control mode for Output 2.
Use
JP10
to configure which two inputs are available on Output 2, when operating in 2x1 Mode
Use
JP11
in conjunction with
JP3
to select the type of GPI control used by the DSS-8224.
12.Output 1 Select Button (SW1)
SW1
selects the next input on Output 1.
13.Output 2 Select Button (SW2)
SW2
selects the next input on Output 2.
This button is used for factory service in the unlikely event of a complete card failure. Do not press this button
unless instructed to do so by Ross Technical Support.
For More Information on...
• the operating modes for the DSS-8224, refer to the section “
• the switch timing of the DSS-8224, refer to the section “
Control and Monitoring Features
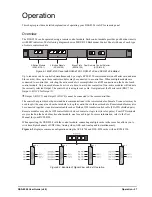
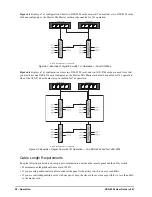
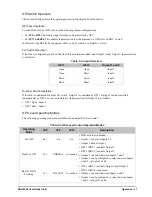
This section provides information on the jumpers, buttons and LEDs for the DSS-8224. (
Figure 3.2 DSS-8224 Card-edge Controls
Содержание OpenGear DSS-8224
Страница 1: ...DSS 8224 User Guide ...
Страница 6: ......
Страница 14: ...14 Before You Begin DSS 8224 User Guide v6 0 ...
Страница 18: ...18 Hardware Overview DSS 8224 User Guide v6 0 ...
Страница 22: ...22 Physical Installation DSS 8224 User Guide v6 0 ...
Страница 34: ...34 Software Upgrades DSS 8224 User Guide v6 0 ...
Страница 42: ...42 DashBoard Menus DSS 8224 User Guide v6 0 ...
Страница 44: ...44 Technical Specifications DSS 8224 User Guide v6 0 ...


