background image

RNX-G100 / RNX-G200 / RNX-G300(E)   

                                                                                                                                      User  Manual 


4

z


A CD-ROM Drive 

z


Cardbus/PCI/USB controller properly installed and working in the laptop computer 

z


A 802.11g or 802.11b Access Point (for infrastructure Mode) or another 802.11g or 802.11b 
wireless adapter (for Ad-Hoc; Peer-to-Peer networking mode.) 


Chapter 2 Designing Your Wireless Network 


The wireless Cardbus/PCI/USB Adapter supports up to 54 Mbps connections. This card is fully 
compliant with the specifications defined in IEEE802.11g standard. It is designed to complement 
PCI Local Bus computers and supports Windows 98SE/Me/2000/XP/Vista. 

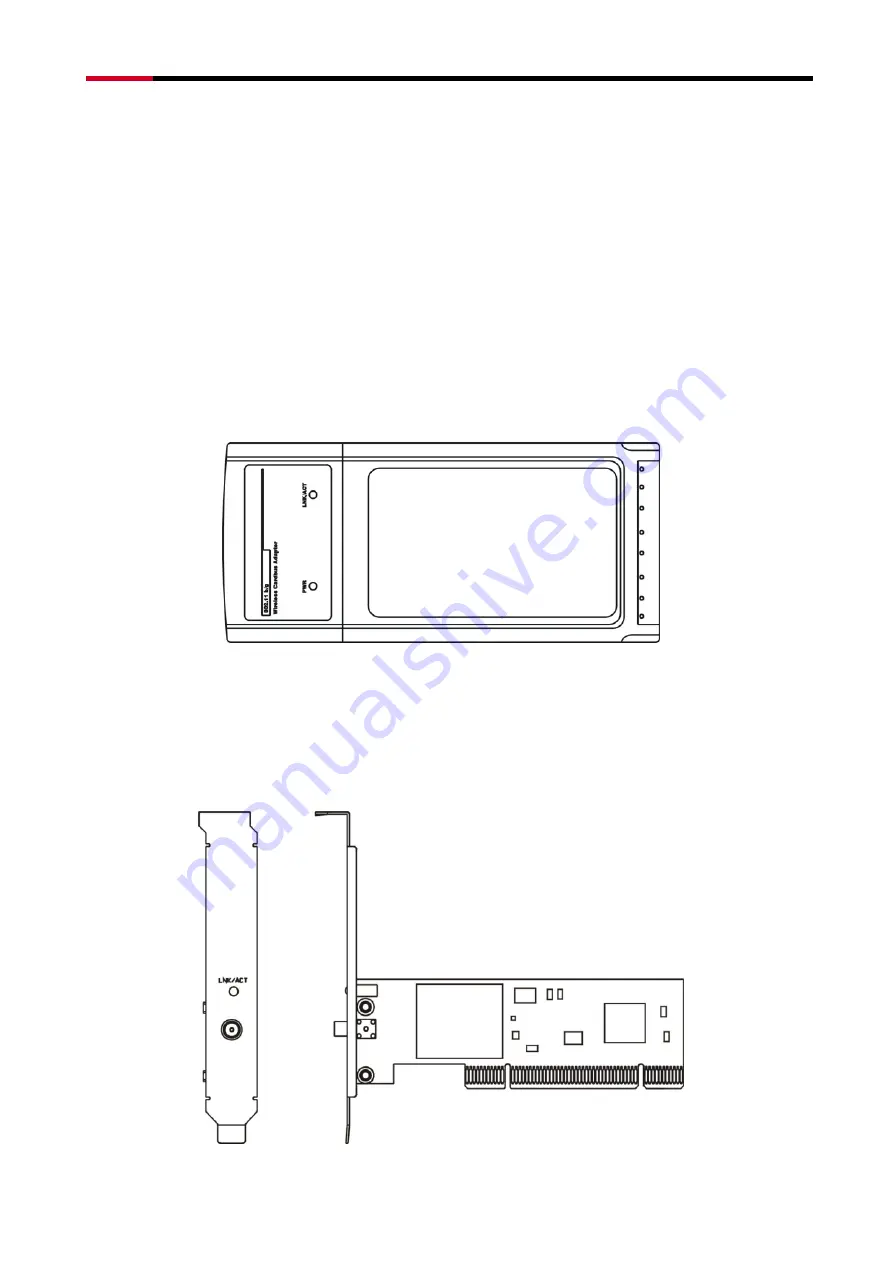
2.1 Cardbus adapter- RNX-G200


Figure 2-1 

The two status LED indicators of the Cardbus wireless adapter are described in the following. 

z


PWR ON (Green): Indicates the Adapter is ready 

z


Lnk/Act ON (Green): Indicates a valid connection   

z


Lnk/Act Flashing: Indicates the Adapter is transmitting or receiving data. 

2.2 PCI adapter- RNX-G300(E) 


Figure 2-2 

Содержание RNX-G100

Страница 1: ...Wireless G USB Adapter RNX G100 Wireless G PCMCIA Adapter RNX G200 Wireless G PCI Adapter RNX G300 E User Manual...

Страница 2: ...twork 4 2 1 Cardbus adapter RNX G200 4 2 2 PCI adapter RNX G300 E 4 2 3 USB adapter RNX G100 5 Chapter 3 Install Wireless Adapter 5 3 1 Install Driver and Utility 5 3 2 Install Adapter 7 3 3 Configura...

Страница 3: ...w to install and configure your Wireless Adapter to get your network started accessing the Internet It will guide you through the correct configuration steps to get your device up and running Note and...

Страница 4: ...dapter supports up to 54 Mbps connections This card is fully compliant with the specifications defined in IEEE802 11g standard It is designed to complement PCI Local Bus computers and supports Windows...

Страница 5: ...s adapter are described in the following z Lnk Act ON Green Indicates a valid connection z Lnk Act Flashing Indicates the Adapter is transmitting or receiving data Figure 2 3 Chapter 3 Install Wireles...

Страница 6: ...0 E User Manual 6 z Click Install Driver Utility on the Wireless Client Configuration Utility screen Figure 2 2 z Follow the Install Shield Wizard steps and click Finish when done Figure 2 3 z Now tur...

Страница 7: ...lays choose Install the software automatically Recommended and click Next button The driver will be installed automatically Figure 3 2 3 2 2 PCI Adapter RNX G300 E z Open your PC case and locate an av...

Страница 8: ...Next button The driver will be installed automatically 3 2 3 USB Adapter RNX G100 z Power on your PC let the operating system boot up completely and log in as needed z Hold the adapter and insert it i...

Страница 9: ...anual 9 3 3 Configuration your wireless adapter z The Wireless Client Configuration Utility screen will appear automatically Figure 4 1 z Click the Site Survey tab then click the Refresh button to sea...

Страница 10: ...ailable wireless networks or create profiles that hold different configuration settings You can double click the icon on your system desktop start it Another way to start the Configuration Utility is...

Страница 11: ...Security The status of the encryption security feature z Link Speed The data transfer rate of the current connection z Channel The channel to which the wireless network devices are set Internet Protoc...

Страница 12: ...X G100 RNX G200 RNX G300 E User Manual 12 Figure 4 2 The section of the window displays the Available Networks Highlight the network to which you wish to connect Click on the Associate button Figure 4...

Страница 13: ...he Key field Click the OK button to complete the network connection and return to the Site Survey screen or click the Cancel button the cancel the network connection and return to the Site Survey scre...

Страница 14: ...User Manual 14 Figure 4 5 z Import profile Click the Import Profile button to import a profile that has been saved in another location From the screen that appears select the appropriate file and clic...

Страница 15: ...RNX G100 RNX G200 RNX G300 E User Manual 15 4 4 Profile Manager Figure 4 7 On the Profile Manager tab click the Create button to create a new profile...

Страница 16: ...ers on your wired network via a wireless access point Choose the Ad Hoc Mode in the Network Type drop down box if you want multiple wireless computers to communicate directly with each other Click the...

Страница 17: ...t button Figure 4 10 The Security screen Figure 6 10 will appear Choose the Authentication Mode and Encryption Method from the drop down menu To use WEP encryption recommended to increase network secu...

Страница 18: ...User Manual 18 Figure 4 11 The Protocol screen will appear Select do not change settings then click Next button Figure 4 12 The Complete Screen will appear Click Finish button You have successfully c...

Страница 19: ...which the Adapter is associated is powered on Make sure that your Adapter is configured on the same channel and with the same security options as with the other computers in the Infrastructure configu...

Страница 20: ...D PWR LNK ACT WEP Key Bits 64 Bit and 128 Bit Dimensions RNX G200 118 3 5 54 5mm RNX G300 E 120 40mm Non Bracket RNX G100 85 5 28 10mm Unit Weight RNX G200 55g RNX G300 E 50g RNX G100 15g Power RNX G2...

Отзывы: