


Quick Installation Guide
Wireless Router
RNX-EasyN400
3
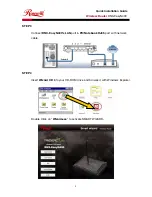
Please click on Setup Wizard and follow the instruction given to complete the
device initiation configuration.
Internet Connection Wizard
1.
Click on the
Internet Connection Setup Wizard
button to begin the process.
2.
The Wizard requires that you configure the password, time zone, and Internet
(WAN) connection. Click on the
Next
button to continue.
3.
By default, the device does not use a password. Specify a password for
administrator access to the device, then type the password once more in the
Verify Password
field. Click on the
Next
button to continue.
4.
Select your time zone from the drop-down list Click on the
Next
button to
continue.
5.
The next step in the wizard is the Internet Connection, select the WAN
connection type from the list, and then click on the
Next
button to continue with
the wizard.
WAN DHCP
1.
Select the
DHCP Connection (Dynamic IP Address)
radio button and then
click on the
Next
button.
2.
You have the option of cloning your PCs MAC address onto the device. Click on
the
Clone Your PCs MAC Address
to automatically copy the MAC address.
You may also specify a host name. Click on the
Next
button to continue.
3.
The WAN configuration is complete. Click on the
Connect
button to connect to
the Internet.
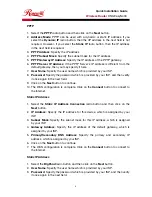
PPPoE
1.
Select the
PPPoE
radio button and then click on the
Next
button.
2.
Address Mode
: PPPoE can be used with a dynamic or static IP address. If you
select the
Dynamic IP
radio button, then the IIP address in the next field is not
required. However, if you select the
Static IP
radio button, then the IP address
in the next field is required.
3.
User Name
: Specify the user name which is provided by your ISP.
4.
Password:
Specify the password which is provided by your ISP, and then verify
it once again in the next field.
5.
Service Name
: Specify the name of the ISP.
6.
Click on the
Next
button to continue.
7.
The WAN configuration is complete. Click on the
Connect
button to connect to
the Internet.


