User Manual
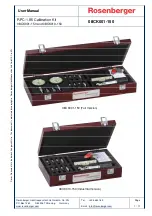
RPC-1.85 Calibration Kit
08CK001-150 and 08CK010-150
08CK001-150
Rosenberger Hochfrequenztechnik GmbH & Co. KG
P.O.Box 1260 D-84526 Tittmoning Germany
www.rosenberger.com
Tel. : +49 8684 18-0
Email : [email protected]
Page
9 / 17
D
ie
s
e
s
D
o
k
u
m
e
n
t
is
t
u
rh
e
b
e
rr
e
c
h
tl
ic
h
g
e
s
c
h
ü
tz
t
●
T
h
is
d
o
c
u
m
e
n
t
is
p
ro
te
c
te
d
b
y
c
o
p
y
ri
g
h
t
●
R
o
s
e
n
b
e
rg
e
r
H
o
c
h
fr
e
q
u
e
n
z
te
c
h
n
ik
G
m
b
H
&
C
o
.
K
G
TRM
(7-term)
Thru-Reflect-Match
The male and female Short standards of this kit are designed with the same offset length. So
the TRM calibration technique can be used. It requires high reflects with a symmetrical
reflection during VNA calibration on both test ports. TRM needs less connections during
calibration than OSLT and UOSM.
UOSL (SOLR)
(7-term)
Unknown-Open-Short-Load (Short-Open-Load- Reciprocal)
The UOSM technique is similar to the OSLT calibration but doesn’t need well-known
adapters. Even a low loss Device under Test (DUT) can be sufficient as Thru standard. The
UOSM technique is particularly well suited for calibration involving different connector types
at the test ports and is most effective when data based standards are available.
In cases when the two VNA test ports have different connector systems installed, e.g. RPC-
1.85 and RPC-2.92 UOSM can handle this situation. A second calibration kit is needed.
Calibration Procedure
The procedures to perform a VNA calibration are very different between the VNA models. Modern
VNA often guide you thru the settings and actions. For details please consult the manual of your
specific VNA.
4.2 Calibration Check
It is advisable to check the calibration after error correction has been performed, particularly when
test port cables and adapters have been used.
During the calibration
•
Calibration standards can easily be mixed up
•
Connections may not be tightened correctly
There might be defects
•
VNA, e.g. mechanically overloaded test port
•
Instable test port cables
•
Mechanically overloaded load
•
Bent or broken contact fingers
With a Verification Kit, reflection and transmission measurements can be checked in a wide
frequency range for DUTs with low and high reflections and low and medium insertion loss. Actual
measurement values can be compared to reference values delivered with the Verification Kit
standards. This should be done from time to time to identify defects.
Air Lines, Precision Adapters and Mismatch Standards can also be used as a faster method for
more frequent checks.


