background image

Содержание B460

Страница 1: ...GAS BUILT IN models 8460 B675 INSTALLATION CARE USE RECIPES I 4356239 343748 ...

Страница 2: ...g the Lower Oven 10 Oven Vent 10 Oven Ignition 10 Your Electronic Range Control 11 12 Oven Cooking 13 Broiling 14 Continuous Cleaning Oven 15 Cleaning Tips 16 Removable Parts 17 SERVICE Replacing the Oven Light 18 What to Do before Calling for Service 19 Adjusting Oven Temperature 20 WARRANTY GC0028 ...

Страница 3: ...on Section must be made before use If your oven is not properly ad justed flames may be too high or the oven may use too much luel releasetoxicfurnesorcook poorly To insure safety for yourself and your home please read your Owner s Manual carefully Keep it handy for quick easy reference Pay close attention to the safety sections of your manual You can recognize the safety sections by looking for t...

Страница 4: ...the oven be installed at or above the minimum height specified The unit has been tested and approved in accordance with safety standards at this height The oven vent area may get hot when the oven is in use Following these installation instructions will move the vent area out of a range where it would likely be touched by small children The cabinet must have a solid bottom This solid bottom may ei...

Страница 5: ...o not operate the burners of this oven I when using L P bottled gas before converting the pressure regulator and burner orifices for L P gas usage You must follow local codes when installing your built in oven Check with your local utilities for codes and ordl nances that apply in your area If there are no local codes you must follow the National Fuel Gas Code ANSl Z223 1 1988 You can get a copy b...

Страница 6: ...gulator must be adjusted 1ocate the pressure regulator see Fig 5 Unscrew the cap and remove the spring retainer Fig 6 Turn the retainer over and put it back into the cap so L P is showing on the bottom 2nd of Ihe retainer Replace the cap CAP rc SPRING RETAINER PRESSUREREGULATOR Fig 6 Slep 2 Adjust Burner Orifices CAUTION The following adjustment must be made before turning on the burner Failure to...

Страница 7: ...w Foreign particles In a t gas IIne may caL e an orange flame al first but this 111 loor disappear i III flames are yellow or llutler operi the air shutter more I hey blow away from the burner close the air shutter more t3 r r flames houlri be checked frequently To adjust air shutter t screirrdrlver to lOosen the air shuller screw Adjust the III snuller and retlgh en the air shutter screw Step 2 A...

Страница 8: ...her prve fly NOTE or IMPORTANT These sections give you helpful tips on using the product Keep your kitchen safe Thousands of people are hurt every year in kitchen fires Read the warning precautions in your Use and Care Guide Make sure other household members know about them too Cooking fires can be dangerous because they usually involve grease Don t use water on a grease fire water only spreads th...

Страница 9: ...uctions before using the product Install or locate the product only in accordance with the provided Installation Instructions Gas fuels and combustion can result in potential exposure to chemicals known to cause cancer or reproductive harm For example benzene is a chemical which is a part of the gas supplied to the cooking product It is consumed in the flame during combustion However exposure to a...

Страница 10: ...on your oven You can keep grease fires from starting if you clean up grease and spills after each oven use Never use aluminum foil to line oven bottoms Improper use of foil could start a fire and cause incomplete combustion Never block the flow of combustion and ventila tion air through oven vents Never try to move a pan of hot fat especially a deep fat fryer Wait until the fat has cooled Never le...

Страница 11: ...When the oven is on heated arr moves through a vent under the control panel This hot air may make control panel area hot The vent is necessary for proper air circulation in the oven and good baking results Do not block this vent Doing so may cause cooking failure fire or damage to the oven UPPER OVEN 1 Oven Light Switch 2 Lower Oven Control 3 Oven Vent area may get hot during oven use Do not block...

Страница 12: ...ation that will start later de lay is currently programmed and whether oven or stop time is being shown OVEN TIME Push before setting length of time the oven will be on for automatic oven operations STOP TIME Push before selecting the time when you want the oven to turn off for automatic oven op erations CLOCK Push before setting clock or to bring time of day back into the display 8 9 10 11 TIMER ...

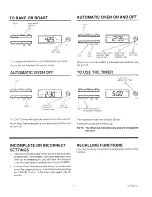
Страница 13: ...H PUSH AND HOLD 3 SECONDS TO CANCEL TURN TO SET AMOUNT OF TIME f The maximum timer time is 9 hrs 55 min A tone will sound when time is up NOTE The timer is a reminder only and will not operate the oven INCOMPLETE OR INCORRECT RECALLING FUNCTIONS SETTINGS You may recall any set function by pushing the button ot that function 1 Attention Tone will sound if oven has only been partially programmed For...

Страница 14: ... the heat because they should have a light golden crust Yeast breads and pie crusts should be baked in glass or dull non shiny pans to absorb the heat because they should have a brown crisp crust Oven temperatures should be reduced 25 degrees below recommended temperatures if you use dark pans or oven proof glass There may be some odor when the oven is first used This is caused by the heating of n...

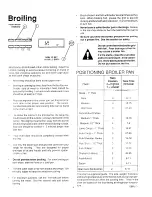
Страница 15: ...of fat from steaks and chops Slit the fatty edges to keep the meat from curling Fcr maximum juiciness salt the first side just before turning the meat Salt the second side just before serving 4 Brush chicken and fish with butter several times as they broil When broiling fish grease the grid to prevent sticking and broil with skin side down It is not necessary to turn fish Never leave a soiled broi...

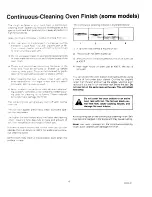
Страница 16: ...ernarnlng so11 WII gr ldually burn off with normal oven use he W II WI appear presentably clean but some spat ters mai be present he hgher the oven temperature the faster the cleanrng lctroi Cleanrng ttme depends on type and amount of 011 over temperature and length of oven use If stubborn starns remain a er normal oven use you can operate the oven empty at 400 F for additional contrnu ous cledrii...

Страница 17: ...ghly after cleaning When using ovens porcelain enameled soap filled steel wool pad or non aerosol oven cleaner on porcelain enameled parts of smooth areas of continu brush on oven cleaner continuous cleaning ovens be sure to keep it ous cleaning ovens broiler away from the continuous cleaning finish compartment Oven cleaners will damage the continuous cleaning finish Oven bottom can be re moved fo...

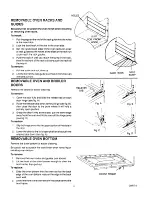
Страница 18: ...e tabs as far as they will go see fig B then close the door to the point where it will hold a partially open position Grasp the door firmly at the sides pull the lower edge away from the oven and lift the door off the hinge arms see fig C To replace 1 Slip the hinge arms into the upper portion of the slots in the door 2 Lower the door to the fully open position and push the release tabs down see f...

Страница 19: ...touch the electrically live metal collaron the bulbwhen replacing it Electrical power must be shut off if you have to replace a broken bulb Replace the bulb with a 40 watt appliance bulb An appli ance bulb is smaller than a standard 40 watt household bulb and is made to withstand high oven temperatures and have a much longer bulb life 18 CMNTo2 ...

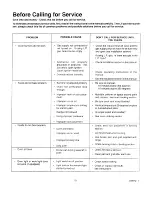
Страница 20: ...Improper utensil used Improper broiling time l Dirty oven l Broiler pan full of grease left in oven 9 Light switch in off position Light bulb or flourescent light starter burned out DON T CALL FOR SERVICE UNTIL YOU CHECK Check the reducer shut off valve and the gas supply shut off valve to be sure they are open see installation section If using L P gas is there any gas in the L P tank l Check inst...

Страница 21: ...1s sign before the number means hat the oven will tx cooler by displayed amount of degrees 5 When you have made the desired adjustment push the CLOCK button to go back to the time of day display or use yotlr oven as you would normally Note The self clean temperature will not be changed by the adjus ments described above To acljust lower oven temperature 1 Turn OVEN TEMP knob to OFF and remove the ...

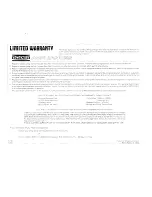
Страница 22: ...porlal on charges rc la ve ic ohlalnlrlg parts involved 1s Ihe respomsb l fy of Ihe original cunsumer purchaser G T lls warranly applies only IO producls properly nslalled adlusled and operaied I accordavce wilh nslrucl ons lound I lhe product l Iera u e This viarranly does nol apply IO any product which has been sJDlecled IO AteratIOn misuse rnproper nsl i la on 1 apl be damage Nor does II apgly ...

Отзывы: