background image

9.


Repeat these steps for the right side.   

  
To suspend the swing:  

10.


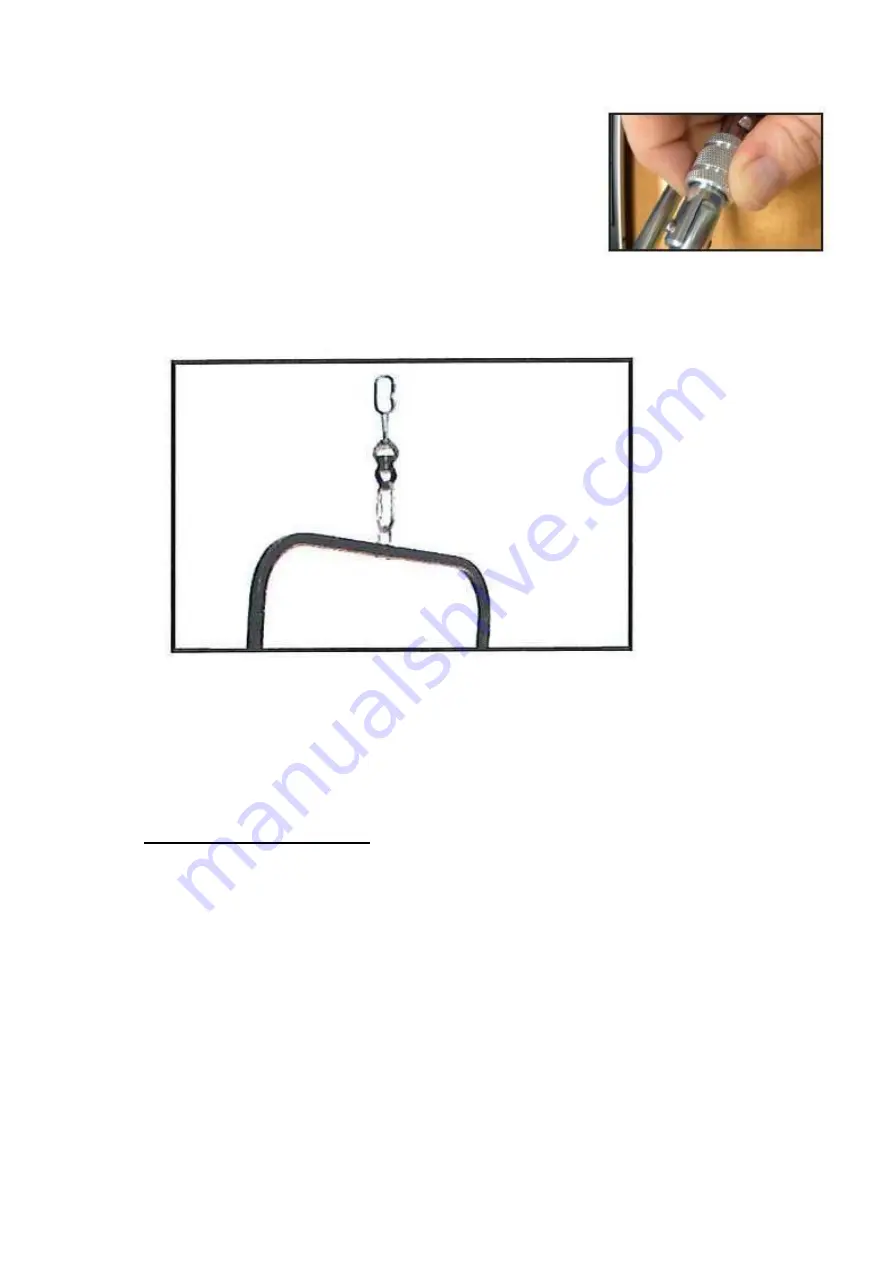
Turn the locking nut to open the Safety Snap (to slide this   
 nut down to allow the snap to be opened).   Turn the nut 
in the opposite direction to slide it up and over the 
opening to lock it.  The locking nut of the Safety Snap 
should not move from side to side at any great angle.  If it 
does, discontinue use immediately.  


11.


Attach the swing to a secure point of suspension using the provided Safety Snap.   

Make sure that your point of suspension is safe, sturdy and secure.  


12.


Adjust the angle of your swing by loosening the knobs on either side of the swing until 
the angle moves – stop loosening these as soon as you feel the angle move, not 
further.  Rotate the seat forward or backward to the desired angle and re-tighten the 
knobs.  


14.


Care and Maintenance  


1.


All the parts of your suspended products should be checked on a regular basis (at 
least monthly, and more if the swing is used often).  Use a maintenance sheet (such 
as the example one provided) to record these checks.  

2.


Check all the parts for signs of wear and tear before each use and replace these as 
appropriate.  For example, check the seat for loose stitching.


3.


Use and store this product indoors, in a safe place.


4.


Dust or wipe the Swing clean with a damp cloth.  Do not immerse in water.  Allow to 
dry before use.  To clean the fabric of the Foot Rest, remove it from the frame and 
shake clean.  Spot clean any marks with a soft cloth dampened with mild soap 
solution.


Содержание TheraGym 21566

Страница 1: ...le Angle Swing with Foot Rests 2 Product Code 21566 3 Colour Likely to be as shown 4 Brief Description Provides a comfortable swinging environment by adjusting the angle to suit your needs Shown above...

Страница 2: ...t Rest frame with fabric x metal extensions for foot rest 2 x parts pack fixtures 1 4 x soft touch star knobs 4 x alligator rotary clamps 4 x carriage bolts 4 x straight clamp 1 square tubes 2 x zinc...

Страница 3: ...6 Snoezelen Stimulations Vestibular 7 Best Use Use from a safe and appropriate suspension system...

Страница 4: ...tone Working load 159kg 350 lbs Size Seat is 104cmH x 58cmW 11 Safety Always supervise the use of this product Always use the Rotational Device to help prevent wear of your swing and the suspension po...

Страница 5: ...d obstacles If using the foot rest this will need to be assembled You will need a hammer 1 Feed one carriage bolt through the right inner hole of the metal Foot Rest assembly and feed all the way thro...

Страница 6: ...lockwise 4 Carefully hit the carriage bolt head with a hammer to free more bolt thread and turn the soft touch star knob anti clockwise to tighten 5 Repeat all of these steps for the left side 6 Slide...

Страница 7: ...mbly into the straight clamp 1 square tube Then feed the carriage bolt through the right inner hole of the straight clamp 1 square tube and feed through to the outer hole 8 Place the soft touch star k...

Страница 8: ...stop loosening these as soon as you feel the angle move not further Rotate the seat forward or backward to the desired angle and re tighten the knobs 14 Care and Maintenance 1 All the parts of your su...

Страница 9: ...d at www rompa com We hope you find our instructions invaluable If you have any suggestions for improving them further your comments will be greatly received please contact us at producthelp rompa com...

Страница 10: ...SENSORY INTEGRATION MAINTENANCE CHECK LIST PRODUCT TO CHECK Date S Satisfactory or R Repair replace...

Страница 11: ...566 3 Couleur Selon l image 4 Br ve Description Permet un mouvement de balancement confortable pour tous gr ce l adaptation du si ge aux besoins du patient Le patient peut s enfoncer profond ment dans...

Страница 12: ...arties d extension en m tal pour le 2 x pack d installations 1 4 x poign e en forme d toile knobs 4 x pinces rotatoires 4 x boulons 4 x tubes d attache droits 2 x rondelles plates en zinc 1 x bouchon...

Страница 13: ...ile poign e en forme d toile tubes d attache droits bouchon bouchon bouchon bouchon bouchon pinces rotatoires pinces rotatoires boulons parties d extension du Repose Pieds parties d extension du Repos...

Страница 14: ...Permet un mouvement de balancement confortable pour tous gr ce l adaptation du si ge aux besoins du patient Le patient peut s enfoncer profond ment dans le si ge Construction durable en acier Pourvue...

Страница 15: ...ract ristiques Techniques Charge maximale 159kg Dimensions 104cm x 58cm Repose Pieds Tissu de 1000 Denier 13 Installation Laissez beaucoup d espace sans obstruction autour de votre Balan oire Les prod...

Страница 16: ...moiti de la pince rotatoire 3 Faites passer la rondelle sur le boulon Placez la poign e en forme d toile sur le bout du boulon et tournez le dans le sens inverse des aiguilles d une montre 4 Avec soi...

Страница 17: ...ite 7 Faites passer le c t gauche des parties d extension pour les Repose Pieds dans le tube d attache droit Faites passer le boulon travers le trou droite l int rieur du tube droit et le faites passe...

Страница 18: ...vrait tre difficile de faire bouger l crou d un c t l autre S il bouge beaucoup remplacez le Mousqueton de S curit 11 Attachez le Balan oire votre point de suspension en vous servant du Mousqueton com...

Страница 19: ...soin Par exemple cherchez les points d faits dans le si ge Pour l usage et l entreposage l int rieur dans un lieu s r Essuyez le Balan oire en vous servant d un torchon l g rement humect Ne pas immerg...

Страница 20: ...LISTE DE CONTR LE DE MAINTIEN PRODUIT V RIFIER Date B Bien or R R parer remplacer...

Страница 21: ......

Отзывы: