Copyright ROMPA® Ltd
SNORING PIG 20134, KH 1.10
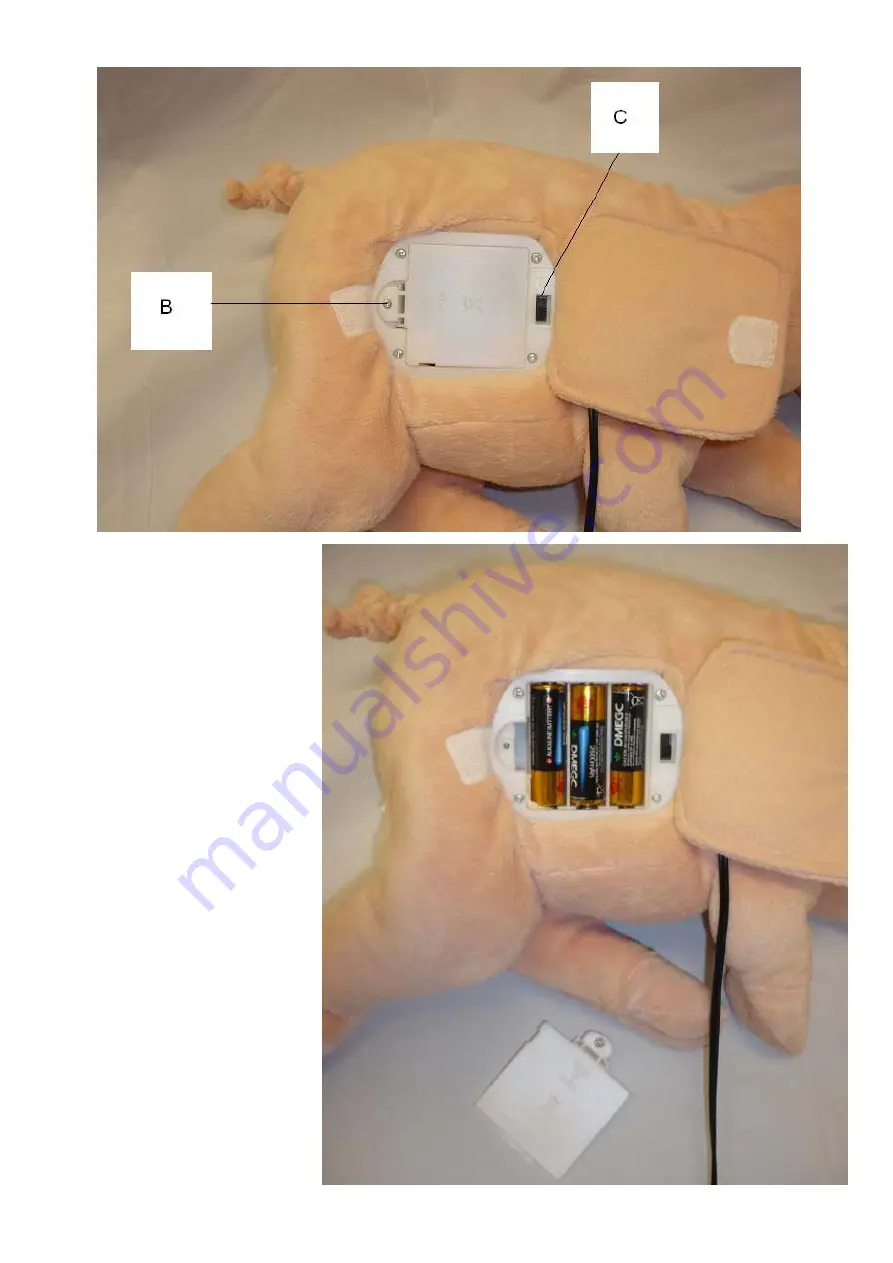
4. Instale 3 pilhas AA
tendo atenção à polaridade indicada.
5. Volte a colocar a
Страница 1: ...atteries BEFORE USE 1 Lay the pig down so that his head is facing to the right 2 Locate the flap A on the side of his tummy and lift this up it is attached by Velcro 3 The battery compartment should now be visible Open the battery compartment by removing the small positive cross head screw B with a small screwdriver Lift off the lid Keep the screw and lid in a safe place ...
Страница 2: ...Copyright ROMPA Ltd SNORING PIG 20134 KH 1 10 4 Insert 3 AA batteries observing the polarity indicated ...
Страница 3: ...s paw D to activate Snoring Pig A second press of his paw will not stop him he will continue to the end of his mumbling and snoring sequence However when connected to the switch a press of the switch will stop him 3 The sound and movement from Snoring Pig is the same each time 4 The Volume is not adjustable 5 Remember to switch OFF after use C SAFETY 1 Always supervise the use of this product 2 Ta...
Страница 4: ... não incluídas ANTES DE UTILIZAR 1 Deite o porco de lado de forma que a cabeça fique virada para a direita 2 Encontre a aba A na lateral da barriga e levante a está presa com velcro 3 O compartimento das pilhas deve agora estar visível Abra o compartimento removendo o parafuso B com uma pequena chave de fendas Levante a lâmpada Guarde a tampa e o parafuso ...
Страница 5: ...Copyright ROMPA Ltd SNORING PIG 20134 KH 1 10 4 Instale 3 pilhas AA tendo atenção à polaridade indicada 5 Volte a colocar a ...
Страница 6: ...ivar o porco ressonador Se premir novamente ele não vai parar vai continuar até ao fim da sequência de murmúrios e ruídos No entanto quando ligado a um switch premir o switch vai pará lo 3 O som e movimento do porco ressonador é sempre o mesmo 4 O volume não é ajustável 5 Não se esqueça de desligar depois de utilizar C SEGURANÇA 1 Supervisione sempre a utilização deste produto 2 Tenha cuidado com ...