13.
Installation
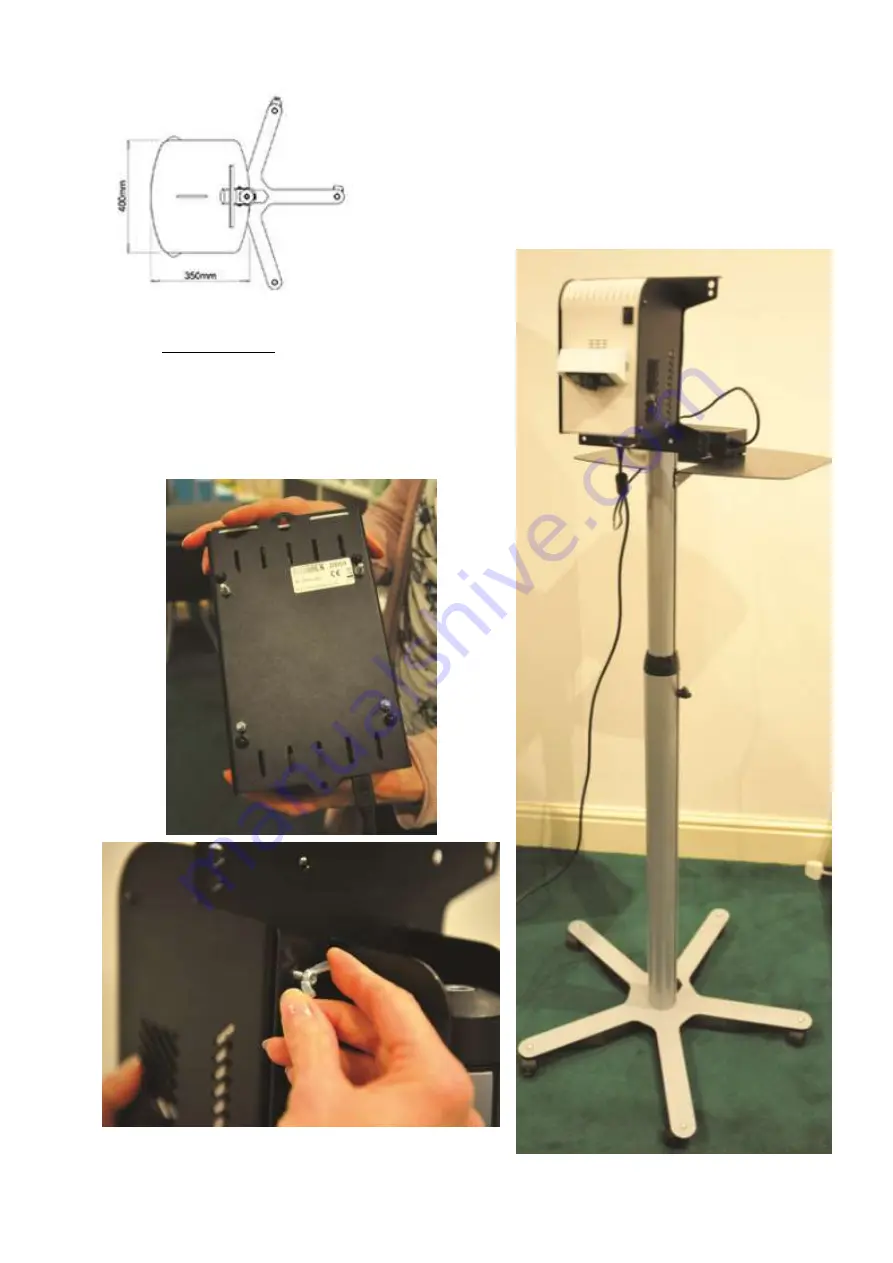
1.
Use the four wing nuts to secure the projection unit to the plate at the top of the stand. There are four screws at the back of the projection unit.
Страница 1: ...o be as shown right 4 Brief Description Optional trolley for projecting onto a table top or wheelchair tray 5 Contents 1 x frame 6 Snoezelen Stimulations Not applicable 7 Best Use Use with 23386 Compact Mobile Interactive Floor Projection 8 Compatible ROMPA Products 23386 Compact Mobile Interactive Floor Projection ...
Страница 2: ...ing onto a table top or wheelchair tray 11 Safety Always supervise the use of this product This is for moving the Compact Mobile Interactive Floor Projection and should not be used with other products Do not place anything else on the stand Do not lean on the stand or exert pressure onto it 12 Technical Specification Size 95 to 150cmH 66cm diameter at the base ...
Страница 3: ...13 Installation 1 Use the four wing nuts to secure the projection unit to the plate at the top of the stand There are four screws at the back of the projection unit ...
Страница 4: ...n unit from the wall socket as necessary 15 Troubleshooting Not applicable Further copies of these instructions can be downloaded at www rompa com We hope you find our instructions invaluable If you have any suggestions for improving them further your comments will be greatly received please contact us at producthelp rompa com WHEELED FRAME FOR COMPACT MOBILE INTERACTIVE FLOOR PROJECTION 23417 Feb...