11
RolliBot RolliCool 208 Portable AC with Heater User Manual
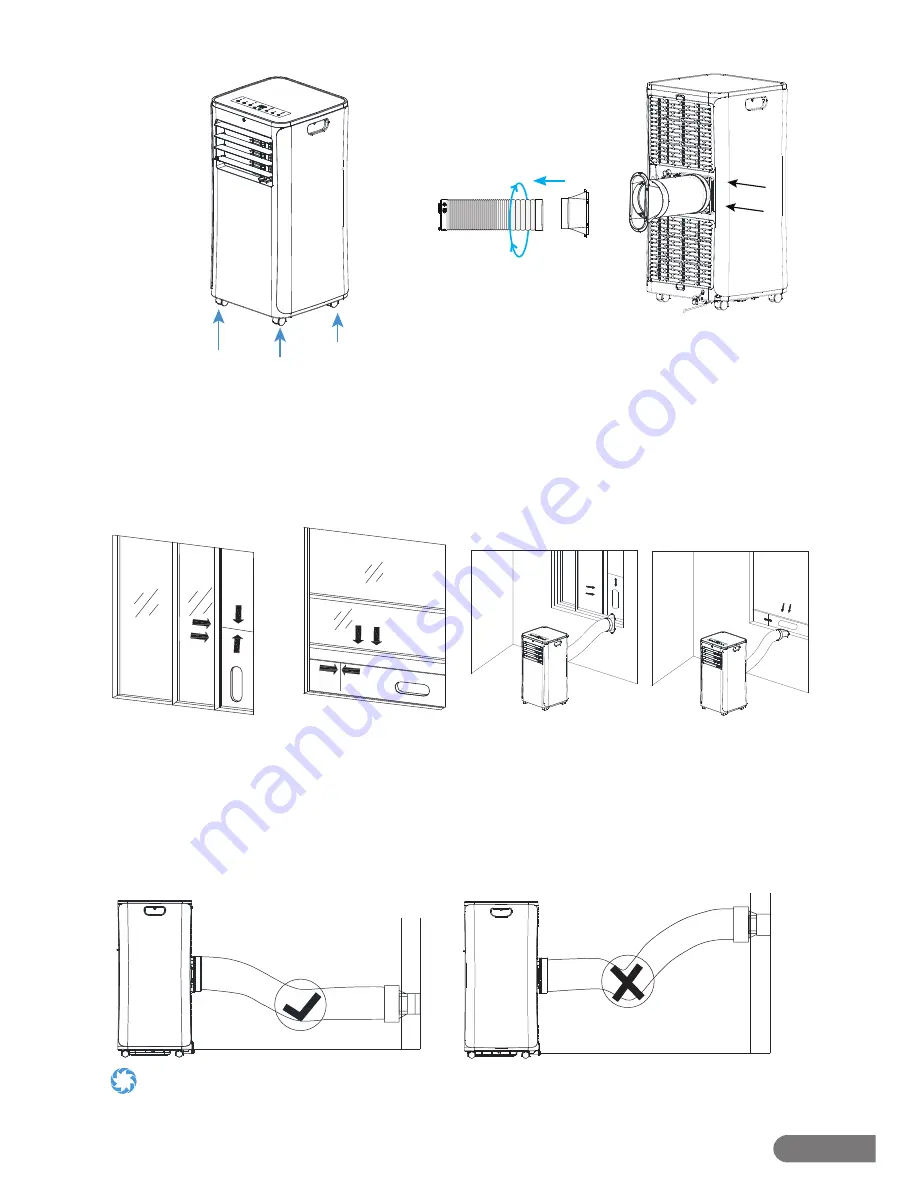
Step 3.
Attach the wheels (if needed) and roll
the unit into the desired room. In the moving
process, ensure that the unit is in an upright
position and the RolliCool is placed on a fl at
surface.
Step 4.
Insert the connector into the piper
and rotate it clockwise to secure it. Slide the
other end of the heat exhaust pipe into the
opening outside the air vent on the back of
the unit. Unfold the pipe to the necessary
length.
Step 5.
Install the assembled window kit into
a gap between the window and the frame
and push the window nearly closed to secure
it. Turn the screw head to tighten or loosen
the screw fastener and adjust the sections as
needed.
Make sure the exhaust pipe is not bent or kinked as this may inhibit air fl ow and/or damage the unit.
Step 6.
Attach the heat exhaust pipe to the
window kit. If desired, add a screw to the end
of the heat exhaust pipe to further secure it to
the window kit.


