


54
Green LED: Focus indicator
• The green LED glows if the focus was set. The subject
is more than 0.6 m away from the camera.
• The green LED flashes slowly if the camera has auto-
matically switched to close-up or macro mode. The
subject is between 1.25 m and 0.6 m from the camera
.
• The green LED flashes quickly if the subject is too
near the camera (0.6 or less) and focusing is impos-
sible. In this case the shutter release locks.
Red LED: “Flash ready” indicator
• The red LED doesn’t come on if the exposure can be
made with the available light.
• The red LED glows if flash is needed and ready.
• The red LED flashes quickly if the flash is needed but
hasn’t been charged up. In this case the shutter re-
lease remains locked until the flash is charged.
• The red LED flashes slowly when auto flash is
switched off (page 19) if the pictures are likely to
come out blurred with the available light. Support the
camera on a firm base or use a tripod.
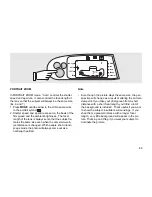
LCD symbols in the finder
The distance symbols in the lower part of the finder
show in which focusing range the subject is. A warning
is displayed if autofocusing is impossible.
Distance 6.5 m –
∞
Distance 2.5 m — 6.5 m
Distance 1.6 m – 2.5 m
Distance 0.7 m - 1.6 m (tele)
Distance 0.6 m - 1.6 m (wide-angle)
The symbol flashes and the shutter is
locked.
Distance less than 0.7 m (tele)
Distance less than 0.6 m (wide-angle)
The symbols flash.
Autofocusing is impossible. If the
shutter is released, some part of the
picture will be sharp nonetheless!
Focusing range 3.7 m –
∞
(tele)
Focusing range 2.8 m –
∞
(wide-angle)