22
3-1 Learning the Basics of Scanning
Step 1: Setting the Scanning Conditions
Let's start actually scanning something.
You mount the object to be scanned, start the 3D scanner, then use the 3D-scanning program to begin
scanning.
Procedure
➊
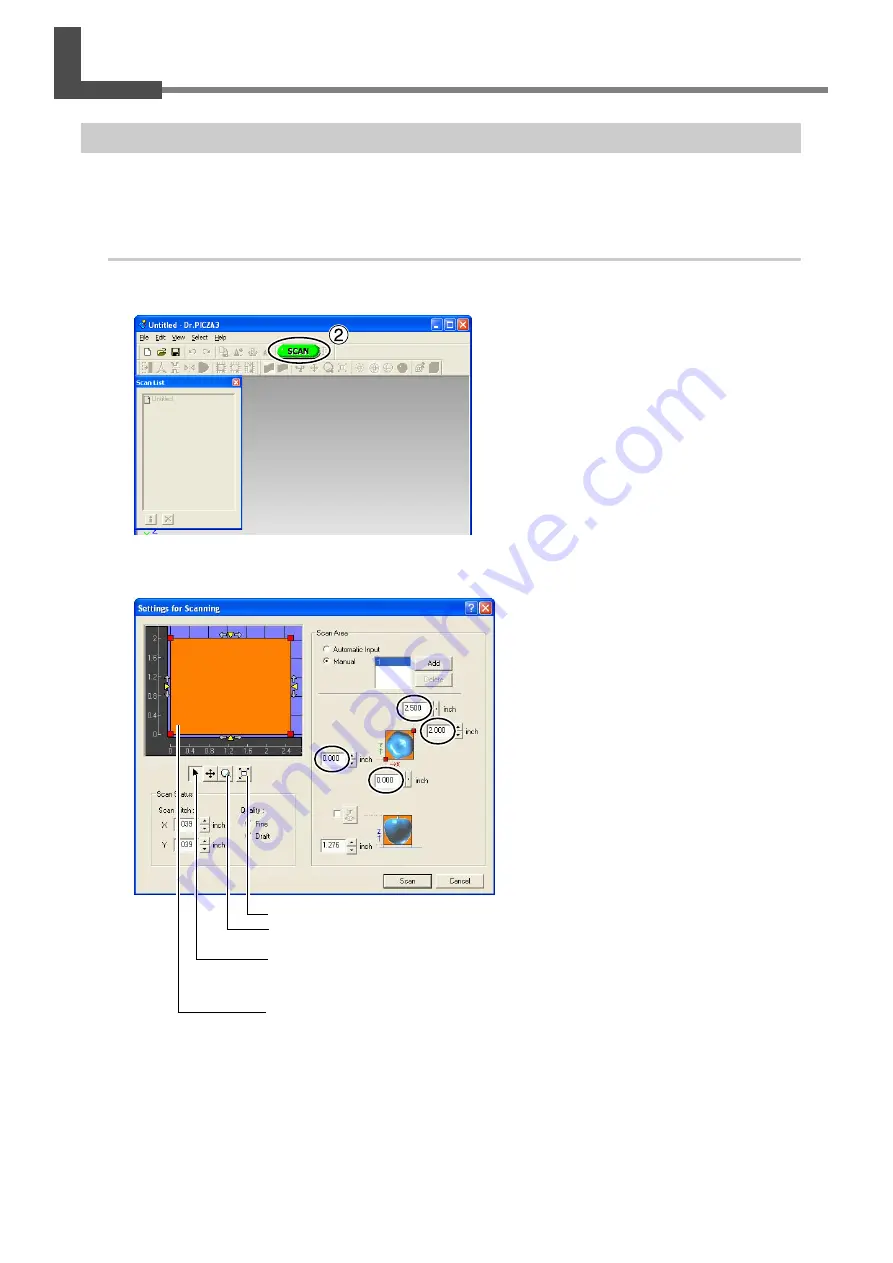
Start Dr. PICZA3 and display the [Settings for Scanning] dialog box.
➀
From the [Start] menu, click [All Pro-
grams] - [Roland Dr. PICZA3] - [Dr.
PICZA3].
➁
Click [Scan].
➋
Make the settings for the area to scan (width and depth).
Type in the lower-left and upper-right
locations of the scanning area.
It's a good idea to reduce the area to the smallest size necessary. Making the area larger than
necessary increases the scanning time and uses up excess memory.
➢
Clicking this returns to the original view.
➢
This enlarges (zooms) the displayed view. Click this, then drag to enclose
the area you want to enlarge.
➢
Click this to set or verify the scanning area.
➢
The orange quadrilateral indicates the area to scan (width and depth).
➢
Double-clicking a red square moves the probe to that location. You use this
to verify the scanning area.
➢
You can make the settings for the scanning area by dragging the red squares.
Содержание ZSC-1
Страница 9: ...7 Chapter 1 Preparing the Sensor Unit...
Страница 17: ...15 Chapter 2 Use and OperationAs a 3D Scanner...
Страница 23: ...21 Chapter 3 Basic Scanning Opera tion...
Страница 27: ...25 Chapter 4 Appendix...
Страница 30: ...28...
Страница 31: ...29...
Страница 32: ......


