background image

20

2. Using the Heater Unit

2-4 What to Do If ...

The results of printing are coarse.

The results of printing may be coarse when the media is not warm enough. In particular, the edges of the media tend not
to become as warm as the center, which may result in ink drips or unevenness, depending on the printing data. If this
happens, increase the preset temperature and perform printing again. If the printing results don't improve even when you
increase the preset temperature, the ambient temperature may be too low. Be sure to perform printing in the recom-
mended operating environment.
Setting the [SCAN INTERVAL] menu item for the printer may improve printing quality. Please refer to "3-2 Additional
Menus on the Printer."

Media wrinkles when performing printing.

Depending on the type of media, it may wrinkle when performing printing after it is left on the platen for 30 minutes to
an hour with the heater temperature at 40˚C. When you are not printing continuously, remove the media or reduce the
preset temperature to 30˚C.

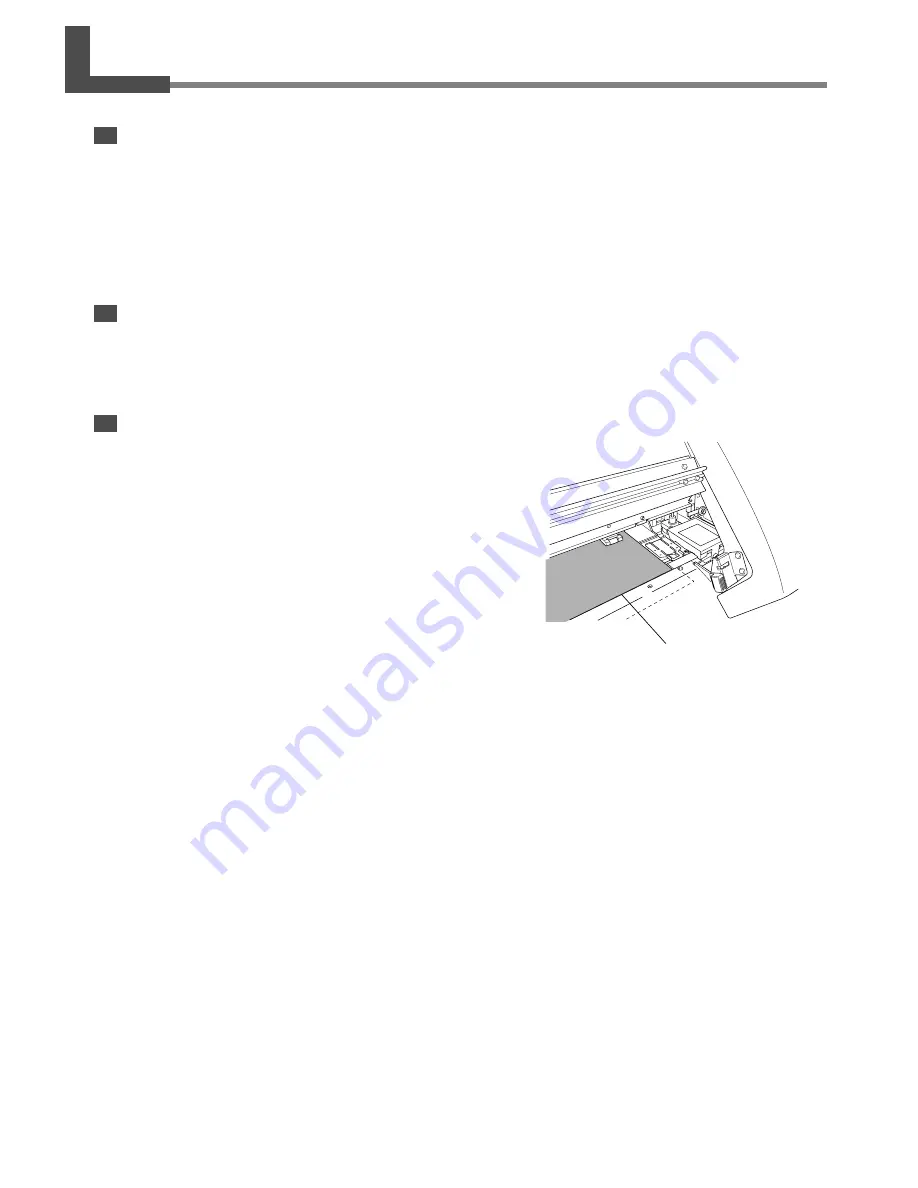
Media warps before performing printing.

Depending on the type of media, it may tend to warp when there is
a large difference between the ambient temperature and the heater
temperature.

If the left and right edges of the media warp . . .

Use media clamps.

If the front edge of the media warps . . .

Reduce the heater temperature or increase the ambient temperature.

It may be possible to prevent media from warping by setting the
[VACUUM POWER] menu item of the printer. Please refer to "3-2
Additional Menus on the Printer."

Front edge of the media

Содержание HU-540

Страница 1: ...fications of this product are subject to change without notice The operation manual and the product have been prepared and tested as much as possible If you find any misprint or error please inform us Roland DG Corp assumes no responsibility for any direct or indirect loss or damage which may occur through use of this product regardless of any failure to perform on the part of this product Roland ...

Страница 2: ... are designed to provide reasonable protection against harmful interference when the equipment is operated in a commercial environment This equipment generates uses and can radiate radio frequency energy and if not installed and used in accordance with the instruction manual may cause harmful interference to radio communications Operation of this equipment in a residential area is likely to cause ...

Страница 3: ...d Ink 10 1 2 Installation and Transport 11 Installing the Heater Unit on the Printer 11 About the Power Supply 11 When Moving the Printer 11 1 3 Part Names 12 2 Using the Heater Unit 15 2 1 Switching the Power On and Off 16 Switching On the Controller 16 Switching Off the Controller 16 2 2 Loading Media 17 About the Ambient Temperature During Heater Use 17 Points to Observe When Loading Media 17 2...

Страница 4: ...gged from the outlet Do not disassemble repair or modify Doing so may lead to fire or abnormal op eration resulting in injury Ground the unit with the ground wire Failure to do so may result in risk of electro cution in the event of a mechanical problem Do not use while in an abnormal state i e emitting smoke burning odor unusual noise or the like Doing so may result in fire or electrocution Immed...

Страница 5: ...ds metal objects or flammables inside the machine Such materials can cause fire Do not hang on to the hose Do not hang anything on it Doing so may cause the unit to tip over lead ing to injury Be sure to use the media with a width of 500 mm 19 11 16 in or more Failure to do so may cause overheating of the heater leading to fire Do not press the SEL key of the con troller Doing so may cause malfunc...

Страница 6: ... these messages In addition to these symbols the symbols shown below are also used Indicates information to prevent machine breakdown or malfunction and ensure correct use Indicates a handy tip or advice regarding use Do not touch the platen It is hot when the heater is operating Controller Inside the front cover Rating label Use a rated power supply ...

Страница 7: ...ée par le dessin à l intérieur du cercle Le symbole à gauche signifie que le fil électrique doit être débranché de la prise Pour utiliser en toute sécurité Mettre l appareil à la terre avec le fil de mise à la terre Ne pas respecter cette consigne peut créer un risque d électrocution en cas de panne mécanique Ne pas utiliser avec une source d alimentation électrique non conforme à la norme indiqué...

Страница 8: ...onsigne peut créer un risque de décharge électrique ou d électrocution ou provoquer un incendie à cause de la détérioration de l isolant électrique Pour débrancher l appareil saisir la fiche et non le fil électrique Tirer sur le fil peut l endommager ce qui ris que de provoquer un incendie ou de causer une décharge électrique ou une électrocution Ne pas débrancher le fil avec des mains mouillées N...

Страница 9: ...aque étant très chaude il est possible de se brûler Toujours utiliser un support d au moins 500 mm Le chauffage risque sinon de trop chauffer ce qui peut entraîner un incendie Ne pas appuyer sur la touche SEL de la commande Ceci peut causer une panne de chauffage et entraîner un incendie S assurer que le lieu de travail est bien aéré Sinon des odeurs fortes peuvent se dégager et il y a risque de m...

Страница 10: ... Intérieur de le couvercle de l imprimante À propos des étiquettes collées sur l appareil Ces étiquettes sont collées à l extérieur de l appareil Les dessins suivants indiquent l endroit et le contenu des messages Commande Étiquette des caractéristiques électriques Utiliser l alimentation appropriée ...

Страница 11: ...9 1 Getting Started This section describes the features part names and the like of the HU 740 640 540 ...

Страница 12: ...you to adjust the heater temperature to match the media Installable Combinations The HU 740 640 540 can be installed on the following printers HU 740 SJ 740 HU 640 SJ 640 HU 540 SJ 540 SC 540 In this manual the HU 740 640 540 is referred to as the heater unit and each model of the printer is referred to as the printer Recommended Ink Use ECO SOL INK to ensure acceptable printing results when perfo...

Страница 13: ...adequately even when used correctly check the voltage of the power supply When Moving the Printer Cables for the heater unit are located under the bottom of the printer When removing the printer from the stand in order to move the printer to a different location take care not to damage these cables Otherwise fire electric shock or other serious damage may occur In addition the printer that the hea...

Страница 14: ... equipped with the heater and tempera ture sensor Hose The power cord and other cables are inside the hose Connecting Cable Do not hang on to the hose Do not hang anything on it Doing so may cause the unit to tip over lead ing to injury Never disconnect the connecting cable Doing so will cause the heater to fail to operate Power Cord Front Rear ...

Страница 15: ...ding to fire or electrical shock Indicators other than C1 do not light This indicator lights when the controller is switched on PV Heater temperature This shows the current temperature of the heater It displays error messages in the event of a problem in the heater unit SV Preset temperature This shows the preset temperature of the heater The number flashes when only the controller is on It remain...

Страница 16: ...14 Chapter 1 Installation MEMO ...

Страница 17: ...15 2 Using the Heater Unit This section describes how to print and cut while using the heater unit and the like ...

Страница 18: ... controller Power Source for the Heater The heater is connected to the sub power for the printer The heater operates only when both the controller and the sub power for printer are switched on When the display shows characters other than numerical figures such as UUUU or LLLL immediately switch off the control ler and contact your authorized Roland DG Corp dealer or service center Switch off the c...

Страница 19: ...nual for the printer Use Media With a Width of about 1 m 40 in or More We recommend using media having a width of about 1 m 40 in or more Media of narrower width may take a long time to heat or may fail to reach the preset temperature Also in no event should media having a width of 50 cm 19 11 16 in or less be used Doing so may lead to danger of overheating Before Loading Media Allow the Heater to...

Страница 20: ...he recommended ambient temperature for ensuring acceptable quality when performing printing is 20 to 32 C 68 to 89 6 F When the ambient temperature is less than 20 C the media doesn t heat up enough to ensure acceptable quality In such cases set the preset temperature to higher value The setting range of preset temperature by the controller is 30 to 50 C 86 to 122 F Performing printing as soon as ...

Страница 21: ...cutting when reloading media To Perform Cutting Only Before performing cutting switch off the controller to turn off the heater and allow the platen to cool sufficiently Do not use the media clamps during cutting Using crop marks when performing printing and cutting even when these are performed simultaneously may help reduce misalignment After printing it is a good idea to allow the heater to coo...

Страница 22: ...r to 3 2 Additional Menus on the Printer Media wrinkles when performing printing Depending on the type of media it may wrinkle when performing printing after it is left on the platen for 30 minutes to an hour with the heater temperature at 40 C When you are not printing continuously remove the media or reduce the preset temperature to 30 C Media warps before performing printing Depending on the ty...

Страница 23: ...21 3 Other Information This section describes daily maintenance additional menus on the printer and specifications ...

Страница 24: ...troller Use a cloth moistened with water then wrung well and wipe gently to clean Wipe the control panel and display gently with a clean soft cloth Periodically clean the platen Buildup of grime may soil printed media and make correct detection of media width impossible When cleaning the platen first switch off the controller and the sub power for the printer Failure to do so may cause burns when ...

Страница 25: ...ifficult to warm AUTO The suction force is adjusted automatically according to the width of media 0 to 100 in steps of 10 The suction force remains constant at the set value Installing the heater unit adds the following menus to the printer FULL WIDTH S SCAN INTERVAL VACUUM POWER To make the settings for these menus follow the instructions below Depending on the menu replace the display of screens...

Страница 26: ...weight Included items SJ 540 151 kg 332 9 lb HU 540 SJ 540 SC 540 Maximum 3 6 A 117 V 1 9 A 220 to 240 V 5 5 kg 12 1 lb 1610 W x 300 D x 340 H mm 63 11 16 W x 11 13 16 D x 13 7 16 H in 13 2 kg 29 1 lb Distance accuracy For printing while the heater is running Acceptable media width For printing with the heater Ink cartridge Dimensions with stand Weight with stand Recommended operating environment ...

Отзывы: