background image


8


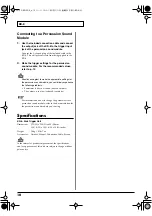
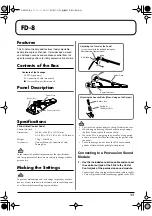
KD-8


Features


• Velocity sensitive pad provides rich expression.

• Vertical trigger surface for extremely quiet 

performance. Also compatible with twin pedals.


Contents of the Box


Panel Description


Making the Settings


921


To prevent malfunction and/or damage to speakers or other 
devices, always turn down the volume, and turn off the power 
on all devices before making any connections.


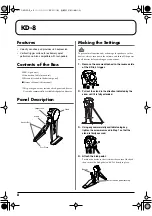
1.


Remove the screws attached to the reverse side 
of the KD-8’s trigger.


2.


Pull out the stand in the direction indicated by the 
arrow until it is fully extended.


3.


Using any commercially available tuning key, 
tighten the screws removed in Step 1 so that the 
stand is firmly secured.


4.


Attach the kick pedal.


Position the beater so that it strikes the center of the head, 
then secure the kick pedal and KD-8 firmly in place.

KD-8 (pad unit)

Connection Cable (monaural)

Screws (attached to the bottom panel)

Owner's Manual (this manual)

* This package does not include a kick pedal and beater. 

   Use with a commercially available kick pedal and beater.

Anchor Bolt

Head

Foot Plate

Stand

Output Jack

Install the kick pedal securely.

Beater

PD/CY/KD/FD-8_e 8 ページ 2007年7月20日 金曜日 午前9時45分

Содержание CY-8

Страница 1: ...erved No part of this publication may be reproduced in any form without the written permission of ROLAND CORPORATION Before using this unit carefully read the sections entitled USING THE UNIT SAFELY a...

Страница 2: ...n inclined surfaces 011 Do not allow any objects e g flammable material coins pins or liquids of any kind water soft drinks etc to penetrate the unit 013 In households with small children an adult sho...

Страница 3: ...Never use benzine thinners alcohol or solvents of any kind to avoid the possibility of discoloration and or deformation Additional Precautions 553 Use a reasonable amount of care when using the unit s...

Страница 4: ...fall off When attaching the PD 8 to a commercially available tom stand check the dimensions of the rod Depending on the dimensions of the rod it may not be possible to attach the pad to the stand Acc...

Страница 5: ...the parameters for a percussion sound module refer to the documentation for the percussion sound module you re using Specifications PD 8 Pad Pad Size 8 5 inches Trigger 2 Head Rim Dimensions 226 W x...

Страница 6: ...ositioned on the opposite side of the playing area 3 Tighten the wing nut to obtain the desired movement Use the included felt washer and the wing nut Take care to ensure that the cables do not touch...

Страница 7: ...Shot This is the most common playing method playing the pad face of the cymbal It corresponds to the sound of the head side of the connected trigger input Edge Shot This playing method involves strik...

Страница 8: ...out the stand in the direction indicated by the arrow until it is fully extended 3 Using any commercially available tuning key tighten the screws removed in Step 1 so that the stand is firmly secured...

Страница 9: ...ts When using the kick pedal on a carpet or similar surface adjust the anchor bolts so their tips protrude from the plate and secure the pedal in place this will make it easier to use the kick pedal H...

Страница 10: ...the percussion sound module you could likely experience the following problems Sometimes it does not sound uneven volume The volume is too low reduced sensitivity For information on how to change the...

Страница 11: ...are sharp Handle with care When using on flooring the anchor bolts may damage the floor Do not attach the anchor bolts When the FD 8 is not going to be used for a long period of time move and fix the...

Страница 12: ...0 2 0 2 0 Retrig Cancel 3 3 3 Mask Time 4 8 8 PD 8 CY 8 KD 8 Trig Sens 6 12 11 Trig Threshold 0 1 0 Trig Type Pd9 Pd5 Kd7 Trig Curve 0 0 1 Scan Time 00 20 08 Retrigger Cancel 2 6 2 Mask Time 8 12 8 Cr...

Отзывы: