background image


27

Selecting and Playing Sounds


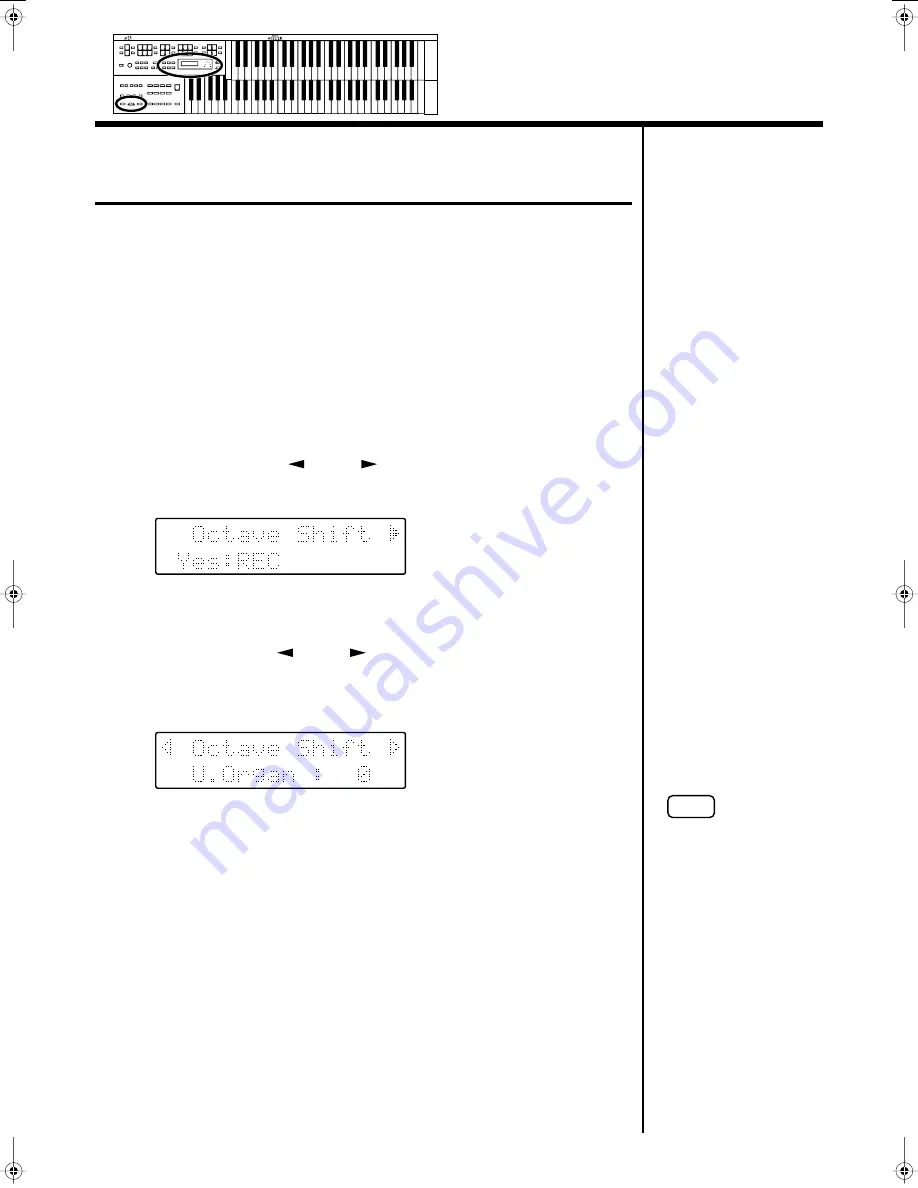
Transpose the Pitch in Octave Units 


(Octave Shift)


The pitch of the sound played by the keyboard can be adjusted in one-octave 
steps.

You can apply an Octave shift to the following 5 Parts:

The Upper Organ Part, Upper Orchestral Part

The Lower Part

The Pedal Part

The Solo Part


1.


Press the [Utility] button. 


2.


Press the Menu [

] and [

] button to select “Octave 

Shift.”


f


3.


Press the [Rec] button.


4.


Use the Menu [

] and [

] button to select a performance 

Part to which you wish to apply an Octave Shift. 


Part: Pedal, Lower, U. Organ, U. Orch, Solo


fig.02-16


5.


Use the Value [-] and [+] buttons to set the amount of shift. 


The value can be set to a range of +/- 3 octaves.


6.


Press the [Utility] button.


The basic screen reappears.

NOTE

Please note that when you 
apply the Octave Shift 
function to certain voices, 
their pitch could be 
stretched beyond their 
recommended note ranges, 
and they may not sound as 
expected. Care should be 
taken when using Octave 
Shift.

AT-15_e.book 27 ページ 2005年1月21日 金曜日 午後8時14分

Содержание AT15 Music Atelier

Страница 1: ... read the sections entitled IMPORTANT SAFETY INSTRUCTIONS p 2 USING THE UNIT SAFELY p 3 4 and IMPORTANT NOTES p 5 6 These sections provide important information concerning the proper operation of the unit Additionally in order to feel assured that you have gained a good grasp of every feature provided by your new unit Owner s manual should be read in its entirety The manual should be saved and kep...

Страница 2: ...g has two blades and a third grounding prong The wide blade or the third prong are provided for your safety When the provided plug does not fit into your outlet consult an electrician for replacement of the obsolete outlet 10 Protect the power cord from being walked on or pinched particularly at plugs convenience receptacles and the point where they exit from the apparatus 11 Only use attachments ...

Страница 3: ...ging in the ears you should immediately stop using the unit and consult an audiologist 011 Do not allow any objects e g flammable material coins pins or liquids of any kind water soft drinks etc to penetrate the unit 012a Immediately turn the power off remove the power cord from the outlet and request servicing by your retailer the nearest Roland Service Center or an authorized Roland distributor ...

Страница 4: ...r an extended period of time Any accumulation of dust between the power plug and the power outlet can result in poor insulation and lead to fire 104 Try to prevent cords and cables from becoming entangled Also all cords and cables should be placed so they are out of the reach of children 106 Never climb on top of nor place heavy objects on the unit 107b Never handle the power cord or its plugs wit...

Страница 5: ...a solid level surface Do not move the unit or subject it to vibration while the drive is operating 354b Do not expose the unit to direct sunlight place it near devices that radiate heat leave it inside an enclosed vehicle or otherwise subject it to temperature extremes Also do not allow lighting devices that normally are used while their light source is very close to the unit such as a piano light...

Страница 6: ...g or writing data Ordinarily the indicator will be less brightly lighted or be extinguished 606 Remove any disk from the drive before powering up or down 607 To prevent damage to the disk drive s heads always try to hold the floppy disk in a level position not tilted in any direction while inserting it into the drive Push it in firmly but gently Never use excessive force 608 To avoid the risk of m...

Страница 7: ...re also included onboard You can simply select sounds and enjoy playing the organ no need to perform complicated editing operations Expansive Lower Keyboard with Damper Pedal for Piano like Expressiveness Piano is indispensable to the performance of contemporary music On the ATELIER series the lower keyboard features an expanded range that gives you the expressive power of a piano The keyboard als...

Страница 8: ... 61 key lower manual can be split into separate sections with each being used to play a different tone Using the Split function lets you perform with the richness of performance expression rivalling that of three manual and even four manual instruments Registration Buttons The AT 15 features eight highly visible and intuitive buttons for calling up registrations which allow you to switch among ton...

Страница 9: ...cting Pedal Bass Voice 23 Selecting Solo Voice 24 Selecting a Voice Using the Others Button 25 Adjust the Volume Balance 26 Transpose the Pitch in Octave Units Octave Shift 27 Sustaining Notes Played on the Lower Keyboard 28 Playing Drum Sound or Sound Effects on the Keyboard 28 Playing Drums from the Entire Lower Keyboard Drums SFX 28 Changing the Drum SFX Set 29 Using the Rhythm Performance 30 S...

Страница 10: ...tration 52 How to Recall a Registration 52 Changing the Timing of Recalling Registrations 52 Automatically Registering When You Switch Panel Settings 53 Assigning a Name to a Registration Set 53 Copying Only the Name of a Registration 55 Saving Registration Sets to a Floppy Disk 56 Loading Previously Saved Registration Sets Into the AT 15 58 Loading a Set of Registrations 58 Loading an Individual ...

Страница 11: ...W 87 Turning Chord Intelligence On Off Chord Intelli 88 Using the Leading Bass Function Leading Bass 89 Changing How the Solo Voice Responds Solo Mode 89 Layering the Solo Voice and Lower Voice Solo To Lower Mode 90 Changing the Solo Split Point Solo Split Point 90 Changing the Pedalboard Polyphony Pedal Bass Mode 90 Preventing Rhythm Tempos from Switching Automatically Auto Standard Tempo 91 Play...

Страница 12: ...After the Power Is Turned Off 108 Settings That Are Stored After the Power Is Turned Off 108 Settings That Are Stored in the Registration Buttons 108 Settings That Are Stored in the Individual Registration Buttons 108 Glossary 109 About ATELIER Series Sound Generator 110 MIDI Implementation Chart 111 Main Specifications 112 Demo Song List 114 Index 116 ...

Страница 13: ...13 MEMO ...

Страница 14: ... p 26 5 Power On switch p 16 6 Master Volume knob p 16 7 Part Balance button p 26 p 44 8 Lower Drums SFX button p 28 9 Transpose buttons p 48 10 Utility button p 87 Display Exit button p 18 Menu buttons Value buttons 11 Display p 18 12 Beat Indicator p 33 13 Harmony Intelligence button p 41 14 One Touch Program button p 34 15 Composer Select buttons Load button p 58 p 59 p 76 p 77 Save button p 56...

Страница 15: ... p 33 Fill In button p 33 Intro Ending button p 31 Start Stop button p 31 17 Rotary Sound Fast Slow button p 43 18 Disk Drive p 35 19 Registration buttons Write button p 51 Manual button p 53 Registration 1 8 buttons p 51 Manual 1 2 3 4 5 6 7 8 19 ...

Страница 16: ... outlet Is the Master Volume knob located at the left of the Lower keyboard set to the Min minimum position fig 01 05 2 Press the Power On switch to turn on the power The power will turn on and the Basic Screen appears on the display fig 01 06 This unit is equipped with a protection circuit A brief interval a few seconds after power up is required before the unit will operate normally 3 Turn the M...

Страница 17: ...ed at an excessively high volume Use the headphones at a moderate volume level Restoring All the Factory Default Settings The settings stored in the AT 15 can be returned to their factory settings This function is called Factory Reset 1 Make sure there is no floppy disk in the disk drive before carrying out the procedure 2 Turning off the power 3 While holding down the One Touch Program button pre...

Страница 18: ... reset is completed the basic screen reappears Adjusting the Contrast of the Screen You can adjust the contrast of the screen 1 Turn the LCD Contrast knob located at the bottom of the unit to adjust the contrast of the screen Displaying Basic Screens The instrument s display provides a large variety of information The AT 15 has two types of basic display screen the Rhythm display and the Composer ...

Страница 19: ...ttons simultaneously fig 02 02 3 Press the Select and buttons to select a Demo song 4 Press the Play Stop button When the selected demo song ends the next demo song will begin playing 5 To stop playback in the middle of the song press the Play Stop button 2 3 4 5 NOTE All rights reserved Unauthorized use of this material for purposes other than private personal enjoyment is a violation of applicab...

Страница 20: ...l appear and it will not be possible to play the Demo songs fig 02 03 If you don t mind erasing this song press the Rec button However if you wish to save this song press the Reset button to cancel the procedure and then save the song onto a floppy disk If you wish to save the musical data to a floppy disk refer to Saving Performance Songs onto Floppy Disk p 73 ...

Страница 21: ...n select one voice for each part meaning that it is possible to layer the voices on Upper Keyboard and play them simultaneously The voice of the Solo part can be layered on the Upper keyboard The Lower Keyboard has the part Lower The Pedalboard has the part Pedal Keyboard Type of voices Parts Upper Keyboard Upper Upper Organ Upper Orchestral Solo Solo Lower Keyboard Lower Lower Solo This voice is ...

Страница 22: ...ces are assigned to both of the Pedal Part and Solo Part button groups The Alternate button switches between these two voices The Alternate button Voice that will be selected The Alternate button is not lit The voice indicated on the button is selected The Alternate button is lit Another voice of the same family or the voice indicated on the bottom half of the button is selected NOTE If none of th...

Страница 23: ...Upper keyboard the two voices Jazz Organ2 and Grand Piano will sound simultaneously mixed together Selecting Pedal Bass Voice Immediately after the power is turned on the Pedal Bass voice will sound single notes using the Organ Bass1 voice Here s how to select Pedal voice played by the Pedalboard 1 Press the Pedal Organ button indicator lights The name of the selected voice appears in the display ...

Страница 24: ...est note played Each time you press the Alternate button you will switch between the two voices which are assigned the button NOTE If you press the Solo To Lower button indicator lights p 47 the Solo voice can now be played by the Lower keyboard not by the Upper Keyboard 1 It is possible to change how a Solo voice will sound Normally the Solo voice will be sounded by the highest note you play on t...

Страница 25: ...or OFF unlit 2 While the voice name is shown in the display screen use the Value buttons to select the desired voice The indicator of the selected Others button will blink To stop mid way through this or any procedure press the Display Exit button 3 Once again press the Others button for the part whose sound you wish to set to confirm the voice The indicator of the Others button will change from b...

Страница 26: ...elier EX SMF music files Rhythm button Rhythm performance Drums SFX Pedal Level button Pedal Voice Bass part of Automatic Accompaniment 1 The volume levels of each part are adjusted using the corresponding and buttons When you press the up button the volume increases when you press the down button the volume decreases The volume can be set to any value from 0 to 12 When you press the Level buttons...

Страница 27: ...ct Octave Shift f 3 Press the Rec button 4 Use the Menu and button to select a performance Part to which you wish to apply an Octave Shift Part Pedal Lower U Organ U Orch Solo fig 02 16 5 Use the Value and buttons to set the amount of shift The value can be set to a range of 3 octaves 6 Press the Utility button The basic screen reappears NOTE Please note that when you apply the Octave Shift functi...

Страница 28: ...d or Sound Effects on the Keyboard Playing Drums from the Entire Lower Keyboard Drums SFX You can use the Lower keyboard to play various drum sounds drum set In this case the Lower voices will no longer sound fig 02 18 1 Press the Drums SFX button indicator lights Play the Lower keyboard and listen to the various drum sounds on each key The Drums SFX button will alternate between on lit and off ea...

Страница 29: ...ress the Value buttons to select a Drum Set or Sound Effect Set The Drums SFX button indicator will begin to blink fig 02 20 You can select from 8 different Drum Sets and one set of Sound Effects as follows STANDARD ROOM POWER ELECTRONIC TR 808 JAZZ BRUSH ORCHESTRA SOUND EFFECTS To stop mid way through this or any procedure press the Display Exit button 3 Press the Drums SFX button once again The ...

Страница 30: ... group The indicator of the Rhythm button will blink 3 Press the flashing rhythm button once more The Rhythm button s indicator will change from blinking to light The Rhythm has now been applied Using the Rhythms of the Disk Button The Disk button contains 4 preset Rhythms These Rhythms can be rewritten by loading disk styles into the AT 15 The Rhythms that are already written in the Disk button m...

Страница 31: ...e Lower keyboard or the Pedalboard The rhythm simultaneously starts when you play the lower manual or pedalboard Starting at the Press of a Button Starting with an Intro 1 Press the Intro Ending button The Intro is played and the Rhythm starts While the Intro is playing the Intro Ending button indicator will light until the Intro ends then the button indicator will go dark Making the Intro Short a...

Страница 32: ... Rhythm and Automatic Accompaniment The Arranger function of the AT 15 can add an Automatic Accompaniment to each Rhythm Based on the selected Rhythm the Arranger function automatically adds an accompaniment that is suitable for the chord being pressed on the Lower keyboard 1 Hold down the Rhythm Latin button and press the Waltz March button This switches the Arranger function on off 2 Start play ...

Страница 33: ...t 20 500 beats per minute can be checked in the display You can also check the tempo by viewing the Beat indicator Fill In Button Function Lit After the fill in has played play the Variation Rhythm pattern Unlit After the fill in has played play the Original Rhythm pattern Tempo button The tempo becomes slower Tempo button The tempo becomes faster The function of the Fill In button can be assigned...

Страница 34: ... moment you play some keys specifying a chord during automatic accompaniment 1 Select a Rhythm p 30 2 Press the One Touch Program button Panel settings appropriate for the rhythm and automatic accompaniment will automatically be called up for Registration 1 4 buttons 3 Press the Registration 1 4 button to select panel settings 4 On the Lower keyboard play a chord At the moment you play the keyboar...

Страница 35: ...firm that its indicator is lit 2 Insert the Music Style disk into the disk drive 3 Use the Select buttons to select a Rhythm on the Music Style disk 4 Press the Start Stop button or the Intro Ending button The selected Rhythm is played NOTE If you re using the disk drive for the first time be sure to read the important notes on page 6 NOTE Never eject a disk while reading or writing is in progress...

Страница 36: ...equently used disk Rhythms into internal memory fig 03 14 1 Press the Rhythm Disk button indicator lights 2 Insert the Music Style disk into the disk drive 3 Use the Select and buttons to select a disk Rhythm indicator begins to blink fig 03 15 4 After selecting a disk Rhythm press the Rhythm Disk button once more The following screen appears fig 03 16 Numbers to which no rhythm is saved are indic...

Страница 37: ... screen appears The following screens appear when a rhythm has already been saved to the save destination fig 03 17 To cancel the procedure press the Display Exit button 7 Press the Rhythm Disk button again to start loading the Rhythm into the internal memory NOTE Never remove the disk or turn off the power while the Rhythm data is being loaded from disk into the AT 15 If you do so the Rhythm data...

Страница 38: ...Rec button 6 Press the Value and buttons to select the copy source rhythm 7 Press the Rec button 8 Press the Value and buttons to select the copy destination rhythm To cancel the procedure press the Display Exit button 9 Press the Rec button While the Rhythm is being copied into internal memory the following screen will be displayed NOTE You cannot select Copy Rhythm from the Utility menu unless a...

Страница 39: ...the Utility button The basic screen reappears Deleting a Rhythm Saved to the Rhythm Disk Button 1 Press the Utility button 2 Press the Menu and button to select Disk Rhythm 3 Press the Rec button 4 Use the Menu and button to select Delete Rhythm 5 Press the Rec button 6 Press the Value and buttons to select the rhythm you want to delete To cancel the procedure press the Display Exit button NOTE Yo...

Страница 40: ...Rhythm Stored in the Rhythm Disk Button to the Factory Settings Use the following procedure to return only the rhythm stored to the Rhythm Disk button to the original factory settings 1 Press the Power On button to turn off the power p 16 2 Hold down the Rhythm Disk button and press the Power On switch The Rhythm that had been stored in the Rhythm Disk button will return to the factory settings To...

Страница 41: ...rmony Intelligence is a function that adds harmony to a single note being played on the Upper keyboard the harmony being dependent on the chord played on the Lower keyboard In addition it automatically selects the appropriate voices according to the harmony type 1 Press the Harmony Intelligence button indicator lights Each time you press a Harmony Intelligence button the indicator will alternate b...

Страница 42: ...telligence button The indicator of the Harmony Intelligence button will light and the Harmony Intelligence is confirmed Harmony Intelligence types Harmonies are added only to the Upper voice Type Solo Voice Upper Voice Number of notes of the harmony BIG BAND Trumpet Flugel Horn 4 STRINGS Strings 1 Strings 1 4 TRADITIONAL Currently Selected Tone 3 HARP Harp 2 JAZZ SCAT Jazz Scat Jazz Scat 3 OCTAVE ...

Страница 43: ...ss the Rotary Sound Fast Slow button to switch between Rotary Fast LED lit and Rotary Slow LED turned off When you switch the rotary effect from Fast to Slow the modulation will slow down gradually and when you switch from Slow to Fast the modulation will speed up gradually LED lit Fast The effect obtained is equivalent to speakers being rapidly rotated LED turned off Slow Effect simulating the sl...

Страница 44: ... adjust the overall Reverb amount When you press the up button additional Reverb is applied Pressing the down button decreases the Reverb level When you press the Reverb buttons the Reverb level will be shown in the display Reverb SMF Rhythm Accomp You can also select the type of Reverb you wish Wall type and the level for each individual Part For details refer to Changing the Reverb Type p 85 Cha...

Страница 45: ... Pedal Bass voices 1 Press the Utility button 2 Press the Menu and buttons to select the Sustain 3 Press the Rec button 4 Press the Menu and buttons to select the desire part Part Upper Lower Pedal 5 Press the Value and buttons to switch ON or OFF 6 Press the Utility button The basic screen reappear The length of Sustain can be modified independently for each keyboard p 84 The Sustain effect will ...

Страница 46: ...e will also play the Pedal Bass voice In this way the Pedal Bass voice will be played by the root note of the chord you play on the Lower keyboard If the Leading Bass function is assigned to the Foot Switch p 87 the lowest note you play in the Lower keyboard sounds the Pedal Bass voice while you depress the foot switch NOTE If the Drums SFX button is ON the Pedal Bass voice will not sound NOTE If ...

Страница 47: ...ess the Solo To Lower button indicator lights When you play the Lower keyboard the Solo voice will sound in the range to the right of the Solo Split Point fig 06 09 3 To turn off the Solo split press the Solo To Lower button indicator turns off The Solo voice will no longer sound in the Lower keyboard the Solo voice will now be played in the Upper keyboard The solo split point is included in the r...

Страница 48: ...ey a semitone The transpose value is displayed in the screen Acceptable values range from A to G in semitone steps fig 06 03 If the pitch is transposed something other than C the indicator of one of the Transpose buttons either will be lit If the pitch is not transposed i e the key is C the indicator of both the Transpose and buttons will be extinguished By pressing the Transpose buttons simultane...

Страница 49: ...anual While you continue depressing the damper pedal notes will be sustained even if you release the keys fig 06 04 Decrease the volume Increase the volume You can specify whether the Expression Pedal will or will not control the volume during the recording of music data p 82 Likewise you can specify whether the Expression Pedal will or will not control the volume during the playback of recorded m...

Страница 50: ...ard the left While you are pressing the Foot Switch the pitch will be temporarily lowered When you release the Left Foot Switch the pitch will return to normal Right Foot Switch Switch the Rotary effect between Fast Slow Left Foot Switch Glide an effect by which the pitch is lowered by a semitone while the foot switch is pressed and is returned to what is originally was when you release your foot ...

Страница 51: ... Registrations 1 Make all the panel settings that you wish to store 2 While holding down the Write button press one of the Registration 1 8 buttons The panel settings will be stored in the selected Registration button 6 Write 2 3 4 5 7 8 1 Manual Settings that have been stored to Registration 1 8 buttons are remembered even if the power is turned off If you wish to restore the settings stored in t...

Страница 52: ...gistration 1 8 button for several seconds but you can change this so that the settings are recalled the instant you press the button 1 Press the Utility button 2 Press the Menu and buttons to select the Arranger Update fig 07 02 3 Press the Value and buttons to switch between DELAYED and INSTANT To return to the basic screen press the Utility button DELAYED When you press and hold a Registration 1...

Страница 53: ...sing the Manual button fig 07 03 Assigning a Name to a Registration Set When saving Registration sets names like REGIST 01 99 will be assigned by default but you can assign a name that will help you later to identify the contents of the Registration set fig 07 03 1 Make sure that the disk drive contains a disk that was formatted p 70 by the AT 15 2 Press the Registration button indicator lights 3 ...

Страница 54: ... and the Save button once again The Registration set in the AT 15 s internal memory has now been named fig 07 06 To return to the basic screen press the Display Exit button space _ A B C D E F G H I J K L M N O P Q R S T U V W X Y Z a b c d e f g h i j k l m n o p q r s t u v w x y z 0 1 2 3 4 5 6 7 8 9 You can also press the Reset button to delete a character and the Rec button to insert a space ...

Страница 55: ...gistration with the name you want to copy in the disk drive 2 Press the Registration button to make the indicator light 3 Press the Select and buttons to select the Registration whose name you wish to copy 4 Simultaneously press the Load button and Save button fig 07 08 5 Press the Load button Only the name of the Registration will be recalled fig 07 09 6 Simultaneously press the Load button and S...

Страница 56: ...ct and buttons to select the number that you wish to save to Numbers which have not been used in the Saving operation will be displayed as fig 07 10 To cancel the operation press the Registration button 4 Press the Save button 5 Press the Value and buttons to select the format in which the data will be saved 6 Press the Save button to execute the save operation When the Registration set is saved t...

Страница 57: ...itten If you wish to save the data without erasing the Registration set already on disk 1 Press the Reset button to cancel the procedure Rewriting of the Registration will be canceled 2 Press the Select buttons to select a number for which is displayed on the upper right of the screen 3 Press the Save button to save the Registration set When the data has been saved the basic display reappears When...

Страница 58: ...ading a Set of Registrations Registrations Sets saved to a floppy disk can be loaded back into the instrument 1 Insert the floppy disk containing the Registration into the disk drive 2 Press the Registration button indicator lights 3 Press the Select and buttons to select the Registration set that you wish to load fig 07 13 To cancel the procedure press the Registration button 4 Press the Load but...

Страница 59: ...ct and buttons to select the Registration set that you wish to load 4 Press the Utility button 5 Press the Value and buttons to specify the Registration button number to be loaded fig 07 14 To cancel the operation press the Utility button 6 Press the Rec button 7 Press the Value and buttons to specify the storage destination Registration fig 07 15 8 Press the Rec button The following display appea...

Страница 60: ... and buttons to select the Registration set that you wish to delete fig 07 13 4 Simultaneously press the Save button and the Registration button The following display appears fig 07 17 To cancel the operation press the Reset button 5 If you are sure that you wish to delete the data press the Rec button When a Registration set has been deleted the indication of USE will change back to If you had as...

Страница 61: ...ur own performances You can record the music that you play You can also record your performances while playing rhythms or automatic accompaniment Play back recorded performances You can play back recorded performance data and check out how you sound Save recorded performances on floppy disk Any music you record will be discarded as soon as you turn off the power on the AT 15 However by saving your...

Страница 62: ...r exchanging performance data among a wide variety of devices In addition to the song files described earlier the AT 15 is also capable of playing back any Standard MIDI File compatible with the General MIDI 2 or GS formats If you wish to purchase SMF music files please contact the dealer where you purchased the AT 15 3 4 2 NOTE Never eject a disk while reading or writing is in progress since that...

Страница 63: ...f the performance data begins 4 To stop playback press the Play Stop button 5 Press the eject button The floppy disk is ejected a little out of the slot Gently grasp the end of the floppy disk and pull it out Eject button When you wish to play back all the performance songs in order press the Select buttons simultaneously The performance data will begin playing When the last song ends you will ret...

Страница 64: ...rack whose indicator was turned off will be muted silenced 2 Press the Track Mute button once again indicator lights The part that had been muted will return to normal and will be heard Assignments to the Track Mute Button When Playing Back Commercial SMF Music Files Button Channel Rhythm Accomp 5 6 7 8 9 10 11 12 13 14 15 16 Bass 2 Lower 3 Solo Upper 1 4 You can also change the Track Mute Setting...

Страница 65: ...button to start recording When you press the Play Stop button the metronome will play two measures bars of count in before recording begins If you wish to use Rhythm and Automatic Accompaniment as you record press the Start Stop button instead of the Play Stop button to begin recording 5 Press the Play Stop button when you have completed your recording 4 5 3 The Play and Stop functions can both be...

Страница 66: ...py disk drive before pressing the Rec button fig 08 03 If the following screen appears The following message appears when the AT 15 contains performance data that has not been saved to a floppy disk fig 08 10 If you wish to erase the performance song 1 Press the Rec button If you wish to save the performance song on a floppy disk 1 Press the Reset button to cancel the procedure 2 Save the song ont...

Страница 67: ...layback is to start Press the Menu to return to an earlier point in the song Press the Menu to advance to a later point in the song If you press the Play Stop button while holding down the Reset button the metronome will play two measures bars of count in before playback starts 2 3 1 You can specify whether or not the Expression Pedal will affect the playback and what you play while Atelier music ...

Страница 68: ...k and the data for the performances on the upper manual and lower manual is recorded over again 3 Press the Play Stop button when your recording is completed The Rec button and the Play Stop button indicators will go dark NOTE If you wish to re record with different settings for voices tempo part balance erase the recorded song p 69 and re record again If the Control track still contains data from...

Страница 69: ...wish to record a new performance you must erase the previously recorded data fig 08 09 1 Press the Registration and Save buttons simultaneously The following message asking you to confirm your choice will be displayed fig 08 10 To cancel the procedure press the Reset button 2 If you are sure that you wish to erase the song press the Rec button 1 2 ...

Страница 70: ...as a format differing from its own format fig 08 11 1 Make sure that the write protect tab of the floppy disk is in the Write permit position fig 08 12 2 With the label of the floppy disk facing upward insert it into the disk drive until it clicks into position 3 Press the Utility button NOTE Formatting a disk will erase any data that may have been stored on it Carefully check any previously used ...

Страница 71: ... following message asking you to confirm will be displayed fig 08 14 To cancel the procedure press the Reset button 8 Press the Rec button again to perform the Format While formatting is in progress the following display appears fig 08 15 When disk formatting is completed the following screen appears then basic screen reappears NOTE Never attempt to remove the floppy disk until formatting is compl...

Страница 72: ...selected when changing a name 3 To confirm the new name simultaneously press the Load and Save buttons once again The new name is now inserted fig 08 17 space _ A B C D E F G H I J K L M N O P Q R S T U V W X Y Z a b c d e f g h i j k l m n o p q r s t u v w x y z 0 1 2 3 4 5 6 7 8 9 To delete a character press the Reset button A space can be inserted by pressing the Rec button 1 3 2 2 NOTE It is ...

Страница 73: ...his symbol will no longer be displayed fig 08 20 fig 08 19 1 Insert a floppy disk formatted p 70 on the AT 15 into the disk drive 2 Press the Save button to save the performance 3 Press the Value and button to select the format You can select either ORIGINAL or SMF format fig 08 21 ORIGINAL Save data in Atelier format SMF Saving in SMF Format for Atelier Sound Modules 3 2 4 You can press the Selec...

Страница 74: ...you wish to update the contents of the performance data 1 Press the Rec button If you wish to save the data without erasing the performance data already on floppy disk you must rename the song 1 Press the Reset button to cancel saving 2 Change the name p 72 and perform the Save procedure once again NOTE Music data that was saved in Atelier format cannot be played back correctly on instruments othe...

Страница 75: ...nd buttons to select Disk Utility fig 08 13 4 Press the Rec button 5 Press the Menu and buttons to select Delete Song fig 08 29 To cancel the procedure press the Reset button 6 Press the Rec button 7 Using the Value and button select the performance song to be erased 8 Press the Rec button You will see the following fig 08 30 To cancel the procedure press the Reset button 9 To delete the performan...

Страница 76: ...ou press the Play Stop button the metronome will play two measures bars of count in before recording begins As you record the music file that was loaded into the AT 15 will play back Your own performance on the upper and lower manuals will be recorded on top of the music files that you ve loaded When the music files include performance data on Channel 1 when the Solo voice is on Channel 3 or Chann...

Страница 77: ...asures bars of count in before recording begins As you record the music file that was loaded into the AT 15 will play back Your own performance on the upper and lower manuals will be recorded on top of the music files that you ve loaded If the loaded music files contains upper keyboard and or lower keyboard performances that performance data will be erased and replaced by your new performance 7 Pr...

Страница 78: ... To return to the basic screen press the Utility button You can transpose the keyboard for performance For details refer to Transposing to a Different Key Transpose Buttons p 48 Changing the Metronome Setting This setting determines whether or not the metronome will sound 1 Press the Utility button 2 Using the Menu and buttons select Metronome 3 Press the Rec button 4 Using the Menu and buttons se...

Страница 79: ...ress the Utility button Changing the Sound of the Metronome You can choose one of 4 different sounds for the metronome 1 Press the Utility button 2 Using the Menu and buttons select Metronome 3 Press the Rec button 4 Press the Menu and buttons to select Metronome Sound fig 09 04 5 Press the Value and buttons to select the type of sound for the metronome To return to the basic screen press the Util...

Страница 80: ...s Track Mute 1 Press the Utility button 2 Using the Menu and buttons select Tr Mute Track Mute 3 Press the Value and buttons to select the track that you wish to mute From the left these are R rhythm A accompaniment B bass L lower U upper S Solo and C control What is a Track The AT 15 s Composer features seven tracks The following types of performance are recorded to the tracks 4 Press the Rec but...

Страница 81: ...he Menu and buttons to select Ch Mute Channel Mute 3 Press the Value and buttons to select the channel that you wish to mute From the left these are 1 Ch channel 1 2 Ch 15 Ch and 16 Ch fig 09 09 4 Press the Rec button fig 09 10 The number will change to indicating that the corre sponding channel has been muted 5 Once again press the Rec button and muting will be canceled To return to the basic scr...

Страница 82: ...recorded and when ATELIER song files are being played back Function During Recording Specify whether Expression Pedal operations will be recorded or not while your performance is being recorded 1 Press the Utility button 2 Press the Menu and buttons to select Exp Source fig 09 06 3 Press the Rec button 4 Press the Menu and buttons to select Recording 5 Press the Value and buttons to specify the pe...

Страница 83: ...e Utility button 2 Press the Menu and buttons to select Lyric fig 09 11 3 Press the Value and buttons to switch the lyric display ON displayed or OFF not displayed To return to the basic screen press the Utility button If you press a voice select button while playing back music files that contains lyrics the display screen will switch and the lyrics will no longer be displayed To re display the ly...

Страница 84: ...n Length The sustain length can be set independently SHORT MIDDLE Medium or LONG for the Upper and Lower keyboards and Bass Pedalboard You can make a separate setting for each keyboard 1 Press the Utility button 2 Press the Menu and buttons to select Sustain 3 Press the Rec button 4 Press the Menu and buttons to select Sustain Length fig 11 06 5 Press the Menu and buttons to select the part whose ...

Страница 85: ...button 4 Press the Menu and buttons to select Wall Type fig 11 04 5 Press the Value and buttons to select a Wall type To return to the basic screen press the Utility button Setting Descriptions ROOM 1 Reverberation of a small room ROOM 2 Reverberation of a small club ROOM 3 Reverberation of a large room HALL 1 Reverberation of a large concert hall HALL 2 Reverberation of a small concert hall SMALL...

Страница 86: ...t the part whose reverb depth you wish to adjust Part Accomp Automatic Accompaniment except Bass Rhythm Drums A Bass Bass part of Automatic Accompaniment Pedal Lower U Organ U Orch Solo 6 Press the Value and buttons to adjust the setting Settings 0 10 AUTO Accomp Rhythm A Bass For the three Parts of the Accomp Rhythm and Accompaniment Bass you have the option of selecting the AUTO setting Parts fo...

Страница 87: ...ift is turned ON each time you press the Foot Switch the registrations will be selected in the following order 1 2 3 12 1 etc To return to the basic screen press the Utility button This setting remains stored in memory even while the power is turned off Changing the Function of the Foot Switch Left Foot SW Right Foot SW You can select any of the following functions and assign them to Foot Switch 1...

Страница 88: ...lligence function is automatically switched ON p 35 Switching Chord Intelligence Off Switch OFF the Chord Intelligence setting in the Utility menu Setting Descriptions ROTARY FAST SLOW Switch the Rotary speed between FAST and SLOW GLIDE While the Foot Switch is pressed the pitch will temporarily be lowered and will gradually return to normal when you release the Foot Switch LEADING BASS The Leadin...

Страница 89: ...s located on each side of the Expression Pedal p 88 While the intro or ending are playing playing the lower keyboard will not produce sound Changing How the Solo Voice Responds Solo Mode When the Solo voice is assigned to the Upper keyboard you can specify how the Solo voice will respond when more than one key is pressed 1 Press the Utility button 2 Press the Menu and buttons to select Solo Mode f...

Страница 90: ...red position 1 Press the Utility button 2 Press the Menu and buttons to select SoloSplitPoint 3 Press the Value and buttons to change the Solo Split Point Settings C2 C7 By pressing the Value and buttons simultaneously you can restore the default setting B 4 To return to the basic screen press the Utility button Changing the Pedalboard Polyphony Pedal Bass Mode You can set the Bass Pedalboard to p...

Страница 91: ...enu and buttons select IntroCountDown 3 Press the Value buttons to switch the Intro Count Down ON or OFF When you press the Intro Ending button an intro will play and the end of the intro will be counted down To return to the basic screen press the Utility button Changing the Sound of the Count Down Count Down Sound You can change the sound that is used for the count played at the end of the intro...

Страница 92: ... select Trans Update Transpose Update 3 Press the Value and buttons to change the setting for Trans Update To return to the basic screen press the Utility button This setting remains stored in memory even while power is turned off Setting Descriptions DELAYED Settings related to Rhythm performances and Automatic Accompaniment will be recalled when you hold a Registration button for several seconds...

Страница 93: ...d in memory even while power is turned off Selecting the MIDI Transmit Channel Tx MIDI Channel When you use the MIDI connectors of the AT 15 to transmit musical data to external devices for each keyboard Upper Lower and Pedal you can specify the channel on which your playing will be transmitted as MIDI messages You can modify these Tx Transmit MIDI settings as needed For details refer to If You re...

Страница 94: ...es that can be received by the keyboard sound generator For details refer to the MIDI Implementation sold separately This setting remains stored in memory even while power is turned off Specifying Transmission of PC Numbers Send PC Switch Transmission of PC Program Change numbers can be switched ON OFF 1 Press the Utility button 2 Press the Menu and buttons to select MIDI 3 Press the Rec button 4 ...

Страница 95: ... 2 Press the Menu and buttons to select MIDI 3 Press the Rec button 4 Press the Menu and buttons to select PC Number fig 12 26 5 Press the Menu and buttons to select Bank MSB Bank LSB PC Num 6 Press the Value and buttons to change the setting To return to the basic screen press the Utility button Menu Setting Bank MSB Bank Select MSB 0 127 Bank LSB Bank Select LSB 0 127 PC Num PC Number 1 128 ...

Страница 96: ...e L Mono jack Use an audio cable to connect the input jack on the audio set or amp mixer to one of the output jacks on the AT 15 Use an audio cable with a standard plug When purchasing an audio cable please consult the vendor where you bought the AT 15 Input Jack You can connect another sound module such as audio equipment or an electronic instrument using audio cables sold separately and play the...

Страница 97: ... instrument to play sounds or switch tones The AT 15 contains two sound generators one sound generator for its own keyboards and one GS sound generator p 110 Normally musical data transmitted from an external device to the MIDI In connector is sent to the GS sound generator but you can also set the MIDI IN Mode parameter p 94 so that the keyboard sound generator is controlled Connecting the AT 15 ...

Страница 98: ...l function p 83 to PEDAL during playback Can t use the function assigned to the foot switch If the Utility menu item Regist Shift change Registrations is RIGHT or LEFT p 87 the foot switch will be dedicated to switching the Registration When the Human Voice Jazz Scat is selected playing dynamics do not change the sound The Utility menu item Initial Touch is turned OFF p 87 Rotary effect is not be ...

Страница 99: ... though you are not playing the Bass Pedalboard The Pedal To Lower button p 46 is ON When the Pedal To Lower button is ON the Bass will be sounded by the Lower keyboard When playing the same sound in the Upper keyboard and Lower keyboard the volume is different On one of the keyboards Initial Touch is turned ON p 87 Lower keyboard cannot be heard The Lower keyboard will not produce sound while an ...

Страница 100: ...saved onto this floppy disk fig E 10 Meanings No floppy disk is inserted to the disk drive Insert the disk correctly and repeat the procedure fig E 11 Meanings There is not sufficient space left on the floppy disk for the data to be saved Save the data onto a different floppy disk fig E 12 Meanings The floppy disk inserted into the disk drive cannot be read Please format the floppy disk fig E 13 M...

Страница 101: ...Meanings To carry out the procedure you first need to erase perfor mance data in the AT 15 This message asks you to confirm that you don t mind doing this To erase the data press the Rec button When you do not want to erase it press the Reset button then save the data on disk fig ot 04 Meanings This Registration is already being used To overwrite the previous Registration data in this memory press...

Страница 102: ...noStr K21 Honky tonk K31 E Piano1 K32 E Piano2 K35 StageE Piano K41 Harpsichord L11 Accordion L12 Bandoneon 2 L21 Harmonica 2 M11 Nylon str Gt 2 M21 Steel str Gt 2 M22 12str Guitar 2 M23 Ac Gtr Sld 2 M31 Jazz Guitar 2 M41 Overdrive Gt 2 N11 Hawaiian Gt 2 N12 Banjo 2 N13 Mandolin N21 Harp 2 N31 Sitar 2 O11 Vibraphone 2 O12 Glockenspiel O13 Celesta O21 Marimba O22 Xylophone O31 Tubular bell O41 Stee...

Страница 103: ...2 Long Low Whistle EXC2 Short Guiro EXC3 Long Guiro EXC3 Claves High Wood Block Low Wood Block Mute Cuica EXC4 Open Cuica EXC4 Mute Triangle EXC5 Open Triangle EXC5 Shaker Jingle Bell Bell Tree Castanets Mute Surdo EXC6 Open Surdo EXC6 Elec BD Side Stick Elec SD Hand Clap Gated SD Elec Low Tom 2 Closed Hi hat 1 EXC1 Elec Low Tom 1 Pedal Hi hat 1 EXC1 Elec Mid Tom 2 Open Hi hat 1 EXC1 Elec Mid Tom ...

Страница 104: ...ga 808 Mid Conga 808 Low Conga High Timbale Low Timbale High Agogo Low Agogo Cabasa 808 Maracas Short Hi Whistle EXC2 Long Low Whistle EXC2 Short Guiro EXC3 Long Guiro EXC3 808 Claves High Wood Block Low Wood Block Mute Cuica EXC4 Open Cuica EXC4 Mute Triangle EXC5 Open Triangle EXC5 Shaker Jingle Bell Bell Tree Castanets Mute Surdo EXC6 Open Surdo EXC6 High Q Slap Scratch Push EXC7 Scratch Pull E...

Страница 105: ...ow P Swing Disk 6 8 Ballad Trad Tango MarchingBand Guitar Trio Music Style Disk 01 BigBndBalld2 02 Boogie 03 Jazz Band 04 Blues 2 05 Blues 3 06 Big Band 4 07 Swing 08 MidiumSwing2 09 Slow Swing 2 10 Bluegrass 1 11 Bluegrass 2 12 Cajun 13 Slow Country 14 ContryBallad 15 CountrySwing 16 Two Step 2 17 Train Beat 18 Twist 2 19 Slow Rock 2 20 Baroque 21 Classic 22 Charleston 23 Dixieland 2 24 Foxtrot 2...

Страница 106: ...elligence is ON Cm7 5 C C D E E F Cmaj7 C maj7 Dmaj7 E maj7 Emaj7 Fmaj7 C7 C 7 D7 E 7 E7 F7 Cm C m Dm E m Em Fm Cm7 C m7 Dm7 E m7 Em7 Fm7 Cdim C dim Ddim E dim Edim Fdim Dm7 5 Em7 5 Caug C aug Daug E aug Eaug Faug Csus4 C sus4 Dsus4 E sus4 Esus4 Fsus4 C7sus4 C 7sus4 D7sus4 E 7sus4 E7sus4 F7sus4 Fm7 5 E m7 5 C m7 5 C6 C 6 D6 E 6 E6 Cm6 Dm6 Em6 F6 Fm6 C m6 E m6 ...

Страница 107: ...7 F m Gm A m Am B m Bm F m7 Gm7 A m7 Am7 B m7 Bm7 F dim Gdim A dim Adim B dim Bdim Gm7 5 Am7 5 Bm7 5 F aug Gaug A aug Aaug B aug Baug F sus4 Gsus4 A sus4 Asus4 B sus4 Bsus4 F 7sus4 G7sus4 A 7sus4 A7sus4 B 7sus4 B7sus4 B m7 5 A m7 5 F m7 5 G6 Gm6 A6 A 6 B6 Bm6 B 6 B m6 Am6 A m6 F 6 F m6 ...

Страница 108: ... OFF Left Foot Switch Assignment Right Foot Switch Assignment Chord Intelligence ON OFF Leading Bass ON OFF Solo Mode Solo To Lower Mode Solo Split Point Pedal Bass Mode Tx MIDI Channel Bank MSB Bank LSB PC Number Pedal To Lower button ON OFF Solo To Lower button ON OFF Transpose button ON OFF Harmony Intelligence button ON OFF Harmony Intelligence Type Rotary Fast Slow button ON OFF The Voices as...

Страница 109: ...s playing the Automatic Accom paniment Inversion When the lowest note of a chord is the root the chord is said to be in root position In contrast forms of a chord in which other notes are the lowest pitch are called inver sions Mute To silence a sound The AT 15 provides a Track Mute function that allows you to turn off the Track Mute button indicator of a track on which music data has been recorde...

Страница 110: ...compatible GS Format additionally offers an expanded number of sounds provides for the editing of sounds and spells out many details for a wide range of extra features including effects such as reverb and chorus Designed with the future in mind the GS Format can readily include new sounds and support new hardware features when they arrive Since it is upwardly compatible with the General MIDI Rolan...

Страница 111: ... Mode 3 4 M 1 O x 0 127 0 127 O O O O 0 127 O x x x x x O 120 126 127 O x O 123 125 O x Bank select Modulation Portamento time Data entry Volume Panpot Expression General purpose controller Glide Hold 1 Portamento Sostenuto Soft Resonance Release Time Attack Time Cut off Decay Time Vibrato Time Vibrato Depth Portamento control Effect1 depth Effect3 depth NRPN LSB MSB RPN LSB MSB 1 O x is selectabl...

Страница 112: ...Tempo The Arranger ON OFF and Synchro Start are linked to the One Touch Program Drum SFX Sets 8 Drum Sets 1 SFX Set Master Tuning 415 3 Hz 466 2 Hz 0 1 Hz Steps Key Transpose 4 7 Half steps Playback Transpose 24 24 Half steps Effects Rotary Sound Reverb Sustain Glide Harmony Intelligence 6 Types Registration Memories 8 Composer Tracks 7 during playback Note Storage Approx 40 000 notes Song Length ...

Страница 113: ... 19 5 16 D x 12 5 8 H inches Stand 1230 W x 515 D x 748 H mm 48 7 16 W x 20 5 16 D x 29 1 2 H inches Total 1230 W x 515 D x 1060 H mm 48 7 16 W x 20 5 16 D x 41 3 4 H inches Weight Console 25 0 kg 55 lbs 2 oz Stand 24 0 kg 52 lbs 15 oz Total 49 0 kg 108 lbs 1 oz Accessories Owner s manual 3 5 inch micro floppy disk 2HD Blank Disk Music Style Disk Power Cord Keyboard Cover 962a In the interest of p...

Страница 114: ...versity of Portland studying with Arthur Hitchcock Additional study was done with Frederick Geoghegan the noted English Canadian organist As a teenager Jonas had the privilege to study with Richard Ellsasser one of the greatest virtuoso organist of 20th century Besides serving as Director of Music for the First United Methodist Church in Portland Oregon and as the Organist for the Oregon Symphony ...

Страница 115: ...osemary had begun touring throughout the United states Concurrently she maintained a weekly radio show The Rosemary Bailey Show broadcast from Chicago Rosemary has performed with many name artists including Victor Borge and Peter Nero as well as the Duke Ellington Orchestra She was also featured soloist with the Chicago Symphony under the direction of Dr Leon Stein At home on electronic as well as...

Страница 116: ...ry Settings 40 Loading 36 Reviewing 35 Disk Utility 71 75 Display of Lyrics 83 Drum Set 28 Drum SFX Set 29 Drums SFX 28 E Eject Button 35 Ending 32 88 109 Erasing Performance Song 69 Exp Source 82 83 Expression Pedal 49 Function 82 F Factory Default Settings 17 Factory Reset 17 Factory Settings Disk Button 40 Fill In Fill In To Original 88 Fill In To Variation 88 Floppy Disk 35 Format 70 Foot Swit...

Страница 117: ...rb Effect 44 109 Reverb Depth 86 Reverb Type 85 Wall Type 85 Rhythm 30 Accompaniment 33 Disk Rhythm 35 37 39 40 Ending 32 Fill In 33 Intro 31 Starting and Stopping 31 88 Rhythm List 105 Rhythm Screen 18 Right Foot SW 87 Root Note 109 Rotary Effect 43 S Saving Performance Song 73 Registration 56 SMF 73 Send PC Switch 94 SMF Format 62 SMF Music Files 62 76 Track Assignment 64 SMF with Lyrics 110 Sol...

Страница 118: ...anagua Nicaragua TEL 505 277 2557 PANAMA SUPRO MUNDIAL S A Boulevard Andrews Albrook Panama City REP DE PANAMA TEL 315 0101 PARAGUAY Distribuidora De Instrumentos Musicales J E Olear y ESQ Manduvira Asuncion PARAGUAY TEL 595 21 492147 PERU Audionet Distribuciones Musicales SAC Juan Fanning 530 Miraflores Lima Peru TEL 511 4461388 NORWAY Roland Scandinavia Avd Kontor Norge Lilleakerveien 2 Postboks...

Страница 119: ...o communications However there is no guarantee that interference will not occur in a particular installation If this equipment does cause harmful interference to radio or television reception which can be determined by turning the equipment off and on the user is encouraged to try to correct the interference by one or more of the following measures Reorient or relocate the receiving antenna Increa...

Страница 120: ...AT 15 Owner s Manual 03238612 05 2 4TP ...

Отзывы: