background image

- 9 - 

OPERATION 

WARNING

 – 

Your safety and the wellbeing of others during the operation of every 

ROLAIR

®

 compressor is our main 

concern. Do not operate or permit anyone else to operate your air compressor until the information contained in this 
manual is read and completely understood. Please contact your distributor or our customer service department if you 
have any questions on the proper use of your air compressor.  
 

DIRECT-DRIVE ELECTRIC 


Establish that the air compressor is ready to operate by reviewing the topics and information provided in the 

“Pre-Start Checklist” section of this manual. Slowly open tank drain to remove any condensate that has accumulated 
and keep drain open for a few seconds after starting to warm up motor/pump assembly. Make sure the pressure 
switch lever is in the “Off” position before plugging power cord into a properly grounded outlet. Move pressure 
switch lever to the “On/Auto” position to build and automatically maintain top end tank pressure setting. Rotate 
regulator adjustment knob counterclockwise until the gauge attached reads 0 PSI before attaching air hose and 
accessory. Set working pressure by rotating regulator adjustment knob clockwise and lock in working pressure 
according to specifications provided by the tool manufacturer. Always use the pressure switch “On(Auto)/Off” lever 
to start or stop the air compressor. Never stop the compressor by unplugging it from the power source. Store 
compressor in a warm/dry location and perform maintenance as indicated in manual. 
 

BELT-DRIVE ELECTRIC 

START/STOP OPERATION:  
 

Follow same procedures described above for use of direct-drive 

electric compressors. Open drain valve located on pump aftercooler for 
cold starting purposes. An electric belt-driven motor should not be 
subjected to more than 15 starts per hour. Consult your dealer or any 
authorized 

ROLAIR

®

 service center for information on a conversion kit if you 

experience nuisance tripping of the motor overload due to an excessive 
amount of motor starts per hour. 
CONSTANT-SPEED OPERATION:  
 

Constant speed or continuous-running operation should be used 

during periods of heavy use to extend motor life and prevent overheating. 
If your machine is built to only operate continuously, special care must 
be taken to safely start and stop the machine. Always shut off the 
power to the electrical outlet at the main breaker or optional on/off 
switch before plugging in or unplugging the power cord. We also highly 
recommend complete draining of storage tank(s) and opening of aftercooler drain valve prior to starting, especially 
when operating in cold temperatures. Never stop the compressor by pulling the plug from the outlet. Use the 
breaker or optional on/off switch to shut off the power to the outlet first. 
DUAL-CONTROL OPERATION: 
 

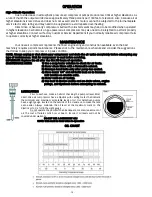
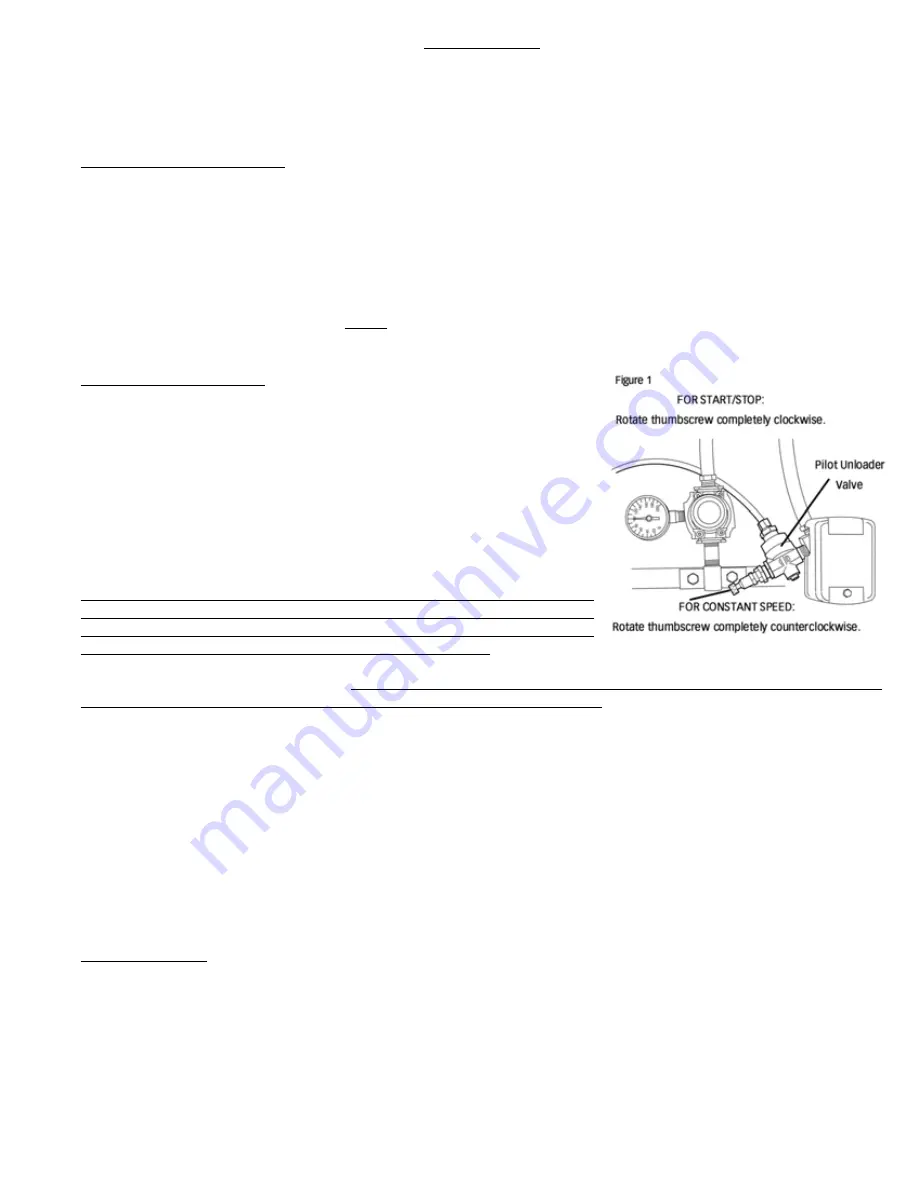
Dual controls allow an easy transition between start/stop and continuous-running operation. See figure 1 for 

instructions to switch operation from start/stop to constant speed. Always flip the lever on the pressure switch to the 
“off” position before plugging in or unplugging the power cord. 
DUTY CYCLE: 
 All 

ROLAIR

®

 belt-driven air compressors are equipped with S1 or 100% duty cycle motors and pumps. Given 

proper ventilation and electrical power, your ROLAIR

®

 compressor is capable of operating continuously when set up 

for constant speed operation. However, an excessive amount of starts per hour may generate enough heat to trip the 
motor overload. Please contact our factory Customer Service Department if overload problems repeatedly occur.  
 Several 

ROLAIR

®

 direct-drive machines, Models FC1500HBP2, FC1500HS3 and JC10, are rated for 70% duty 

cycle. If subjected to continuous operation the internal overload will shut down the motor and only restart when 
sufficient cooling has occurred. 
 

GAS POWERED 


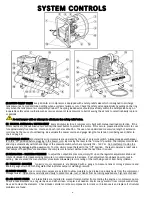
Refer to item numbers 12, 16, 17 & 18 in the “System Controls” section of this manual for information on the 

engine automatic idle control, kill switch, choke and fuel shut-off valve. Also note the engine throttle arm is locked 
into a top RPM setting that will provide maximum service life and does not need to be moved to start or stop the 
machine. Additional instructions can be found in the engine owner’s manual. Use the drain valve located on the 
pump aftercooler or intercooler for cold-starting purposes. Take additional care to keep dirt/debris from entering the 
fuel tank or obstructing the air flow through the engine or past the pump. Make sure the air flow to the regulator is 
completely closed (gauge attached reads 0 PSI) before attaching air hose and accessory. A slight 

hissing noise caused 

by the air flow being directed to atmosphere during engine idle is normal. Store compressor in a warm/dry location 
and perform maintenance as indicated in your manuals.


Содержание GD4000PV5H

Страница 1: ...AL MANUEL D INSTRUCTION FRAN AIS PAGE 16 MANUAL DE INSTRUCCIONES ESPA OLES P GINA 31 MODEL GD4000PV5H SERIAL NUMBER __________________ 606 South Lake Street P O Box 346 Hustisford WI 53034 0346 920 34...

Страница 2: ...save time and expense by including this reference information when requesting service or replacement parts Place Date of Purchase Volts Model HZ Serial HP With the tank gauge at 0 PSI and air line s d...

Страница 3: ...last This manual was compiled for the benefit of the operator Do not use or allow anyone else to use your air compressor until this manual is read and all safety operating instructions are understood...

Страница 4: ...use air tools or attachments before reading the owner s manual to determine the maximum pressure recommendations Never exceed the manufacturer s maximum allowable pressure ratings Do not use compress...

Страница 5: ...ssor Never point the air stream or tools at any point of your body other people or animals Always turn off the air compressor and drain tank pressure completely before attempting maintenance or attach...

Страница 6: ...start and stop automatically within the settings of the pressure switch which are typically 105 130 PSI Do not attempt to stop the compressor by unplugging the power cord To stop simply move the leve...

Страница 7: ...fe Do not alter the factory top RPM setting The engine idle speed is factory set and controlled by a black plastic Philips head screw on the carburetor A slight increase to the idle speed setting may...

Страница 8: ...r Pay special attention to the intake filters Check intake filters daily 5 USE LONGER PROPERLY SIZED AIR HOSE RATHER THAN EXTENSION CORDS If an extension cord must be used please refer to the chart be...

Страница 9: ...and stop the machine Always shut off the power to the electrical outlet at the main breaker or optional on off switch before plugging in or unplugging the power cord We also highly recommend complete...

Страница 10: ...r in peak condition NOTE Always unplug or shut down your compressor and drain the air tanks completely before attempting any type of maintenance Wait for compressor to cool before servicing IMPORTANT...

Страница 11: ...until the internal rod makes contact with the steel ball inside After making contact turn differential 2 counterclockwise 1 4 turn Secure position by tightening locknut 1 and proceed to top end setti...

Страница 12: ...ulleys must be properly aligned and drive belt tension set to specification Improper pulley alignment and belt tension can cause motor overloading excessive vibration and premature belt and or bearing...

Страница 13: ...flywheel Tighten appropriate parts Loose belts Adjust belt tension Internal pump problem Take unit in for service Overheating compressor Poor ventilation Relocate compressor Improper pump rotation Co...

Страница 14: ...s of merchantability and fitness for purpose and of any other obligations and or liabilities on the part of Associate Engineering Corporation Associate Engineering Corporation neither assumes nor auth...

Страница 15: ...le repr sentant local ROLAIR pour planifier une r vision De 0 _____ lb po2 De 0 _____ lb po2 Date min s Date min s COMPRESSEUR D AIR PORTATIF MANUEL DE L UTILISATEUR AVERTISSEMENT L AIR DE REFOULEMEN...

Страница 16: ...rce que nos appareils sont construits pour durer Ce manuel a t labor l intention de l op rateur Ne pas utiliser ou permettre quiconque d utiliser le compresseur d air jusqu ce que ce manuel soit lu et...

Страница 17: ...soupape de s ret et de d charge ou d autres composants qui contr lent la pression du r servoir Ne jamais faire aucun ajustement aux composants qui contr lent la pression du r servoir Ne pas transform...

Страница 18: ...ommandes automatiques peut red marrer tout moment et entra ner des blessures corporelles un moment inattendu Toujours d brancher le compresseur d air et purger les r servoirs d air compl tement avant...

Страница 19: ...e chaque jour et maintenir les niveaux d huile un niveau appropri Toujours faire fonctionner le compresseur dans une position de niveau s curitaire qui l emp che de basculer ou de tomber pendant l uti...

Страница 20: ...tre 105 et 130 lb po2 Ne pas tenter d arr ter le compresseur en d branchant le cordon d alimentation Pour arr ter d placer simplement le levier la position Off arr t Le levier active une soupape de re...

Страница 21: ...2 COMMANDE AUTOMATIQUE DE RALENTI Chaque compresseur d air essence ROLAIR est muni d un ensemble commande de ralenti moteur qui diminue automatiquement la vitesse du moteur lorsque le param tre de pre...

Страница 22: ...onctionner dans une zone o d autres gaz fum es ou vapeurs sont pr sent e s pouvant cr er une atmosph re explosive lorsque l air sera comprim Ne pas faire fonctionner le compresseur dans un endroit clo...

Страница 23: ...ce que la jauge indique 0 lb po avant de fixer le flexible d air et l accessoire R gler la pression de fonctionnement en tournant le bouton de r glage du r gulateur dans le sens horaire puis verrouill...

Страница 24: ...lb po avant de fixer le flexible d air et l accessoire Un l ger sifflement caus par le d bit d air dirig vers l atmosph re au cours de ralenti du moteur est normal Ranger le compresseur dans un endro...

Страница 25: ...e l huile Nos pompes entra nement par courroie ont une jauge visuelle situ e l ext rieur du carter pour faciliter la t che Toujours maintenir le niveau d huile la marque maximale de la pige ou aux 2 3...

Страница 26: ...rentiel 2 jusqu ce que la bielle interne entre en contact avec la bille en acier l int rieur Apr s le contact tourner 1 4 tour le diff rentiel 2 dans le sens antihoraire Fixer solidement le contre cr...

Страница 27: ...ement doivent tre correctement align es et la tension de leur courroie conforme aux sp cifications L alignement incorrect des poulies et la tension inappropri e de leur courroie peuvent provoquer la s...

Страница 28: ...e Panne de la pompe interne Faire r viser l appareil Surchauffe du compresseur Faible ventilation D placer le compresseur d air Rotation de la pompe inappropri e Communiquer avec un lectricien Panne d...

Страница 29: ...usage pr vu et quelque autre obligation et ou responsabilit de la part de Associate Engineering Corporation Associate Engineering Corporation n assume aucune responsabilit ni n autorise aucune autre...

Страница 30: ...vicio De 0 a _____ psi kPa De 0 a _____ psi kPa Fecha Min Seg Fecha Min Seg COMPRESORA DE AIRE PORT TIL MANUAL DEL PROPIETARIO ADVERTENCIA EL AIRE DE DESCARGA DE LA COMPRESORA PUEDE CONTENER HIDROCARB...

Страница 31: ...en ROLAIR porque est n fabricadas para durar Este manual fue escrito para beneficio del operador No utilice ni permita que alguien m s utilice su compresora de aire sin antes haber le do y comprendid...

Страница 32: ...controlan la presi n del tanque podr a provocar lesiones graves o la muerte Nunca realice ajustes a los componentes que controlan la presi n del tanque No altere la configuraci n de f brica de la pres...

Страница 33: ...ver a arrancar en cualquier momento y provocar lesiones f sicas cuando menos se espere Siempre desconecte la compresora de aire y drene completamente los tanques de aire antes de tratar de realizar re...

Страница 34: ...e adecuados Siempre encienda la compresora en una posici n nivelada y segura que evite que se incline o se vuelque durante su uso No la utilice sin un filtro de aire o en un entorno corrosivo Siempre...

Страница 35: ...iante el uso de un interruptor de presi n Siempre aseg rese de que la palanca se encuentre en la posici n de Apagado antes de conectar el cable de alimentaci n Al mover la palanca a la posici n de Enc...

Страница 36: ...araci n o un reemplazo 11 RESPIRADERO TAP N DE LLENADO DE ACEITE Todas las bombas de las compresoras de aire reciprocantes incluyen una ventilaci n de c rter que alivia la presi n que se acumula debid...

Страница 37: ...ba se obstruya y esto anular la garant a del producto 22 UTIL CELA EN UN REA LIMPIA SECA Y BIEN VENTILADA Deje un espacio de al menos 18 pulgadas 45 72 cm detr s de la protecci n de la correa para log...

Страница 38: ...las del reloj en presi n operativa de acuerdo con las especificaciones que proporciona el fabricante de la herramienta Siempre use la palanca del interruptor de presi n Encendido autom tico Apagado pa...

Страница 39: ...ores el ctricos no pueden someterse a la capacidad completa de amperaje de factor de servicio de placa de identificaci n y es posible que deban acondicionarse para evitar el sobrecalentamiento reitera...

Страница 40: ...r el funcionamiento de la v lvula de seguridad X Cambiar el aceite de la compresora X Limpiar cambiar el filtro de aire X Realizar una prueba de tiempo de bombeo X Revisar el funcionamiento de los con...

Страница 41: ...argarse prematuramente a 100 P S I G 689 kPa de man metro gire la perilla del valor superior 4 en el sentido de las manecillas del reloj en incrementos de 1 4 de vuelta d golpes leves a la varilla int...

Страница 42: ...eas flojas Ajuste la tensi n de las correas Problema interno de la bomba Lleve la unidad a reparaci n La compresora se sobrecalienta Ventilaci n deficiente Cambie la ubicaci n de la compresora Sentido...

Страница 43: ...otras las garant as de comerciabilidad y de idoneidad para un fin espec fico y todas las dem s obligaciones y o responsabilidades por parte de Associate Engineering Corporation Associate Engineering...

Страница 44: ...44...

Страница 45: ...ug 310 1 12 Check Valve CV3X4T 1 13 Brass Straight BRST0250X012538 1 14 1 4 Nylon Tubing 16 178D 1 25 Brass Ring BRRG0250 2 Brass Nut BRNT0250 2 Brass Sleeve BRSL0250 2 15 Screw MIS10093C 6 16 Rubber...

Страница 46: ...46...

Страница 47: ...022040F 1 21 Snap Ring 015001000F 2 22 Piston Assembly 416022004F 1 23 Connecting Rod 116091021F 1 24 Dipstick 012035000F 1 25 Drain Plug 014013024F 1 26 Crankcase Cover 116022006F 1 27 Screw MIS10036...

Отзывы: