78
Step 3
Step 4
Step 5
Step 6
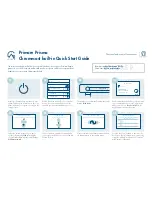
Use the PARAMETER ADJUST control to select the controller number to be assigned to the
PARA 1 parameter. Any number from 0 to 120 may be selected, as well as OFF (will not
respond to MIDI control changes). Match the number selected for this parameter with the
controller number on the MIDI transmitter.
Turn the PARAMETER ADJUST control to scroll through the available parameters for the
current configuration.
Turn the PARAMETER SELECT control one step clockwise to display the parameter that is
currently mapped to the NUMB 1 control number.
After selecting the desired controller number, press the STORE button to save the number for
the NUMB 1 parameter. "STORED" will flash briefly on the display.
NUMB 1
7
STORED
PARA1
OUTPUT
PARA1
REVERB LVL
Содержание VOODU Valve
Страница 12: ...9 5 Connections 5 Connections Using the Voodu Valve with a stereo power amp and guitar cabinets ...
Страница 13: ...10 Using the Voodu Valve direct into a mixing console ...
Страница 36: ...33 7 Voodu Valve Configurations 7 Voodu Valve Configurations H GAIN CRS DLY REV Configuration ...
Страница 39: ...36 H GAIN FLAN DLY REV Configuration ...
Страница 42: ...39 H GAIN TREM DLY REV Configuration ...
Страница 45: ...42 H GAIN PSHF DLY REV Configuration ...
Страница 48: ...45 WAH H GAIN DLY REV Configuration ...
Страница 51: ...48 PHAS H GAIN DLY REV Configuration ...
Страница 54: ...51 L GAIN CRS DLY REV Configuration ...
Страница 57: ...54 L GAIN FLAN DLY REV Configuration ...
Страница 60: ...57 L GAIN TREM DLY REV Configuration ...
Страница 63: ...60 L GAIN PSHF DLY REV Configuration ...
Страница 66: ...63 WAH L GAIN DLY REV Configuration ...
Страница 69: ...66 PHASE L GAIN DLY REV Configuration ...


