11
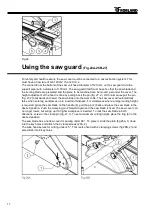
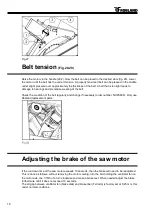
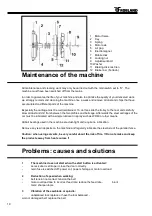
Put the locking pin in the opening of the saw table and turn the spindle with the key (3) until the locking
pin (2) engages in the hole in the saw spindle pulley.
Now unlock the nut (1). Before fitting the new sawblade ensure the blade and flanges are clean. This
prevents wobbling of the sawblade.
Never forget, after the saw spindle nut has been tightened, to remove the locking pin from the pulley
before starting up the motor.
ATTENTION:
Only saw blades with a diameter of 300 to 400 mm may be placed on the machine.
The use of HSS saw blades is strongly prohibited, as well as the use of deformed or cracked saw
blades. Only use saw blades in carbide!
Also make sure that the saw blades are always sharp and cut according to the manufact
urer’s
specifications.
WARNING:
All main sawblades which are used on the panel saw must have two additional holes in the sawblade
body, to prevent the sawblade from loosening when the rotation of the saw spindle is stopped by the
brake on the motor.
The two little bolts in the fixed saw spindle flange prevent the saw from coming off and may under no
circumstance be removed.
Fig.9
Use and adjustment of the riving
knife
(Fig.10-11)
The machine is equipped with two riving knives for the use of sawblades from 300 to 500 mm. The
riving knife has to be adjusted in such a way that over its entire length the gap between sawblade and
riving knife does not exceed min.3 mm and max.8
mm.
The riving knife can be adjusted in both vertical and
horizontal direction.
In the upper range, the riving knife must be adjusted
so that the top is between 0 mm and 2 mm below
the highest tooth of the saw blade.
After height adjustment always lock the central bolt
(3) at a torque of 60 Nm. The 4 adjustment screws
(2) are used for the exact setting of the riving knife
in line with the sawblade.
Содержание M500 EL
Страница 6: ...6 General dimensions...


