background image

22

© 2018 Robern, Inc. 701 N. Wilson Ave. Bristol, PA  19007  U.S.A.

800.877.2376      

www.robern.com


Instructions d'installation  / Instrucciones de instalación 

No. de pièce / Pieza n.

°

 209-1231-D Cartesian, Profiles H1   rev. 05/16/18

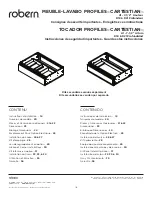
Meuble-lavabo Cartesian™, Profiles™ / Tocador Cartesian™, Profiles™ 

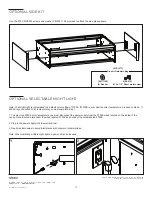
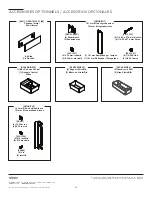
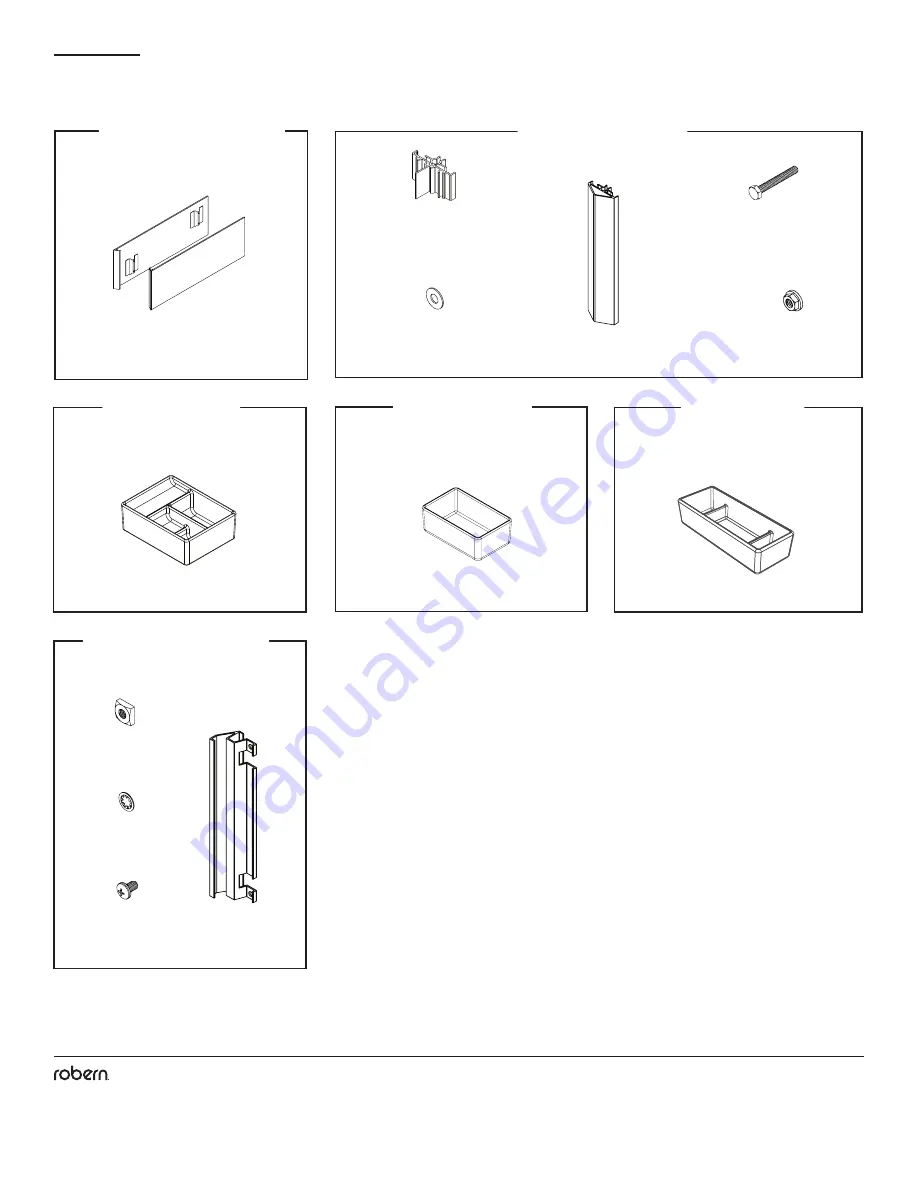
ACCESSOIRES OPTIONNELS / ACCESORIOS OPCIONALES


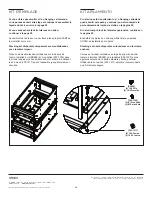
Kit Side

Kit De Lado

[VM(1, 2)SKH1D(18, 21)##]

Panneau latéral 

Panel lateral

 [SS267]

(4) 10-32 écrou

(4)10-32 tuerca

[203-1390]

(4) #10 rondelle 

(4) #10 arandela

[SS268]

(4) Vis 

(4) tornillo

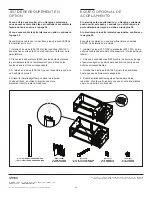
[VMAKITH1]

191 mm Kit de finition Alcove

191 mm Kit de acabado Alcove

[VMGKITH1]

191 mm Kit de regroupement  

191 mm Kit agrupamiento

(1) 191 mm Remplissage / Tampon

(1) 191 mm Rellenador / Paragolpes

[R290-1-462R]

(4) Séparateurs

(4) Espaciadores

[203-1302]

(4) 1/4 -20 x 47.6 mm Boulon

(4) 1/4 -20 x 47.6 mm Perno

[203-1301]

(4) 6.35 mm rondelle 

(4) 6.35 mm arandela

[203-1261] 

(4) 1/4-20 Écrou

(4) 1/4-20 Tuerca

[GLASSBIN6.38]

(1) Bac De Verre Central

(1) Bandeja Central 

Glass 

 [GLASSBIN8.5]

(2) Grand verre BIN

(2) Gran Vidrio BIN

 [GLASSBIN5.25]

(2) Support Verre Bin

(2) Medio de Cristal Bin

Содержание CARTESIAN Series

Страница 1: ...contains information on how to install the 7 1 2 high Cartesian Vanity and Profiles Vanity This series comes in several sizes and variations Electrical option s may be provided with your vanity s The...

Страница 2: ...bern Price Book for a complete list of model numbers MODEL NUMBERS Model Numbers V M 24 H1 D21 P L V Vanity 12 12 1 8 308 mm 24 24 1 8 613 mm 30 30 1 8 765 mm 36 36 1 8 918 mm H1 7 5 191mm H2 15 381mm...

Страница 3: ...2 Screw 203 1317 4 10 32 Nut 203 1270 T 30 Driver 203 1390 4 10 Washer 203 1256 4 5 16 x 2 1 2 Structural Bolt SS268 4 10 32 Screw 1 12 24 30 or 36 frame 30 shown here 1 Drawer front 1 Drawer front 24...

Страница 4: ...nity OPTIONAL ACCESSORIES Side Kit VM 1 2 SKH1D 18 21 Side Kit SS267 4 10 32 Nut 203 1390 4 10 Washer SS268 4 10 32 Screw VMAKITH1 7 1 2 Alcove finishing kit VMGKITH1 7 1 2 Ganging kit 1 7 1 2 Filler...

Страница 5: ...1 2 34 1 2 572 mm 724 mm 876 mm 12 1 8 24 1 8 30 1 8 36 1 8 308 mm 613 mm 765 mm 918 mm 12 1 8 24 1 8 30 1 8 36 1 8 308 mm 613 mm 765 mm 918 mm 24 1 8 30 1 8 36 1 8 613 mm 765 mm 918 mm 24 1 8 30 1 8...

Страница 6: ...Profiles H1 rev 05 16 18 Cartesian Vanity and Profiles Vanity 2 51 mm 2 x 10 Side view showing blocking location in wall Backing material height Frame height Backing material location Plumbing install...

Страница 7: ...nity and requires electrical outlets The night light has no switch It is recommended that you switch the outlet to operate the night light Locate the switch near the doorway to the bathroom All applic...

Страница 8: ...ly Do not unpack them until the room is safe from hazards If you are ganging and or stacking vanities see pages 10 11 1 Mark the height for the vanity frame install on the finished wall Fig 1 2 Instal...

Страница 9: ...4 The left keyhole is elongated to allow for up and down adjustment 5 Install the four Structural Screws 203 1256 into the four top frame holes Fig 5 A T 30 Torx Bit is provided If the wall is bowed...

Страница 10: ...r front on page 15 If you purchased the optional side kits continue to page 13 For the optional Alcove Kit continue to page 12 Assemble frames on a clean level surface BEFORE installing on the wall St...

Страница 11: ...nue to page 12 Assemble frames on a clean level surface BEFORE installing on the wall 1 Install 4 bolts 203 1302 and 4 washers 203 1301 into the square holes near the top and bottom edge of the side p...

Страница 12: ...Installations Requiring extra fillers Two Alcove Kits VMAKIT are used in place of side kits when installing the vanity into an alcove Each Alcove kit adds 3 8 to the overall nominal width of the vanit...

Страница 13: ...to a default color setting of 2700K If 2700K is your desired color temperature proceed to step 2 If 4000K is your desired color temperature you must complete step 1 1 To select the 4000K color temper...

Страница 14: ...rtesian Vanity and Profiles Vanity DRAWER INSTALLATION 1 Lay the drawer onto the drawer slides as shown Fig 1 2 Push the drawer in until an audible sound a series of clicks is heard on each side Fig 2...

Страница 15: ...05 16 18 Cartesian Vanity and Profiles Vanity GLASS DRAWER FRONT Install the counter top and plumbing before installing the glass drawer front 1 Thread the screw and washer through the holes inside t...

Страница 16: ...th vertically and horizontally Once aligned tighten the screws When working with multiple drawers do this step on all drawer fronts before proceeding 2 Fine adjustments can be done with the adjustment...

Страница 17: ...e warranty is void in the event the product is damaged in transit or if damage or failure is caused by abuse misuse abnormal usage faulty installation damage in an accident improper maintenance or any...

Страница 18: ...lation du cadre 26 27 Kit d empilage 28 Jeu de regroupement en option 29 Alc ve et Corner Installations 30 Kit lat raux en option 31 Installation du tiroir 32 33 34 Utilisation et Entretien 35 Garanti...

Страница 19: ...vabo install es ne peuvent pas tre retourn es Si vous prouvez de la difficult avec votre meublelavabo veuillez contacter soit votre marchand ou contactez directement Robern Garantie limit e d une dur...

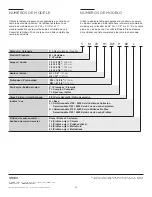
Страница 20: ...ulte la Robern Precio Reserva para obtener una lista completa de los n meros de modelo V M 24 H1 D21 P L V Meuble lavabo Tocador 12 12 1 8 308 mm 24 24 1 8 613 mm 30 30 1 8 765 mm 36 36 1 8 918 mm H1...

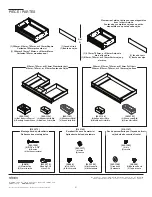
Страница 21: ...4 10 32 tornillo 1 304mm 610mm 762mm or 914mm Rep re Cartesian 762mm pr sent s ici 1 304mm 610mm 762mm or 914mm Marco Cartesian 762mm muestran aqu 1 face de tiroir 1 frente de caj n 1 face de tiroir 1...

Страница 22: ...32 tuerca 203 1390 4 10 rondelle 4 10 arandela SS268 4 Vis 4 tornillo VMAKITH1 191 mm Kit de finition Alcove 191 mm Kit de acabado Alcove VMGKITH1 191 mm Kit de regroupement 191 mm Kit agrupamiento 1...

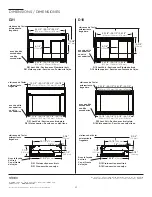
Страница 23: ...724 mm 876 mm 12 1 8 24 1 8 30 1 8 36 1 8 308 mm 613 mm 765 mm 918 mm 12 1 8 24 1 8 30 1 8 36 1 8 308 mm 613 mm 765 mm 918 mm 24 1 8 30 1 8 36 1 8 613 mm 765 mm 918 mm 24 1 8 30 1 8 36 1 8 613 mm 765...

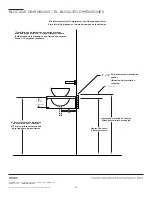
Страница 24: ...du blocage dans le mur Vista lateral de bloqueo en la pared que muestra la ubicaci n Hauteur du mat riau de soutien Altura del material de respaldo Hauteur du cadre Altura del marco Emplacement du mat...

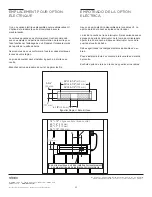
Страница 25: ...votre r gion La prise de courant peut s installer gauche droite ou au centre Branchez option de lumi re de nuit et de g rer les fils Hay una opci n el ctrica disponible para tocadores H1 La opci n de...

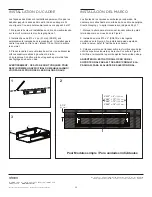
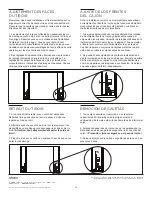
Страница 26: ...permet de faire des r glages de haut en bas AVERTISSEMENT CES VIS NE SONT CON UES POUR SERVIR COMME UN APPUI FINAL DU MEUBLELAVABO VOIR PAGE 25 POUR FIXER LES BOULONS FINAUX Los frentes de los cajone...

Страница 27: ...n cessaire caler le bas l intersection trame lat rale comme indiqu sur la figure 6 7 Installez deux 10 x 2 po 50 mm SS674 travers la fente mince de l orifice sur le rebord comme le montre le graphiqu...

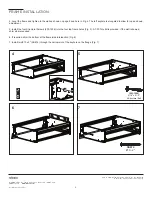
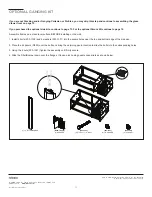
Страница 28: ...rondelles 203 1390 dans les trous les plus proches du bord avant et arri re En utilisant les 4 crous 203 1317 serrer l ensemble jusqu fermement s curis Si usted no est de apilamiento y o Ganging carte...

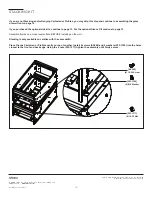
Страница 29: ...Glisser le remplissage Tampon dans les rebords Si elle est l che en utilisant l aiguille nez pince pincement comme indiqu ci dessous Si usted no est de apilamiento y o Ganging cartesiana puede omitir...

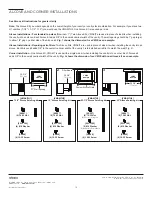
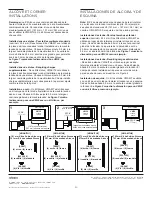
Страница 30: ...naci n pila Por ejemplo si se apilan dos tocadores H1 191 mm 191 mm 381 mm se usar a el VMAKITH2 Se requiere un kit de alcoba por lado Instalaciones de alcoba Para los tama os est ndar superior nomina...

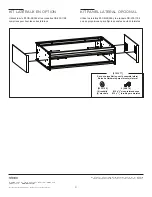
Страница 31: ...es KIT LAT RAUX EN OPTION KIT PANEL LATERAL OPCIONAL Utilisez les vis 8 CB SS269 et les rondelles CB 203 1198 comprises pour fixer les verres lat raux Utilice los tornillos 8 CB SS269 y la arandela CB...

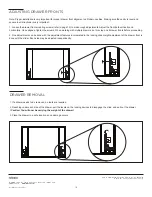
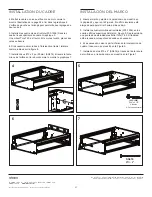
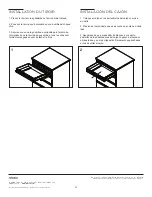
Страница 32: ...indiqu 2 Poussez le tiroir jusqu entendre un son audible de chaque c t 3 Assurez vous que la goupille de verrouillage l arri re du tiroir glisse dans le tiroir des deux c t s et que les clips sont fer...

Страница 33: ...ir en verre 1 Enfilez la vis et la rondelle travers les trous dans le tiroir l avant du verre 2 Installez les bouchons vis comme le montre la figure 2 Instalar la encimera y las tuber as antes la inst...

Страница 34: ...s las direcciones es muy importante 1 Los ajustes aproximados se realizan aflojando los tornillos de montaje del frente del caj n y ajust ndolos cuando el caj n est bien alineado Consulte los tornillo...

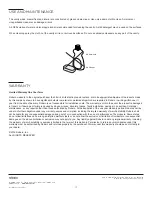
Страница 35: ...st recommand pour nettoyer la meublelavabo Un d tergent doux peut tre utilis sur des surfaces Lors du nettoyage vaporiser le tissu pas les surfaces meuble lavabo miroir ou surround Ne pas utiliser de...

Страница 36: ...antie doit tre autoris e par Robern et la marchandise doit tre retourn e frais de poste pr pay s par l acheteur Les r clamations sous cette garantie doivent tre transmises directement votre marchand R...

Отзывы: