background image

MAN 

TGA XXL 

41.660 8x4/4

No. 3301

Assembly and operating instructions

Montage- en gebruiksaanwijzing


Содержание MAN TGA XXL 8x4/4

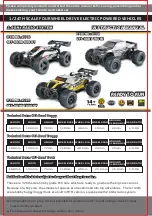
Страница 1: ...MAN TGA XXL 41 660 8x4 4 No 3301 Assembly and operating instructions Montage en gebruiksaanwijzing...

Страница 2: ...2...

Страница 3: ...tructions 1 Cyano acrylate glue cyano Use cyano for these joints 2 Grease tube Use grease robbe No 5532 at these points 3 Loctite Use Loctite medium strength thread lock fluid robbe No 5074 at these p...

Страница 4: ...3 2 and one fur ther ballrace 3 1 onto each of the half shafts 3 3 Insert the prepared half shaft assemblies in the differenti al 3 4 and engage the circlips 3 5 Screw the bevel gear 3 6 to the diffe...

Страница 5: ...ith Teflon grease and attach the backplate 7 5 to the housing Assemble the motor 7 6 and the gearbox assembly inclu ding the motor mount 7 7 and fix the parts together using the socket head screws 7 8...

Страница 6: ...painting E F Prepare the dummy equipment control console 10 31 and air dryer 10 33 10 34 for installation on the right hand side of the frame as seen from the rear These parts are fitted to the under...

Страница 7: ...ders but do not glue them the final positi on of the mudguards can only be established once the whole driver s cab sub assembly has been installed and the parts are aligned accurately Glue the dummy r...

Страница 8: ...ed here Use cyano for all glued joints but plea se note that this must be applied sparingly to avoid excess adhesive soiling the surface of any parts already painted In most cases small drops of glue...

Страница 9: ...terests of clarity various components are not shown in this drawing To permit the driver s cab to tip forward it must be connected to the front tipping brackets 6 13 on the ladder frame and the pivot...

Страница 10: ...premature wear and damage to the motor and gearbox and also provides longer run ning times CAUTION The receiver draws its current from the drive batteries If the battery capacity is inadequate you ma...

Страница 11: ...or komen dat het in kogel of glijlagers terecht komt Loctite eventueel in de gaten aanbrengen Algemene aanwijzingen om te lakken Aanbevolen kleurtinten Grondverf grijs 400 ml Transparante lak 400 ml H...

Страница 12: ...eflonvet smeren De tweede ashelften aanbrengen en met parkers 3 13 en 3 14 vastschroeven As nr 4 De voorgemonteerde differentieeleenheid 3 1 tot 3 7 in de ashelft 3 8 aanbrengen De kogellager 3 10 en...

Страница 13: ...pte van het inschroeven Bouwfase 8 1 montage van de spatborden en de chassi safsluiting Aanwijzing voor de verduidelijking van de montage is de complete achteras nr 4 uit de tekening weggelaten De ach...

Страница 14: ...voorkant stevig op de drie hoeksteunen van de toren lijmen I Om de dieseltank overeenkomstig de bevestigingsgaten in de toren demonteerbaar te bevestigen moeten de delen als volgt bewerkt worden Het...

Страница 15: ...ts hebben uitgewezen dat het beter is als deze delen beweegbaar blijven De registerkoppelingseenheid met de schroeven 12 20 aan de bumper schroeven De komplete bumper met de schroeven 12 22 en de rin...

Страница 16: ...gemaakt worden van transparante contactlijm of transparante epoxylijm Let op de ramen van de deuren moeten van binnenuit aangebracht worden Spiegels en wissers De spiegeldelen 12 70 tot 12 73 zoals aa...

Страница 17: ...m de jui ste positie te verkrijgen van de aanbouwdelen Alle aanbouwdelen uitrichten daarna alle nog niet vastge draaide schroeven voorzichtig vastdraaien Ter afsluiting de stickers aanbrengen Functiet...

Страница 18: ...en hoofdschakelaar of stekkerverbinding naar de rijaccu losnemen dan de zen der uitschakelen Onderhoud Maak het model na ieder gebruik zorgvuldig stofvrij met een kwastje Let hierbij in het bijzonder...

Страница 19: ...19...

Страница 20: ...or written approval of robbe Modellsport GmbH Co KG Fouten en technische veranderingen voorbehouden Copyright robbe Modellsport 2007 Kopie en nadruk ook gedeeltelijk alleen met schriftelijke toestem m...

Отзывы: