Arduino
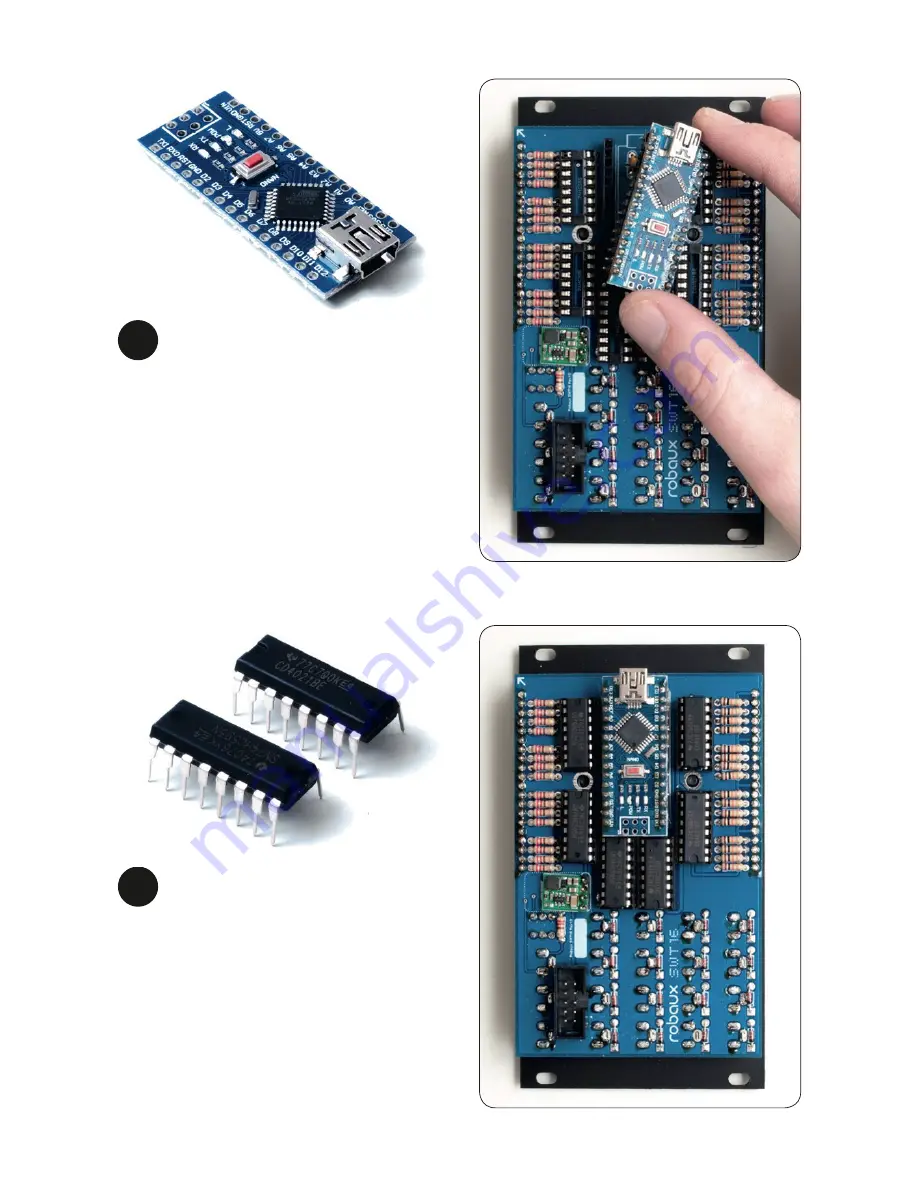
Now plug the Arduino board
onto the headers as shown
in the picture. Note that the
USB connector should point
upwards.
24
ICs
Now insert the ICs into the so-
ckets. Be sure to attach them in
the correct direction as shown
in the picture.
Voilà - your SWT16 is ready!
25