background image

6

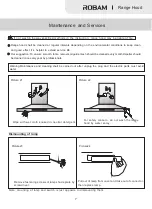
Switch off the plug in case of no time no use

.

Picture


20

Picture


19


Pull


out


the oil cup


and


discharge


the


waste


oil

.

Picture


16

Picture


18

Picture


17

  After


ensuring


power


is


on

lightly


touch

 "

Light

key


by


finger

its


lamp


turns on


and


press

 "

Light

key


again

its


lamp


goes


out

.(

Lighting


lamp


turns

off

)

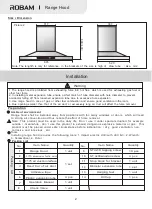
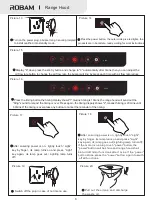
  Press the timing button,the timing display shows"1",means timing is 10mins,the range hood will send out the 
"Ding" sound to remind the timing is over.Press again ,the timing dispaly shows "2",means thiming is 20mins,until
 60mins.If the timing is over,press any button to cancel the reminder of the timing.

  Display "6" when press the stir-fry button and change to "3" automatically after 3mins,then you can adjust the

 air flow rate button to change the air flow rate ,the buzzer will ring by press each time with air flow rate reduce

.

Picture


15


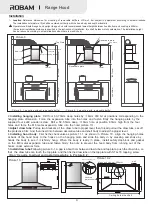
key by finger, its lamp turns on and press "Light" 
key again, its lamp goes out(Lighting lamp turnsoff);
If the motor is running,touch "power"button,the 
"power"button will be shine and range hood shall 
be turn off motor functions after 1 mins.If the “power"
button shine,press the "power"button


again to swith

 off all functions.

After ensuring power is on, lightly touch "Light" 

A822

A822


Range Hood

Picture


13

Picture


14

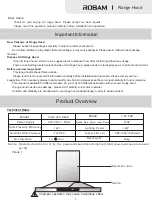
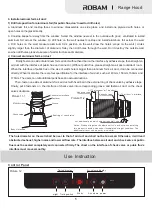
Turn on the power plug, a buzzer rang 3 sound prompted
 to install qualified, into standby mode.


Press the power button, the outer circle give red lights, the 

products are in boot state, ready, waiting for work instructions.

Содержание CXW-200-A822

Страница 1: ...A822 Operation Manual Range Hood CXW 200 A822...

Страница 2: ...CONTENTS 1 Important Information 1 2 Product Overview 1 3 Installation 2 4 Use Instruction 5 5 Maintenance and Services 7 6 Circuit Diagram 9 7 General Troubleshooting 9...

Страница 3: ...assist us to dispose so as to protect environment Before use new range hood This range hood exhaust fume outside Please read this manual and all information carefully before installation and operation...

Страница 4: ...4 3 2 Range Hood Plastic expansion tube Operation Manual Check Valve 1 unit 4 pcs 1 unit ST 4x18 tapping screw 10 pcs 175 aluminum foil s duct ST 4x60wooden screw 4 pcs 13 14 Stop block for bracket 1...

Страница 5: ...e hood outside because the smell from building material dust painting coating material may cause rust We suggest users to install range hood after decoration Don t allow to install range hood on the w...

Страница 6: ...e the expansion tube into the holes and fasten firmly the hanging plate by the supplied four 4x60 wooden screw Drill a 50 55mm deep 10mm hole at position 65mm high from the four holes and force the M6...

Страница 7: ...foil s air duct when installing this product to avoid noise under incompletely straight condition The additional air duct can be cut by wire cutter Check valve Body of machine Seal ring of check valve...

Страница 8: ...fry button and change to 3 automatically after 3mins then you can adjust the air flow rate button to change the air flow rate the buzzer will ring by press each time with air flow rate reduce Picture...

Страница 9: ...itch is just opposite to dismounting them If not wash in the way specified methods in the instruction range hood may be liable of fire Range hood shall be cleaned at regular intervals depending on the...

Страница 10: ...raw tube from the decorative tube 4 Remove the cover plate after screwing off the fastening screws by Philips screwdriver 5 Remove the baffle ring after screwing off its fastening screws 6 Screw off c...

Страница 11: ...s used at the same time as appliances burning gas or other fuels Do not flambe under the range hood Regulations concerning the discharge of air have to be fulfilled This appliance is not intended for...

Страница 12: ...Edition A 1...

Отзывы: