WWW.RSIWW.COM
38 of 45
8.8A
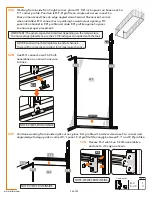
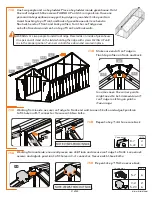
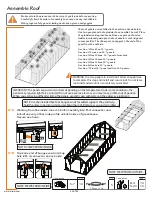
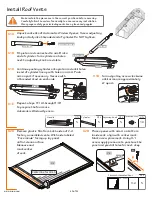
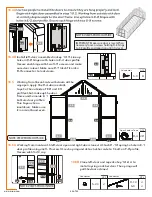
Continue working from back to install section seven.
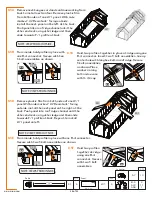
Remove plastic film from both sides of one W-1
panel. With side marked “ UV Resistant”
facing outside, install next panel at
slight angle on left. If necessary,
loosen the previous B-4
connector and profile and
move them towards the
back of the greenhouse
to make more room
to fit panel in place.
W-2
W-2
W-2
W-2
W-2
W-1
NOTE: VIEWS FROM OUTSIDE.
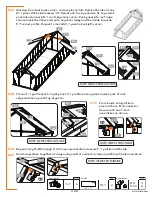
NOTE: VIEWS FROM OUTSIDE.
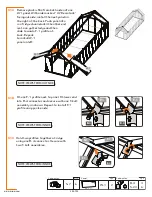
NOTE: VIEWS FROM OUTSIDE.
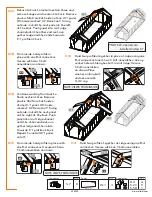
NOTE: VIEWS FROM OUTSIDE.
NOTE: VIEWS FROM OUTSIDE.
NOTE: VIEWS FROM OUTSIDE.
W-2
5
Panel
QTY
24” x 32
¼”
W-1
1
Panel
QTY
24” x 57”
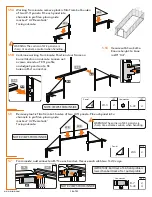
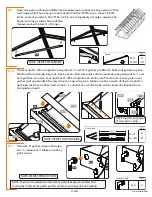
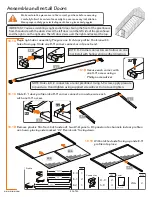
8.8D
Remove plastic film
from both sides of
second W-2 panel and
repeat step 8.9B to
install in fouth section
from back left.
F-1
F-1
F-1
W-1
W-2
F-1
F-1
F-1
W-1
W-2
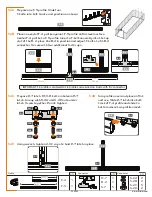
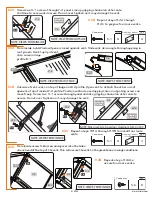
8.8B
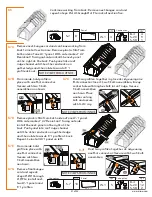
Remove plastic film from both sides of one W-2 panel. It will be
installed opposite the W-1 panel installed in 8.9A. From
outside position panel with extended ledge profile at outside
top. Install panel at slight angle sliding all the way into profile.
Fit other end into opposite profile. If necessary apply slight
pressure to bend panel and snap into place.
F-1
F-1
F-7
W-1
W-2
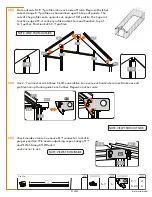
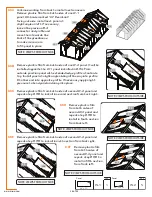
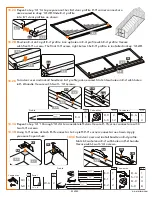
8.8f
Remove plastic film
from both sides of
second W-2 panel and
repeat step 8.9B to
install in fifth section
from front left.
F-1
F-1
F-1
W-1
W-2
8.8c
Remove plastic film from both sides of second W-2 panel and
repeat step 8.9B to install in second section from back right.
8.8e
Remove plastic film from both sides of second W-2 panel and
repeat step 8.9B to install in sixth section from back right.
F-1
F-7
F-1
W-1
W-2

