Check for parts online at
www.HuntRiversEdge.com
or call 800-345-6007 M-F 8-5
22
Operator's Manual
LOCKDOWN WIDE Ladder Stand
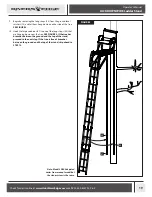
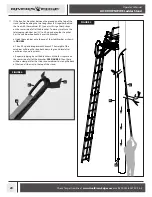
14. Once the straps (55) and carabiner (57) are all the way up the back
of the tree, unhook the tether rope (56) from the two long straps
(55) and set aside. The tether rope can later be used as a haul line
to pull your gear up into the stand. Feed the straps down through
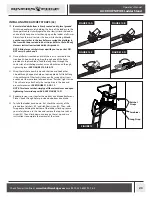
the ladder ratchets (28) and ratchet a few cranks just to hold
the straps in place.
SEE FIGURES 9 A-D
for proper use of ladder
ratchets. Do not fully ratchet the straps tight yet.
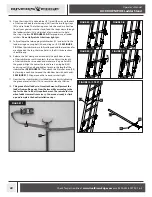
15. Fully collapse the telescoping stabilizer bar (22) and install to the
ladder using one wing bolt (34) and wing nut (33).
SEE FIGURE
10.
When the stabilizer bar is fully collapsed and the lever handles
are aligned on the top, the three holes in the first three sections
should line up.
16. Release the first clamp and extend only the bark-biter section
of the stabilizer bar until it contacts the tree. Adjust the length
of the stabilizer bar as needed and make sure it is parallel with
the ground. Align the nearest hole and insert a wing bolt (34)
and wing nut (33) and hand tighten to secure the length of the
stabilizer bar.
SEE FIGURE 10.
Then attach the 8’ ratchet strap (54)
by forming a cinch knot around the stabilizer bar with both ends.
SEE FIGURE 11.
Wrap around the tree and ratchet tight.
17. Now that the stabilizer bar is installed, you can finish tightening
the ground level ratchets (28) to secure the stand to the tree.
18. This ground level ladder-to-tree attachment will prevent the
ladder from pulling away from the tree while ascending to the
top for the final ratchet strap attachment. The same holds true
when ladder removal is necessary. You are now ready to climb
up and complete the final installation steps.
FIGURE 9-A
FIGURE 9-B
FIGURE 9-C
FIGURE 9-D
FIGURE 11
22
54
22
34
33
33
34
FIGURE 10 / STEP 15

