


29
Dedicated Equipment
VALEZUS T2100 User’s Guide
Remove printouts from the Double Tray Stacker.
There are two ways of removing the printouts.
■
When removing printouts with the
carriage
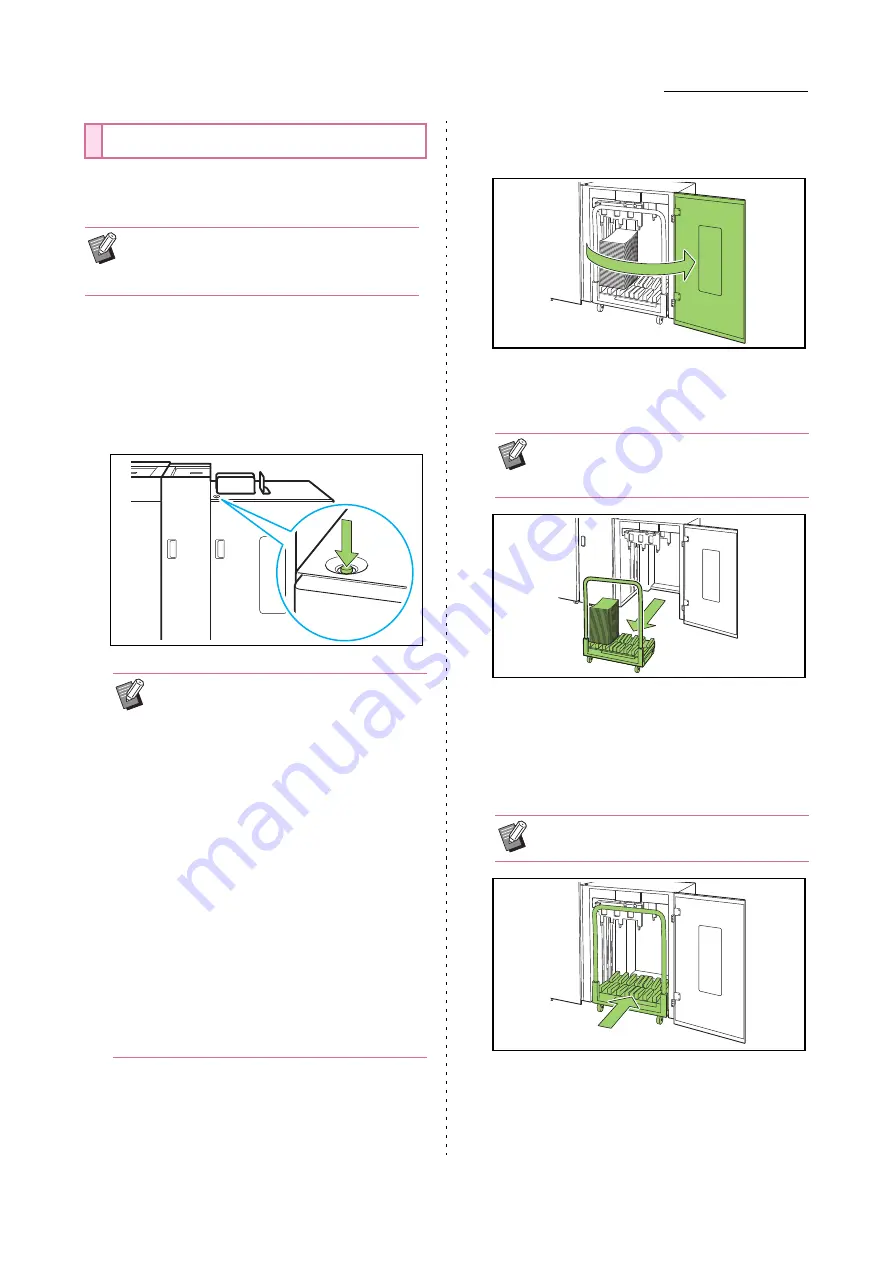
1
Press the stacking tray descent
button.
2
Open the right cover of the Double
Tray Stacker.
3
Pull out the carriage along with the
stacking tray on it.
4
Remove printouts from the carriage.
5
Return the carriage to the Double
Tray Stacker.
Removing Printouts
•
You can remove printouts by opening the right
cover of the stacker that is not operated while
the other stacker is operated.
• Press the stacking tray descent button in a
state where the covers on both sides of the
stacker are closed. The stacking tray will
not operate if the covers are open.
• The stacking tray will be automatically
lowered to bottommost position after it
outputs approximately 3,200 to 4,000
sheets of paper (at full capacity).
• Once printing has ended, the stacking tray
will be automatically lowered to a position
configured by the administrator. To change
the position to which the stacking tray is
lowered, contact your administrator.
• If you accidentally press the stacking tray
descent button while printing, be sure to
remove the printouts. In a state where
printouts exist on the tray, the unit will not
be capable of raising the stacking tray to
the position for output.
• Slowly pull out the carriage while holding
its handle. Abruptly moving the cart may
cause the printouts to collapse.
• Be sure to return the carriage in a state
where the stacking tray has been set.
Содержание VALEZUS T2100
Страница 1: ...User s Guide VALEZUS T2100 T2_UG EN_05...
Страница 7: ...5 VALEZUS T2100 User s Guide...
Страница 43: ...41 Consumables VALEZUS T2100 User s Guide...
Страница 54: ...52 VALEZUS T2100 User s Guide...
Страница 55: ......
Страница 56: ...Copyright 2021 RISO KAGAKU CORPORATION Please contact the following for supplies and service 2021 2...


