background image


27 


V 1.0 

The monitor appears 
blank or the screen is 
too dark. 

Adjust the screen contrast using the buttons on the 
front panel of the computer monitor. Should problems 
persist, contact the Customer Support Center. 

Mouse is not working.  1.


Check if the mouse is properly connected to the 
PS/2 port located at the rear of the monitor. The 
USB cable must be connected to the USB port.   

2.


This can occur when there is a problem with the 
mouse device administrator. Click [Start]-[Control 
panel]-[Performance and maintenance]-[System] 
and then click on [Device administrator]-[Mouse 
and other pointing devices] in ‘hardware’ tab. 
Remove the mouse item and restart the computer.   

Keyboard is not 
working. 

1.


Check if the keyboard is properly connected to the 
PS/2 port located at the rear of the monitor. The 
USB type must be connected to the USB port.   

2.


When the system is down, this may occur. Restart 
the computer and check whether the keyboard is 
working. 

USB device is not 
working. 

1.


If the USB device manufacturer provides the 
driver, install the driver first and restart the 
computer. 

2.


Disconnect the USB device and then reconnect it 
and check if it works properly. (Re-execute the 
plug-and-play functionality) 

3.


This may be caused if the system fails to read the 
USB device or USB device administrator, restart the 
computer and check if it works properly.   

4.


To check if there is the problem with the USB 
device, try connecting it to another computer. If it 
works fine with the other computer, contact the 
Customer Support Center. 

Unable to shut off the 
computer. 

This could stem from a number of reasons. First, turn 
off the computer by pressing the power button for 
more than four seconds. If this does not work, unplug 

Содержание RS-2917 series

Страница 1: ...V 1 0 All In One 17 TFT LCD Panel PC RS 2917 series User s Guide Version A1 0 Users guide Ver A1 0 Sep 2007...

Страница 2: ...back ups at all times Even though we did our best in drawing up this user s guide there may be omissions and errors we failed to notice Manufacturers and suppliers cannot be held liable for problems s...

Страница 3: ...ot place heavy things on it z To prevent electric shock and fire do not use an outlet that is damaged or that is not standard z If you plug the power cord into an extension cord be sure that the total...

Страница 4: ...is product z Take precautions to avoid losing data stored on the hard disc of this PC and back up important data at all times in case of an unforeseen accident z Do not attempt to disassemble this pro...

Страница 5: ...Chapter 3 Starting up the computer for the first time 11 For Windows XP Home Edition 11 Step 0 Windows XP and basic driver pre setup 11 Step 1 To set up the computer 12 Step 2 The installation of dri...

Страница 6: ...vi V 1 0 Appendix 3 Product warranty 33...

Страница 7: ...vii V 1 0...

Страница 8: ...four built in USB ports compatible with USB v2 0 The PC enables wireless networking without additional equipment using its built in network adaptor The PC s 17 TFT LCD display directly driven by digi...

Страница 9: ...e for backup Optional devices Software A touch screen is optional and you can order it before the product is shipped To enable touch screen you need to have the following device PS 2 mouse PS 2 keyboa...

Страница 10: ...ices compatible with USB 2 0 9 External speakers headphones 9 External microphones 9 External audio devices 9 External monitors For reference z What is USB USB is a high speed serial bus standard for...

Страница 11: ...er on and off z Buttons for adjusting the screen contrast Up Down Adjusts the contrast of the TFT LCD display z Buttons for adjusting the speaker volume Up Down Adjusts the sound volume of the interna...

Страница 12: ...tion port Icon Connections PS 2 mouse connection PS 2 keyboard connection USB device 1 2 connection 10 100 1000 Mbps network LAN cable connection USB device 3 4 connection Printer cable connection Fou...

Страница 13: ...6 V 1 0 Install Power Adapter Step 1 Insert power cord into power adapter 2 Insert power adapter cable into Power Adapter Input of rear panel 3 Insert power cord into AC power socket...

Страница 14: ...SEL1 2 3 short Battery for CMOS JBAT1 Power Switch Option J1 and SW1 JCFSEL1 1 2 short CF is Master 2 3 short default CF is Slave BIOS Setting When use CF card please press Ctrl Alt Del into BIOS setu...

Страница 15: ...nverter Voltage Switch J2 Internal USB Jumper Pin USB1 USB2 JP2 1 2 short default 5V 2 3 short 3 3V J2 1 2 short default Power on 1 2 open Power off 5V for 17 Panel 3 3V for 15 Panel This jumper pin c...

Страница 16: ...9 V 1 0 COM4 Select for RS232 485 422 JCSEL1 JCSEL2 JCSEL1 RS232 RS485 RS422 1 3 3 5 3 5 2 4 4 6 4 6 7 9 9 11 9 11 8 10 10 12 10 12 JCSEL2 RS232 RS485 RS422 1 2 3 4 5 6 JCSEL1 JCSEL2...

Страница 17: ...LED Color Green CF MD Card Reader 1 Compact FlashTM CF Interface Type I Type II 2 Micro Drive Interface MS SM SD MMC Card Reader up to 1GB 1 Memory StickTM MS Memory StickTM Pro MS Pro Interfaces 2 S...

Страница 18: ...s and other optional specifications chosen by the user before shipping The following is a list of operating systems and basic driver files that are pre setup z Microsoft Windows XP Home Edition z VIA...

Страница 19: ...r s guide that comes with the purchase of this PC and select Next 5 A dialog box will appear asking you to designate a computer name Enter a computer name and computer description in the blanks and cl...

Страница 20: ...er and press Next To proceed to the next step you have to enter at least one name 10 When a dialog box that reads Thank you pops up this means the basic setup is complete Press Finish to reboot your c...

Страница 21: ...ion devices USB devices and game consoles MIDI devices install the appropriate software e g utilities or other applications provided by the manufacturer of the device following the instructions displa...

Страница 22: ...t Windows XP Home Edition s Help and Support Center provides the following information on a variety of features and other basic operations of Windows XP Home Edition z What s new in Windows XP Confirm...

Страница 23: ...d and the system must be reinstalled due to serious damage to the system only drive C needs to be reformatted while data stored in drive D is kept intact without any intervention For the very first ti...

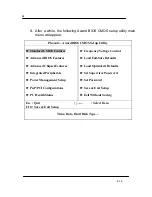
Страница 24: ...ng a new device However if the BIOS CMOS utility setup is wrongly configured a serious system error can take place such as unable to boot the system so be c areful when changing the settings For refer...

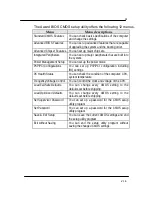
Страница 25: ...s Advanced BIOS Features Advanced Chipset Features Integrated Peripherals Power Management Setup PnP PCI Configurations PC Health Status Frequency Voltage Control Load Fail Safe Defaults Load Optimize...

Страница 26: ...t up PnP PCI configuration including IRQ settings PC Health Status You can check the condition of the computer CPU system temperature Frequency Voltage Control You can control the clock and voltage of...

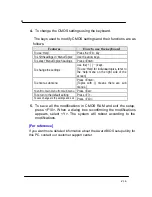
Страница 27: ...menu on the right side of the screen To enter a sub menu Press Enter Topics with means there are sub menus To shift to main menu from sub menu Press Esc To return to the default setting Press F7 To s...

Страница 28: ...to meet the user s growing need s so please upgrade to the latest version for major software that is alr eady installed on this PC on a regular basis at the following sites z Windows XP Home Edition...

Страница 29: ...flash utility program for Windows 1 First download an upgraded BIOS file R68X X BIN and BIOS flash utility program for Windows Flash exe Winflash sys at our Web site For reference You can also find a...

Страница 30: ...23 V 1 0 3 Update BIOS following the instructions displayed on the execution screen and restart the system to reflect the updated BIOS...

Страница 31: ...ve and start up the computer The Windows Setup screen will appear automatically starting the installation 2 Continue installing the Windows XP Home Edition following the instructions displayed on the...

Страница 32: ...or in the Driver Mode Setup menu Here it is possible to set up an output to an external monitor The REALTEK R8110SC LAN driver does not need to be installed since Windows XP provides the same basic fu...

Страница 33: ...disk If it turns out that the hard disk is not being read properly contact the Customer Support Center Error message CMOS checksum error appears when booting This can occur when the motherboard s CMO...

Страница 34: ...ated at the rear of the monitor The USB type must be connected to the USB port 2 When the system is down this may occur Restart the computer and check whether the keyboard is working USB device is not...

Страница 35: ...epeat contact the Customer Support Center The computer suddenly freezes wile in use 1 This may be caused by an error in a program Press Ctrl Alt Del and click on End now on the Windows Task Manager di...

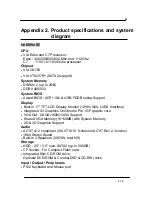
Страница 36: ...ilt in 17 TFT LCD Display Monitor 1280x1024 LVDS Interface Integrated S3 Graphics UniChrome Pro 1GP graphic core VGA Out UXGA 1600x1200 Support Shared VGA Memory 16 64MB with System Memory 2D 3D Graph...

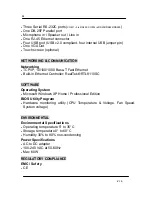
Страница 37: ...TCP IP 10 100 1000 Base T Fast Ethernet Built in Ethernet Controller RealTek RTL8110SC SOFTWARE Operating System Microsoft Windows XP Home Professional Edition BIOS Utility Program Hardware monitoring...

Страница 38: ...31 V 1 0 FCC PHYSICAL CHARACTERISTICS Weight 10 kg Main Body only Height 455 mm Width 425 mm Depth 260 mm WARRANTY 1 year warranty standard MODEL CONFIGURATION Model CPU DDR SDRAM HDD ODD OS...

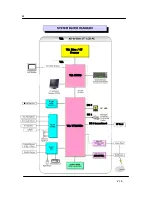
Страница 39: ...0 SiSM661FX 963 Chipset SiS M661FX Internal Garphic Engine SiS 315 SiS 963 South Bridge 3 5 HDD VIA Eden C7 Process VIA VIA CN700 VIA VIA VT8237R 8 4 CF Card IDE 1 master slave IDE 2 IDE 1 10 100 100...

Страница 40: ...ervice period is one year from the date of purchase 3 When requesting repair please show the warranty document to the service representative 4 We do not reissue warranty documents so keep them with ca...

Страница 41: ...se factors are unavoidable find ways to protect the product 2 Please equip with A V R or Power Conditioner with enough capacity for a stable operation 3 If users do not have the warranty document or h...

Страница 42: ...Model Name RS 2917...

Отзывы: