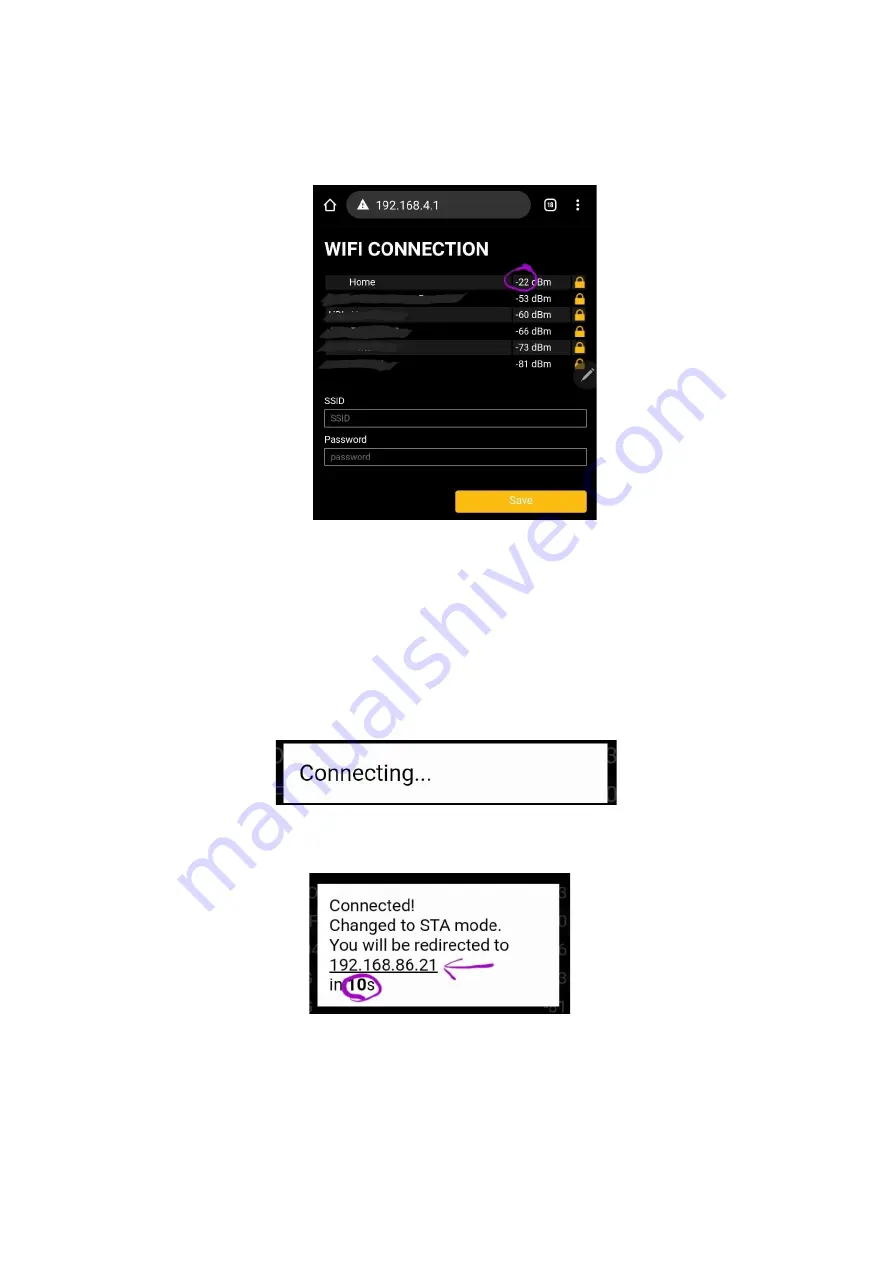
9.
Once the page is loaded (note refresh the page if it does not load the first time or if you
want the RIOT CloudLink to rescan for available home / office WI-FI networks) take note of
the available networks and their respective RSSI (signal strength and quality).
10.
Select the WIFI network that you want the RIOT CloudLink to use and then enter the
password and press the save button.
a.
If there are multiple networks that you are able to use then select the one with the
lowest RSSI (ie the one as high up in the list as possible).
b.
RIOT does not guarantee the operation of the device if the RSSI of the network
selected is worse than 60 dBm. Ask RIOT about its external antenna option for the
CloudLink or consider installing a signal booster closer to the RIOT CloudLink device.
11.
A popup will appear while the RIOT CloudLink is attempting to connect to the selected
home/ office network with the provided credentials.
a.
If successful the pop up will display
“Connected!”, the RIOT CloudLink will turn off its
own WIFI hotspot (ie RIOT_CloudLink_V…
Wi-Fi) and start a 20 second count down.
b.
At this point your mobile phone should now automatically reconnect to the home /
office wifi network.
c.
Please take note of the new IP address that the local home/ office Wi-Fi router has
given the RIOT CloudLink


