8
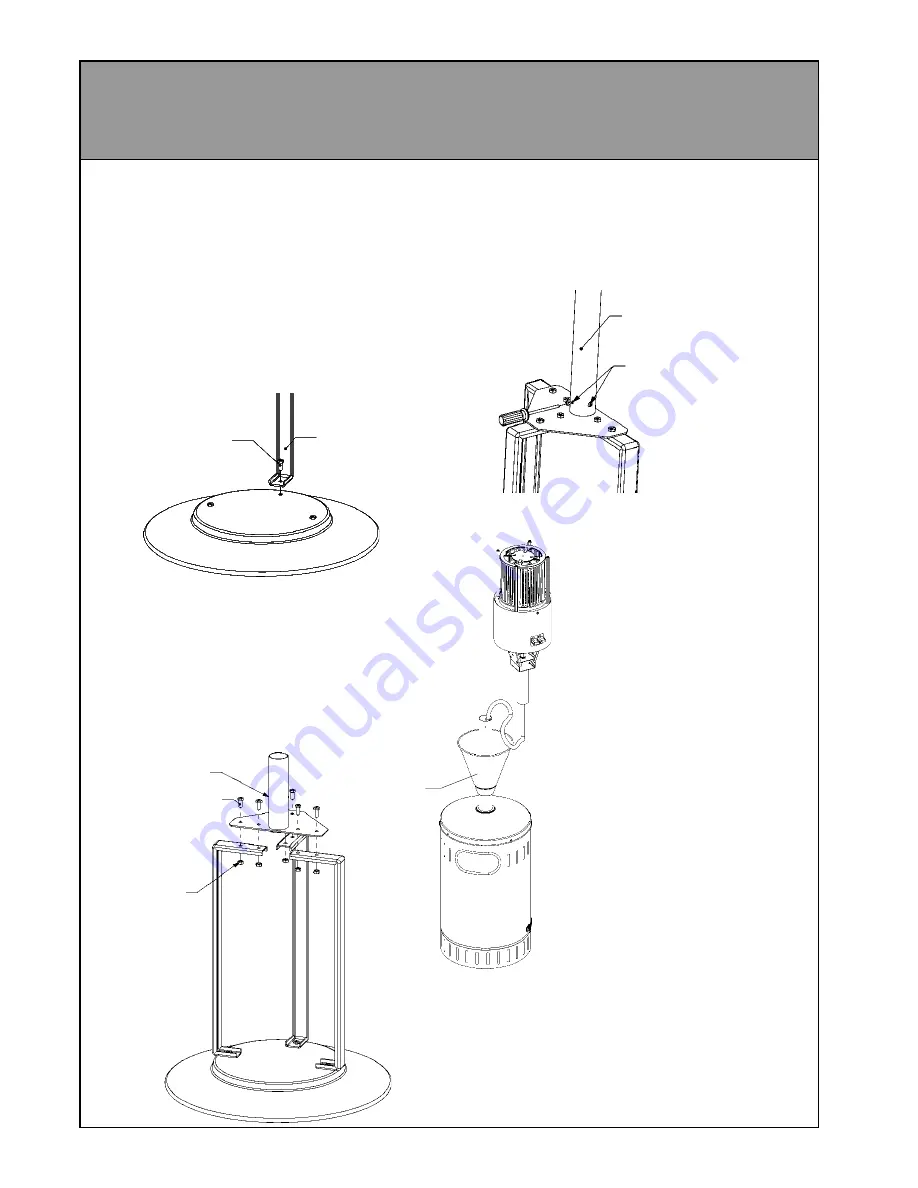
ASSEMBLY CONTINUED
1 Place the base on a flat surface, making
sure that the wheels are folded away
underneath the base.
2 Remove 1 bolt from the base and, using the
same bolt, attach 1 of the legs as shown
(do not re-tighten the bolt fully at this stage)
CAUTION: DO NOT REMOVE MORE
THAN 1 BOLT AT A TIME
3 Once all three legs are in place, attach the
leg flange to the top of the legs using the
M8 x 20 bolts and nuts. You can now fully
tighten the bolts in both the base and the
leg flange.
4 Slide the stainless steel pole over the leg
flange and attach using BOTH self
tapping screws. Take care not to over-
tighten the screws, as this may strip the
threads.
5 Slide the stainless steel
bottle cover assembly over
the pole, then remove the
protective rubber strip from
the end of the burner
assembly spigot tube.
Remove the battery cover
from the burner assembly
and slide it over the pole as
well.
6 Carefully hold the burner
support and feed the gas
supply hose down the pole
until it protrudes through the
leg flange.
7 Slide the burner assembly
spigot tube inside the pole.
You will need to depress the
small silver button on the
back of the spigot tube to
allow the assembly to slide
down fully. (Take care not to
pinch fingers)
8 Once the assembly is
inserted, you may need to
rotate it until the silver button
protrudes from the pole.
M8 x 20 Bolt
Leg
Leg Flange
M8 x 20 Bolts
M8 nuts
Stainless steel
pole
2 x self tapping
screws
Battery cover
Содержание PATIOSSL
Страница 6: ...6 OUTDOOR AREA CONTINUED...


