

4001942_B
Page 2
Copyright © 2017 Rimage
10
Learn more
11
9
How to power off your Allegro 100 system
Test and verify
6
7
Load discs in the system
Install the software and plug in the USB cable
Use QuickDisc™ to run a 3-disc test job to verify that the Allegro 100 system is
operating correctly.
Note:
You can now use Rimage WebRSM™ to adjust the system settings.
8
Answer setup prompts
Your PC may prompt you for alignment and calibration. Follow the prompts
on the screen.
USB 3.0 Port
We recommend always leaving the
main
power switch
on the back of the
system in the “on” position to ensure that the Allegro 100 system is ready
when needed. To power the Allegro 100 off, press the
power button
once.
• These documents are available on the
Rimage Allegro User Guide disc
that shipped with your Allegro 100 system:
Rimage Allegro 100 User Guide
Rimage Product Warranty
Access these documents by placing the
User Guide disc
in the disc drive
of a PC.
Note:
If the User Guide menu does not display automatically, browse to the
Home.htm
file on the
User Guide disc
.
• Please refer to www.rimage.com for the most current versions of all
documents.
•
For information about operating and maintaining the Allegro 100
system, refer to the
Rimage Allegro 100 User Guide
.
•
For additional support and product information, go to
The
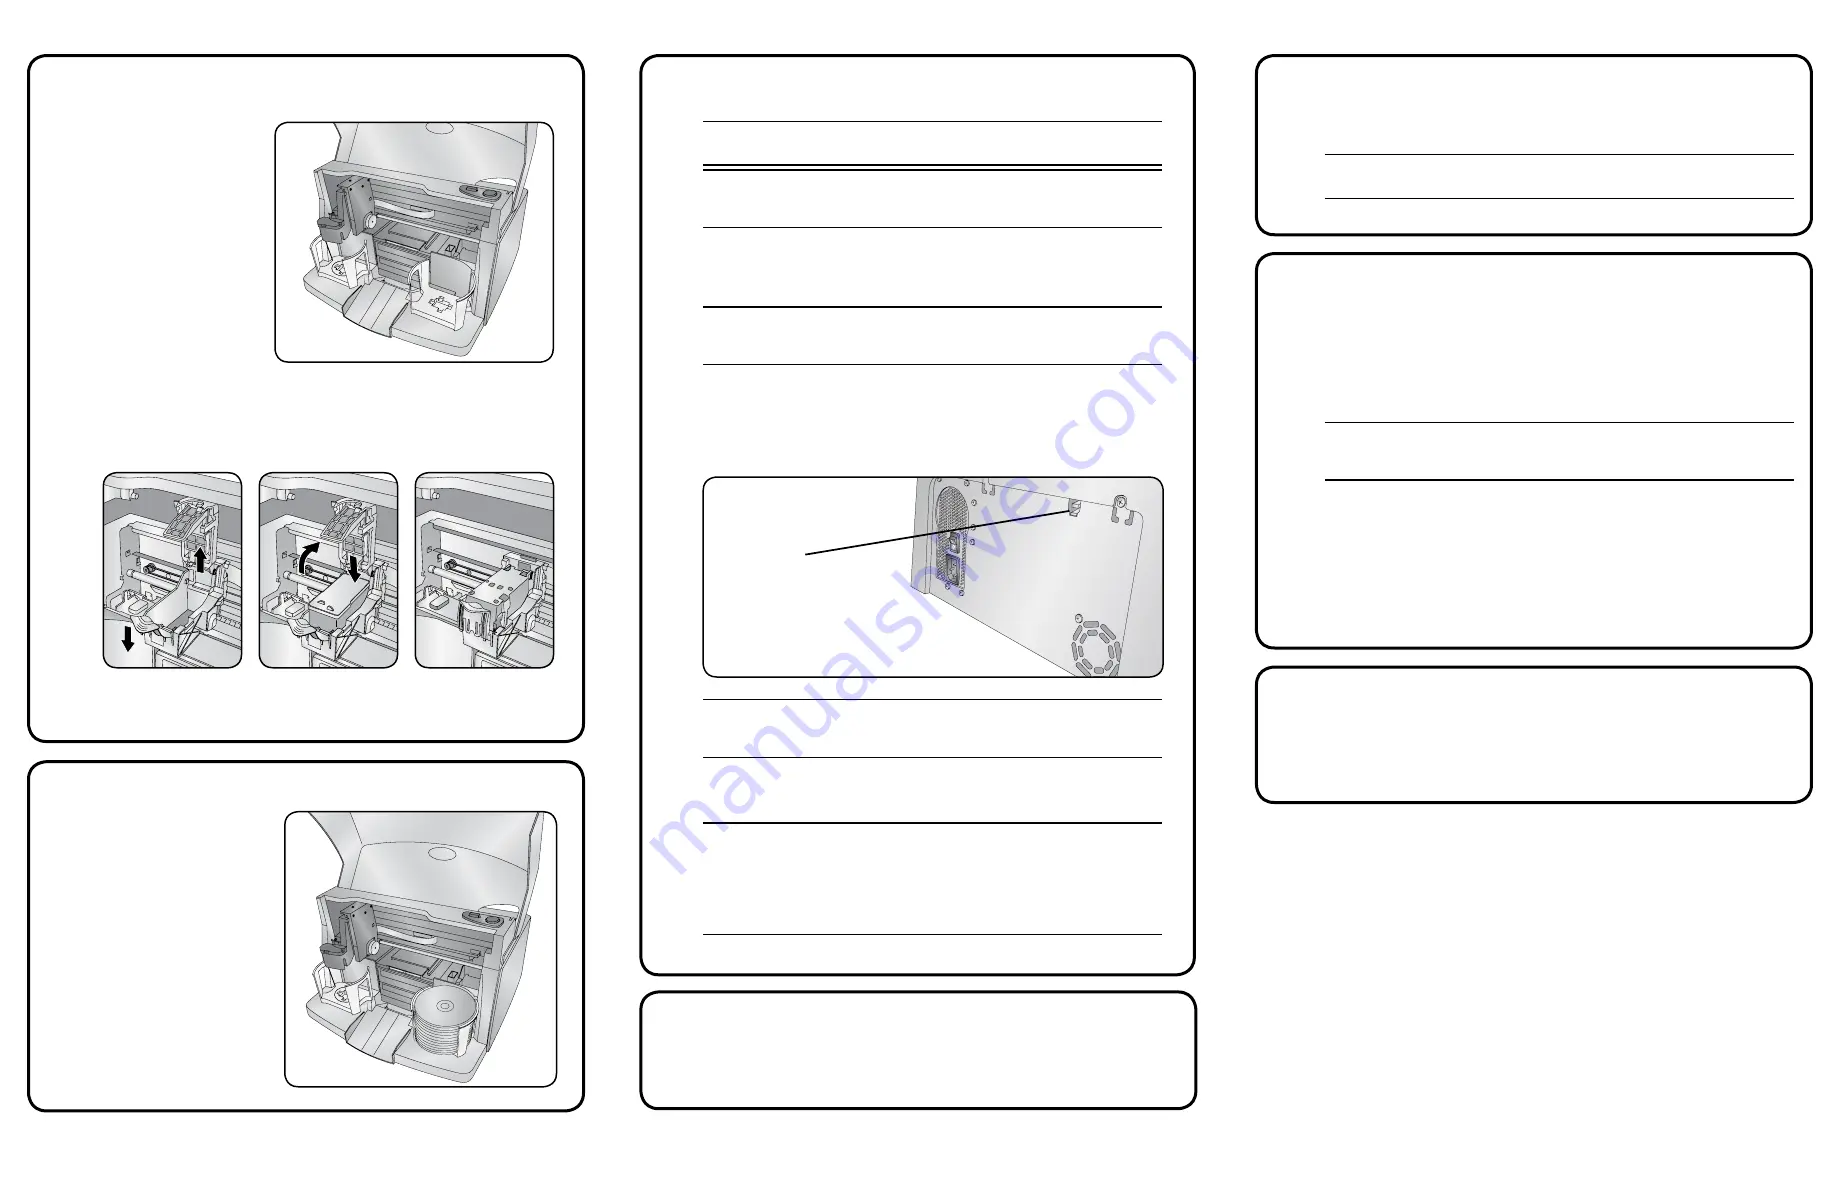
input bins
hold 50 discs
each. Use only recordable
discs that are coated with an
inkjet printable surface. Place
the
discs
in the right
input
bin
so that the recording side
of the discs is facing down;
the print surface will be
facing up.
If desired, also place discs
in the left
input/output bin
,
attach the
external output
bin
and
holder
, and specify
bin configuration in the
software.
Important!
Do not plug in the USB cable until instructed to do so.
Note:
You must have administrative privileges to install the software on
the external PC.
a. Place the
Rimage Software Suite disc
into the disc drive of the
connected external PC. The
Choose Setup Language
dialog box opens.
(The default is English).
Tip:
If the software installation does not start automatically, browse to the
DistSetup.exe
file on the
Rimage Software Suite disc
.
b.
Follow the on-screen prompts to continue the software installation.
c.
When prompted, connect the
USB cable
.
i. Connect the
USB cable
to the back of the Allegro 100.
ii. Connect the other end of the
USB cable
to the external PC.
Note:
For optimum performance, connect the Allegro 100 USB cable to a
USB port on your motherboard rather than to a USB card port.
d.
Continue to follow the on-screen prompts to complete installation. Once
installation is complete, you may be prompted to reboot your PC.
Note:
After the software starts, the Allegro 100 system begins the
initialization process. Initialization may take up to 5 minutes. During the
initialization process, the lift arm moves to the recorder and the printer.
When the lift arm assembly stops moving, initialization is complete and
your system is ready to process jobs.
USB 3.0
Port
5
Install the all-in-one ink cartridge
a.
Lift the printer
cover
.
b. The ink cartridge cradle
automatically moves to
loading position.
c.
When the ink cartridge cradle is stationary, lift the
cartridge latch
(see below).
d. Slide the
all-in-one ink cartridge
into the cradle as shown.
e. Close the
cartridge latch
.
f. Close the printer
cover
. The Allegro 100 system initializes.


