


38
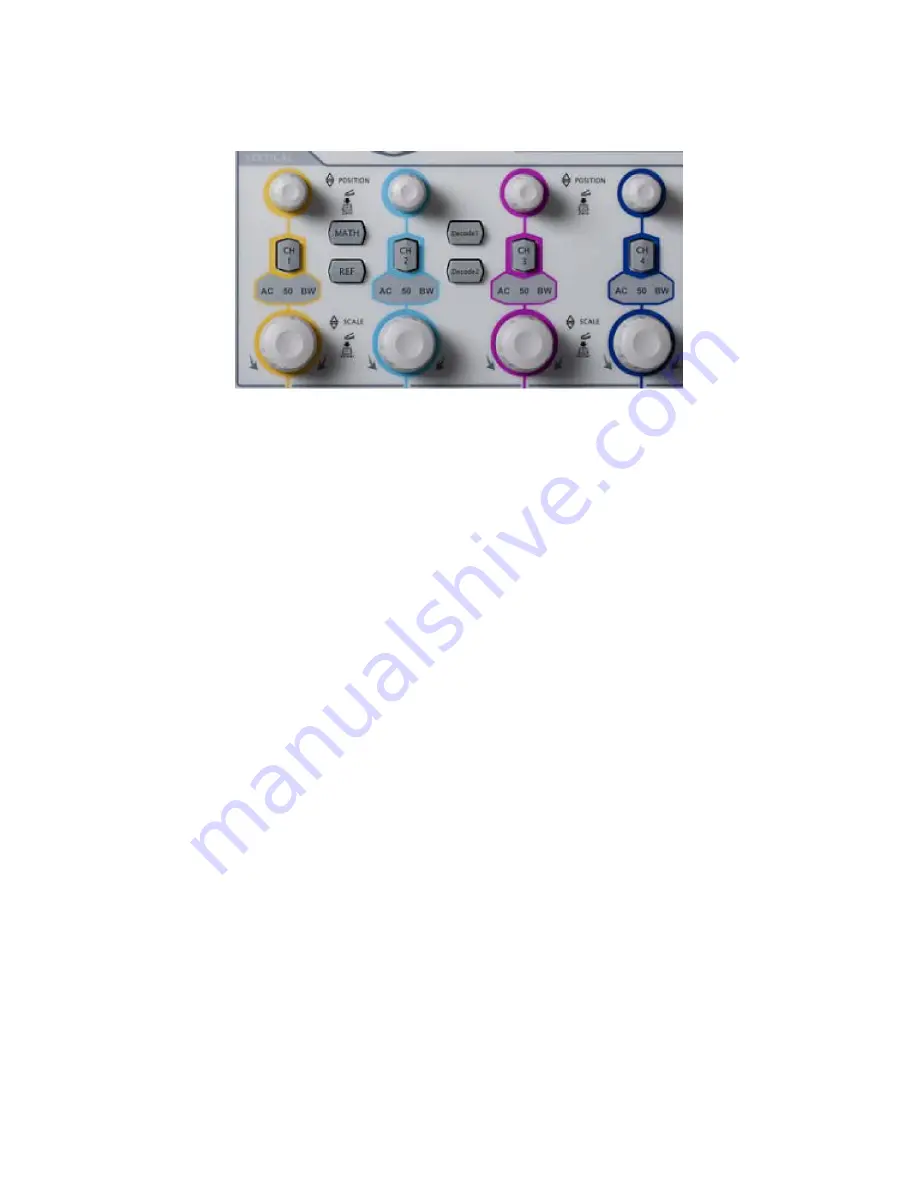
VERTICAL
• CH1, CH2, CH3, CH4:
analog input channel switches. The four chan-
nels are marked by different colors which are also used to mark the
corresponding waveforms on the screen and the channel input con-
nectors. Press any key to turn on the corresponding channel and open
the corresponding channel menu; press again to turn off the channel.
• VERTICAL POSITION:
channel vertical position knobs. Turn the knob to
modify the vertical position of the corresponding channel waveform.
During the modification, the waveform of the corresponding channel
moves up and down; the vertical position information pops up at the
lower-left side of the screen in real-time. Pressing down the knob can
quickly reset the vertical position (zero).
• VERTICAL SCALE:
channel vertical scale knobs. Turn the knob to modify
the vertical scale of the corresponding channel waveform. During the
modification, the waveform of the corresponding channel is expand
-
ed or compressed vertically (the actual amplitude keeps unchaged);
the vertical scale information at the bottom of the screen changes
accordingly. Pressing down the knob can quickly switch the vertical
scale adjustment mode between “Coarse” and “Fine”.
• MATH:
press this key to open the math operation function menu. You
can perform addition, subtraction, multiplication, division, FFT, digital
filter, logic operations and advanced operations.
Содержание DS4024
Страница 10: ...08 1 Turn on the power to the oscilloscope and wait for it to ini tialize...
Страница 11: ...09 2 Attach the probe to the BNC terminal of the oscilloscope...
Страница 12: ...10 3 Connect the probe s ground clip to ground in the circuit...
Страница 13: ...11 4 Connect the probe s measuring clip to the point within your circuit you wish to measure...
Страница 15: ...13 6 You should see your waveform on the screen...
Страница 19: ...17 10 You can zoom into the horizontal view by pressing the dial...
Страница 20: ...18 11 To return to the default view press the scale button again...
Страница 22: ...20 13 To return to the original position press the horizontal posi tion button...
Страница 25: ...23 16 To return to the default vertical position press the vertical position button...
Страница 28: ...26 19 To display all information about your waveform press the Measure button on the front panel...
Страница 29: ...27 20 Press the Display All soft key...
Страница 30: ...28 21 The trigger is set to auto by default You can adjust the trigger level by rotating the trigger dial...
Страница 31: ...29 22 Return to the original trigger level by pressing the trigger dial button...
Страница 32: ...30 253 To store a screen shot insert a USB drive into the port on the front panel...
Страница 33: ...31 24 Press the Storage button on the front panel...
Страница 34: ...32 25 Rotate the Multi Function Knob to highlight DiskD and press to select the USB drive...
Страница 35: ...33 26 Press the New File soft key...
Страница 36: ...34 27 Name the file if needed...
Страница 37: ...35 28 Press the OK soft key...
Страница 38: ...36 29 Press the Menu button on the right of the screen to exit...
Страница 39: ...37 APPENDIX FRONT PANEL FUNCTION OVERVIEW...


