background image

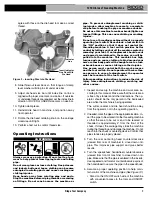
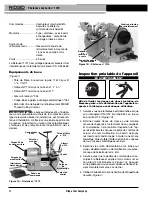
6. If on a model 120 stand, remove the retaining pin

(See Figure 4, inset) and grasping both carry han-
dles, remove the machine from the stand (machine
weighs 59 pounds).

Maintenance Instructions

WARNING

Make sure the ON/OFF switch is in the OFF position
and the machine is unplugged before performing any
maintenance or making any adjustments.

Always wear eye protection.

Maintain threading machine according to these
procedures to reduce the risk of injury from elec-
trical shock, entanglement and other causes.

Cleaning

After each use, empty the threading chips from the chip
try and wipe out any coolant residue. Wipe any coolant
present off of exposed surfaces, especially areas of
relative motion like the carriage rails.

If the jaw inserts do not grip and need to be cleaned, use
a wire brush to remove any build up of pipe scale, etc.

Lubrication

On a monthly basis (or more often if needed) lubricate all
exposed moving parts (such as carriage rails, cutter
wheels, cutter feedscrew, jaw inserts and pivot points) with
a light lubricating oil. Wipe any excess oil from exposed
surfaces.

Replacing Cutter Wheel

If the cutter wheel becomes dull or broken, push cutter
wheel pin out of frame and check for wear. If needed re-
place pin, and install new F-3 Cutter Wheel (Catalog
Number 33105). Lubricate pin with light lubricating oil.

Replacing Jaw Inserts

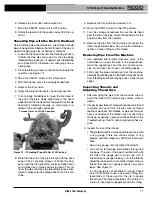
If Jaw inserts are clean and don’t grip pipe, they need to
be replaced.

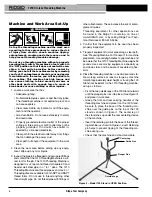
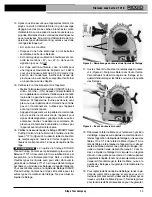
1. To remove jaw insert – place punch into spring de-

tente slot of jaw insert and push down. 

(Figure 16)

2. Continue to push down on spring detente and slowly

slide jaw insert out of chuck jaw holder. Remove jaw
insert.

3. Install new jaw insert – place into chuck jaw holder

and with finger depress spring and plunger. Slowly
move jaw insert past spring and plunger until insert
fully sits in chuck jaw.

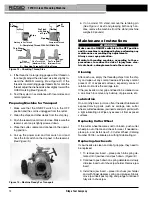
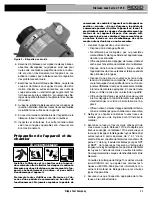
Figure 14 – Checking Thread Size

4. If the thread is too large (ring gauge will not thread on

far enough) adjust the die head size bar slightly to-
ward the UNDER marking

(See Figure 8). If the

thread is too small (ring gauge threads too far onto the
thread) adjust the die head size bar slightly toward the
OVER marking 

(See Figure 8).

5. Test the system in accordance with local codes and

normal practice.

Preparing Machine for Transport

1. Make sure that the ON/OFF switch is in the OFF

position and the cord is unplugged from the outlet.

2. Clean the chips and other debris from the chip tray.

3. Push the reservoir vent down to close. Make sure the

reservoir vent cap is tightly screwed down.

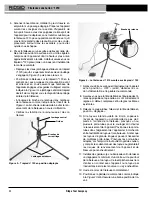
4. Place the cutter, reamer and die head in the operat-

ing position.

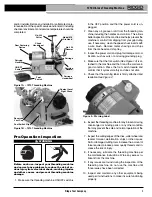
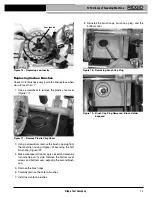
5. Coil up the power cord and foot switch cord and

hook the foot switch on the clip next to the reservoir
(See Figure 15).

Figure 15 – Machine Ready For Transport

Ridge Tool Company

12

1210 Oil-less Threading Machine

W

W

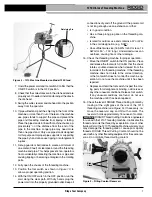
#1
Die

Pipe

#1
Die

A - Completed Thread With Full Width Die

Starting to Cut Thread

Flush

(Basic Size)

One Turn Large

(Maximum Size)

One Turn Small
(Minimum Size)

Thin Ring

Gauge

Completed Thread

Die Flush

with End

of Pipe

B - Checking Threads With Ring Gauge

Pipe

Содержание 1210

Страница 1: ...çais 17 Castellano pág 35 1210Operator s Manual WARNING Read this Operator s Manual carefully before using this tool Failure to understand and follow the contents of this manual may result in electrical shock fire and or serious personal injury ...

Страница 2: ...d Adjusting For Size In No 610 Quick Opening Die Head 8 Operating Instructions 9 Cutting Pipe with No 354 Cutter 10 Reaming Pipe with No 334 Reamer 10 Threading Pipe with No 610 Die Head 11 Removing Pipe From Machine 11 Inspecting Threads and Adjusting Thread Size 11 Preparing Machine for Transport 12 Maintenance Instructions Cleaning 12 Lubrication 12 Replacing Cutter Wheel 12 Replacing Jaw Inser...

Страница 3: ...1210 Oil less Threading Machine 1210 1210 Oil less Threading Machine Record Serial Number below and retain product serial number which is located on nameplate Serial No ...

Страница 4: ...ols This is the safety alert symbol It is used to alert you to potential personal injury hazards Obey all safety messages that follow this symbol to avoid possible injury or death DANGER indicates a hazardous situation which if not avoided will result in death or serious injury WARNING indicates a hazardous situation which if not avoided could result in death or serious injury CAUTION indicates a ...

Страница 5: ...ur application The correct power tool will do the job better and safer at the rate for which it is de signed Do not use power tool if the switch does not turn it ON and OFF Any power tool that cannot be con Ridge Tool Company 3 1210 Oil less Threading Machine trolled with the switch is dangerous and must be re paired Disconnect the plug from the power source and or the battery pack from the power ...

Страница 6: ...achine to install or remove fit tings it is not an intended use of the machine This practice could lead to trapping entanglement and loss of control Secure machine to bench or stand Support long heavy pipe with pipe supports This practice will prevent tipping Do not wear gloves or loose clothing when oper ating machine Keep sleeves and jackets buttoned Do not reach across the machine or pipe Cloth...

Страница 7: ...ng tools increase the amount of force required produce poorer quality threads and in crease the risk of injury 8 If necessary lubricate the threading machine per the maintenance instructions Wipe any excess lu bricant from the machine 9 If any issues are found during the inspection of the threading machine do not use the machine until those issues have been corrected 10 Inspect and maintain any ot...

Страница 8: ...schedule 40 and heavier wall steel pipe in 1 2 to 1 sizes The 1210 Threading Machine can thread pipe as short as 41 2 Threading dies are available for both NPT and BSPT thread forms Do not use to thread anything other than straight pipe Do not thread pipe with fittings or Ridge Tool Company 6 1210 Oil less Threading Machine other attachments These increase the risk of entan glement injuries Thread...

Страница 9: ... poor quality threads RIDGID Thread Cutting Coolant should not be used with any other threading equipment for the same rea sons Do not dilute thread cutting coolant Figure 5 Filling Coolant Reservoir Figure 4 1210 Machine Mounted on Model 120 Stand 7 Uncoil the power cord and foot switch Confirm that the ON OFF switch is in the OFF position 8 Check that the correct dies are in the die head and are...

Страница 10: ...transporting 21 Move the ON OFF switch to the OFF position and with dry hands unplug the machine Installing Dies and Adjusting For Size In No 610 Quick Opening Die Head The 610 quick opening die head Figure 8 uses one set of dies for 1 2 and 3 4 threads and another set for 1 threads Dies are available for NPT and BSPT thread forms The 610 Die Head is designed for use ONLY with the 1210 Threading M...

Страница 11: ...he threading and damage the machine Do not reach into the chuck or centering device Confirm that pipe stands are properly placed 3 Turn the rear centering head counterclockwise viewed from rear of machine to close down onto pipe This improves pipe support and gives better results 4 Turn the speedchuck handwheel counterclockwise viewed from front of machine to close down onto pipe Make sure that th...

Страница 12: ... remove the burr as desired Figure 12 Reaming Pipe with No 334 Reamer Be sure that you can control the foot switch Do not step on foot switch yet Be sure that you have good balance and do not have to over reach Figure 10 Operator in a proper operating position Cutting Pipe with No 354 Cutter 1 Open cutter by turning feedscrew counter clockwise Lower cutter into the cutting position over the pipe U...

Страница 13: ... 12 Remove the pipe from the machine and inspect the thread as instructed below Do not use the machine to tighten or loosen fittings on the thread Removing Pipe From The Machine 1 Use repeated and forceful clockwise spins of the handwheel to loosen the pipe in the speedchuck Open the speedchuck and the rear centering de vice Do not reach into chuck or centering device 2 Firmly grip the pipe and re...

Страница 14: ...1 To remove jaw insert place punch into spring de tente slot of jaw insert and push down Figure 16 2 Continue to push down on spring detente and slowly slide jaw insert out of chuck jaw holder Remove jaw insert 3 Install new jaw insert place into chuck jaw holder and with finger depress spring and plunger Slowly move jaw insert past spring and plunger until insert fully sits in chuck jaw Figure 14...

Страница 15: ... machine housing Figure 18 exposing the first brush cap Figure 19 4 Make sure reservoir vent cap is closed and carefully turn machine on it s side Remove the bottom cover screws and bottom cover exposing the second brush cap 5 Remove the brush caps 6 Carefully remove the carbon brushes 7 Install new carbon brushes 8 Reinstall the brush caps brush cap plug and the bottom cover Figure 18 Removing Br...

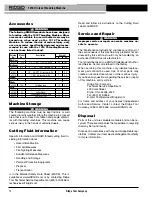
Страница 16: ... The following RIDGID products have been designed to function with the 1210 Threading Machine Other accessories suitable for use with other tools may be hazardous when used on the 1210 Threading Machine To reduce the risk of serious injury only use accessories specifically designed and recom mended for use with the 1210 Threading Machine such as those listed in chart Machine Storage WARNING The th...

Страница 17: ... Replace dies Replace dies Only use RIDGID Thread Cutting Coolant Check coolant drip rate and adjust as needed Clean chips dirt or other foreign material from between diehead and carriage Recommend using with black or galvanized steel pipe Pipe wall too thin use schedule 40 or heavier pipe Adjust die head to give proper size thread Clean and lubricate carriage rails Adjust die head to give proper ...

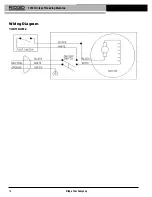
Страница 18: ...Ridge Tool Company 16 1210 Oil less Threading Machine Wiring Diagram 120V 60 Hz ...

Страница 19: ...le numéro de série indiqué sur la plaque signalétique de l appareil N de série AVERTISSEMENT Familiarisez vous bien avec le mode d emploi avant d utiliser l appareil L incompréhension ou le non respect des consignes ci après augmenteraient les risques de choc électrique d incendie et ou d accident grave ...

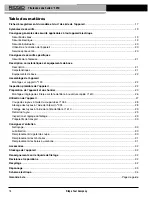
Страница 20: ...ation de l appareil et du chantier 23 Montage et réglage des filières sur tête de filière à ouverture rapide nº 610 26 Utilisation de l appareil 27 Coupe des tuyaux à l aide du coupe tubes nº 354 28 Alésage des tuyaux à l aide de l alésoir nº 334 28 Filetage des tuyaux à l aide de la tête de filière nº 610 29 Retrait du tuyau 29 Inspection et réglage du filetage 29 Préparatifs de transport 30 Cons...

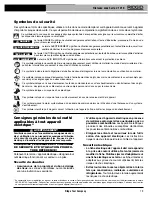
Страница 21: ...nt Ce symbole interdit le port de gants durant l utilisation de l appareil afin de limiter les risques d enchevêtrement Ce symbole indique un risque de lésion ou d écrasement en cas de renversement de l appareil Ce symbole indique un risque d écrasement ou lésion contondante en cas d enchevêtrement ou d entraînement des doigts des mains des jambes des vêtements ou autres objets personnels dans ou ...

Страница 22: ...tion de travail et un bon équilibre à tout moment Cela vous permettra de mieux con trôler l appareil en cas d imprévu Habillez vous de manière appropriée Ne portez ni vêtements amples ou bijoux Éloignez vos cheveux vos vêtements et vos gants des mécanismes Les vêtements flottants les bijoux et les cheveux longs risquent d être entraînés par les éléments rotatifs de l appareil En présence d un syst...

Страница 23: ...charge Moteur Type Universel Tension d alimentation 115V monophasé 50 60 Hz Résistance 6 4 ampères Consignes de sécurité particulières AVERTISSEMENT La section suivante s adresse tout particulière ment à la sécurité d utilisation de l appareil en question Familiarisez vous soigneusement avec ces consign es avant d utiliser la fileteuse sans huile no 1210 afin de limiter les risques de grave blessu...

Страница 24: ...étiquette de sécurité Figure 2 Commandes Interrupteur marche arrêt à bascule et pédale de commande marche arrêt Mandrins Type marteau avec inserts échangeables dispositif de centrage arrière à cames Système de refroidissement Réservoir de liquide de refroidissement incorporé de 16 oz avec pompe à rotor denté Poids 59 livres La fileteuse nº 1210 est protégée plusieurs brevets US et internationaux e...

Страница 25: ...e des vête ments autour d un bras ou autre membre 1 Localisez l appareil dans un endroit qui Dispose d un éclairage suffisant Ne renferme pas de liquides gaz ou poussières combustibles N étant pas blindé cet appareil risque de créer des étincelles Offre une plate forme dégagée de niveau stable et sèche pour l ensemble du matériel et son utilisateur Dispose d une bonne ventilation Ne pas utiliser l...

Страница 26: ... pédale de commande comme indiqué à la Figure 10 afin d assurer une bonne position de tra vail 5 Amenez l ensemble du matériel à pied d œuvre en empruntant un passage dégagé Préparez l appareil suivant les consignes de la section Préparatifs de transport Servez vous des poignées de transport de l appareil pour le déplacer sans toutefois oublier que la fileteuse 1210 pèse quand même 59 livres et qu...

Страница 27: ... appoint Le réservoir contient environ 16 onces de liquide de file tage Le liquide de filetage RIDGID Thread Cutting Coolant est spécialement prévu pour la fileteuse nº 1210 Il assurera à la fois la lubrification et par évaporation le refroidissement des filets L utilisation d autres types de liquide aura pour effet d annuler la garantie de la fileteuse nº 1210 et risque d endommager ses filières ...

Страница 28: ...re graduée 10 Serrez le levier de verrouillage 11 Réinstallez la tête de filière sur l appareil puis relevez la 12 Resserrez la molette de verrouillage du chariot à fond Figure 7 Réglage du débit de liquide de filetage 20 Relevez la tête de filière La position de la tête de fil ière ouvre et ferme l arrivée du liquide de filetage lorsque l appareil tourne Afin de conserver le liq uide ne rabaissez...

Страница 29: ...versement ou chute du matériel ou des tuyaux Ne portez pas de gants ou de vêtements amples Boutonnez vos manches de chemise et vos blousons Les vêtements amples ou flottants risquent d être entraînés dans le mécanisme et provoquer l écrasement des membres ou autres blessures corporelles Éloignez vos mains des tuyaux et mécanismes lors de leur rotation Arrêtez l appareil avant d essuyer les filetag...

Страница 30: ...ge trop agressif ne servirait qu a user le galet de coupe prématurément et créer des bavures de coupe plus importantes Ne pas soutenir le tuyau à la main Laissez l appareil et le porte tubes soutenir la chute Figure 11 Coupe des tuyaux à l aide du coupe tubes nº 354 7 Lâchez la pédale de commande et retirez votre pied de son étrier 8 Mettez l interrupteur de l appareil en position OFF 9 Dégagez le...

Страница 31: ...oupez la section filetée du tuyau réglez la tête de filière puis entamez un nouveau filetage Tout filetage non conforme risque de provoquer des fuites Figure 14 En l absence d une jauge annulaire un raccord neuf propre et de pas adapté peut servir au con trôle des filetages Le filetage effectué doit per mettre un engagement du raccord de 4 ou 5 tours à la main avant de buter 7 Ramenez l interrupte...

Страница 32: ...arrêt et l appareil débranché avant toute intervention de révision ou réglage de celui ci Portez systématiquement une protection oculaire Respectez les consignes d entretien suivantes afin de limiter les risques de choc électrique d en chevêtrement et autres blessures corporelles Nettoyage de l appareil Après chaque utilisation videz le tiroir à copeaux avant d en essuyer les résidus de liquide de...

Страница 33: ...fonctionner avec la fileteuse no 1210 L utili sation d accessoires prévus pour d autres types Remplacement des mâchoires Lorsque des mâchoires propres ne tiennent plus les tuyaux elles doivent être remplacées 1 Pour retirer une mâchoire introduisez un poinçon dans l orifice de la détente à ressort de l insert puis appuyez Figure 16 2 Tout en appuyant sur la détente à ressort retirez progressivemen...

Страница 34: ...qui n est pas adressé dans cette section devra être confié uniquement à un réparateur RIDGID agréé L appareil devra alors être confié à réparateur RIDGID in dépendant ou renvoyé à l usine Seules des pièces de rechange d origine doivent être employées lors de la révision de cette machine Le non respect de cette consigne pourraient augmenter les risques de choc électrique ou autre blessure grave Veu...

Страница 35: ...ndrin desserré Remplacer les filières Remplacer les filières N utiliser que le liquide de filetage RIDGID Thread Cutting Coolant Vérifier et régler le débit Nettoyer la zone entre la tête de filière et le chariot Utiliser de préférence du tuyau noir ou galvanisé Parois de tuyau trop minces Régler la tête de filière pour obtenir les côtes prévues Nettoyer et lubrifier les rails du chariot Régler la...

Страница 36: ...Ridge Tool Company 34 Fileteuse sans huile no 1210 Schéma électrique 120V 60 Hz Pédale de commande Neutre Terre Noir Blanc Vert Noir Blanc Noir Blanc Inter Marche Arrêt Moteur ...

Страница 37: ...mente su Manual del Operario Pueden ocurrir descar gas eléctricas incendios y o graves lesiones si no se compren den y siguen las instrucciones de este manual Roscadora Seca sin aceite No 1210 Apunte aquí el número de serie del aparato que se encuentra en su placa de características No de Serie ...

Страница 38: ... Instrucciones de funcionamiento 45 Corte de tubos con la Cortadora No 354 46 Escariado de tubos con la Escariadora No 334 46 Roscado de tubos con el Cabezal de Terrajas No 610 47 Cómo sacar el tubo de la Roscadora 47 Inspección de las roscas y ajuste del tamaño de la rosca 47 Preparativos para el transporte de la máquina 48 Instrucciones para el mantenimiento Limpieza 48 Lubricación 48 Reemplazo ...

Страница 39: ... al hacerla funcionar Este símbolo indica que el operario no debe usar guantes mientras hace funcionar esta máquina puesto que podrían en gancharse Este símbolo indica que la máquina puede volcarse y golpear o aplastar a una persona Este símbolo indica que existe el riesgo de que dedos piernas la ropa y otros objetos se enganchen o se envuelvan en los ejes giratorios de la máquina y causar graves ...

Страница 40: ...opa suelta ni joyas Mantenga su cabello y ropa apartados de las piezas en movimiento La ropa suelta las joyas o el pelo largo pueden engancharse en la piezas móviles Si se proveen dispositivos para la extracción y recolección del polvo cuando se usa el aparato conéctelos y empléelos correctamente El uso de mecanismos que limpian el aire en el ambiente de trabajo reduce el riesgo de problemas respi...

Страница 41: ...Técnico de Ridge Tool Company al 800 519 3456 o escriba a techservices ridgid com Seguridad de la Roscadora Si la pieza de trabajo se extenderá más allá de la máquina rodee la zona de trabajo con barreras dejando un mínimo de un metro de espacio libre alrededor de la Roscadora Esta zona segura im pedirá que otros se puedan acercar y engancharse en el tubo que gira Siga las instrucciones para usar ...

Страница 42: ...ruebe que la etiqueta de advertencias se en cuentra bien pegada sobre la máquina y completa mente legible Figura 2 Sistema refrigerante depósito incorporado con capacidad de 16 onzas de refrigerante con bomba tipo Gerotor Peso 59 libras La máquina Roscadora No 1210 se encuentra protegida por patentes estadounidenses incluida la No 5826469 e internacionales Equipo estándar Figura 1 Cabezal de Terra...

Страница 43: ...or por tanto su ropa podría en rollársele alrededor de su brazo u otra parte de su cuerpo con feroz fuerza y quebrar o aplastarle hue sos pegarle o lesionarlo gravemente 1 Elija una zona de trabajo donde haya suficiente luz no estén presentes líquidos vapores o polvos com bustibles La Roscadora no está hecha a prueba de explosiones y puede lanzar chispas haya un sitio despejado seco nivelado para ...

Страница 44: ...roscadora y del tubo que se labra Así per sonas ajenas al funcionamiento de la Roscadora no entrarán sin querer en contacto con la máquina o el tubo en los cuales podrían engancharse y o causar el vuelco de toodo el equipo 12 Abra el portabrocas de la máquina por completo 13 Sitúe el interruptor de pie como se muestra en la dora para tomarla y sea consciente de que pesa 59 li bras Tenga cuidado al...

Страница 45: ...as de RIDGID en las ventanillas en la parte trasera de la Roscadora No 1210 vea la Figura 5 Si le falta líquido quite la tapa del depósito y llénelo con refrig erante Al dep osito le caben 16 onzas de refrigerante El Refrigerante para Cortar Roscas de RIDGID está especialmente formulado para usarse en la Roscadora No 1210 Lubrica la rosca y la enfría medi ante evaporación El empleo de otros refrig...

Страница 46: ...o de requerirse roscas sobredimensionadas o subdimensionadas coloque la línea índice en dirección a las marcas OVER por encima ó UNDER por debajo en la barra de dimensionamiento 10 Apriete la palanca de agarre Figura 7 Ajuste del ritmo de goteo del refrigerante 20 Levante el cabezal de terrajas La posición del cabezal abre o cierra el flujo del refrigerante mientras la máquina se encuentra en func...

Страница 47: ...perilla de retención del cabezal en el carro hacia la derecha hasta quedar apretada 13 Efectúe una rosca de prueba para verificar el tamaño de rosca deseado Instrucciones de funcionamiento ADVERTENCIA Use siempre anteojos de seguridad Use calzado con punteras de acero para proteger sus pies en caso de caerse el tubo o la máquina No use guantes o ropa suelta cuando haga fun cionar la Roscadora Mant...

Страница 48: ...tubo hasta cortar el tubo Si se aprieta el mango con demasiado dinamismo se acortará la vida útil de la cortadora y aumentará el tamaño de las rebabas en el tubo No sujete el tubo con la mano Permita que el carro de la máquina y los soportatubos sostengan el tubo que se corta Figura 11 Corte de un tubo con la Cortadora No 354 7 Suelte el interruptor de pie y retire su pie 8 Apague el interruptor d...

Страница 49: ...fugas Vea la Figura 14 Si no dispone de un calibrador anular para veri ficar el tamaño de la rosca se puede usar en su lugar un acoplamiento o tubo de unión limpio representativo de los que se están empleando en la obra La rosca del tubo debe labrarse de modo que con 4 ó 5 vueltas el tubo quede en roscado a mano con el acoplamiento 8 Vuelva la escariadora a su posición original alejada del operari...

Страница 50: ... que la máquina pesa 59 li bras Instrucciones de mantenimiento ADVERTENCIA Asegure que el interruptor de la máquina está en apagado OFF y que se encuentra desenchufada antes de efectuarle cualquier servicio o ajustes Siempre use anteojos protectores Hágale mantenimiento a la Roscadora de acuerdo a estos procedimientos con el fin de evitar lesionarse por descargas eléctricas enganches u otras causa...

Страница 51: ...al descubierto stale una nueva Rueda de Corte F 3 No 33105 en el catálogo Lubrique el pasador con aceite liviano Reemplazo de las inserciones de la mordaza Si las inserciones de la mordaza están limpias pero no agarran necesitan reemplazarse 1 Para extraer las inserciones meta un punzón en la ranura del retén de resorte en la mordaza y empuje hacia abajo Figura 16 2 Continúe empujando el retén de ...

Страница 52: ...r problema que no haya sido tratado en este capítulo debe ser resuelto únicamente por un técnico autorizado de RIDGID La máquina debe llevarse a un Servicentro Autorizado Independiente RIDGID o devuelta a la fábrica Cuando se le haga servicio a esta máquina sólo deben emplearse repuestos idénticos a los originales El uso de otras piezas y partes podría crear el riesgo de que ocur ran descargas elé...

Страница 53: ...place las terrajas Reemplace las terrajas Sólo emplee Refrigerante para Cortar Roscas de RIDGID Revise el ritmo de goteo del refrigerante y ajústelo Elimine las virutas mugre y todo material foráneo que detecte entre las terrajas y el carro Se recomienda el empleo de tubos de acero negro o galvanizado Pared del tubo muy delgada emplee tubos de Serie 40 o más gruesos Ajuste el cabezal de terrajas p...

Страница 54: ...dge Tool Company 52 Roscadora Seca sin aceite No 1210 Diagrama de cableado 120V 60 Hz INTERRUPTOR DE PIE NEUTRO INTERRUPTOR DE ENCENDIDO APAGADO BLANCO NEGRO NEGRO NEGRO BLANCO BLANCO A TIERRA VERDE MOTOR ...

Страница 55: ...o abuso o desgaste normal RIDGE TOOL no se hace responsable de daño incidental o consiguiente alguno Relación entre la garantía y las leyes locales Algunos estados de los EE UU no permiten la exclusión o restricción referente a daños incidentales o consiguientes Por lo tanto puede que la limitación o restricción mencionada anteriormente no rija para Ud Esta garantía le otorga derechos específicos ...

Отзывы: