background image

3

English

Deutsch

Step 3

Step 2

Step 1

B1

A1x4

B5

A3x2

A5x2

A2x2

A10

B2

Содержание FS305B

Страница 1: ...an Ihrem Bildschirm VESA Befestigungsl cher Diese Wandhalterung unterst tzt folgende Lochabst nde Horizontal Waagerecht Vertikal Senkrecht Bildschirm R ckseite ACHTUNG NIEMALS DAS MAXIMAL ZUL SSIGE B...

Страница 2: ...chten m chten Ziehen Sie die Schrauben fest an jedoch nicht berziehen berdrehen berziehung der Schrauben kann zu Sch den an der Konstruktion f hren und reduziert die Haltbarkeit der gesamten Konstrukt...

Страница 3: ...x4 M8x30 M E x4 M8x50 M F x4 x8 M H A10x1 A11x1 A4x1 A12x2 A9x2 English Deutsch Lieferumfang WICHTIG Stellen Sie vor der Montage sicher dass alle Teile welche hier aufgef hrt sind bei der Lieferung d...

Страница 4: ...3 English Deutsch Schritt 3 Schritt 2 Schritt 1 B1 A1x4 B5 A3x2 A5x2 A2x2 A10 B2...

Страница 5: ...A7x2 A4 A6x2 Achtung Stellen Sie sicher dass die beiden Pfeile der A4 und B6 nach oben zeigen wie auf diesem Bild gezeigt wird Zuerst ziehen Sie die Schrauben A7 und an schlie end die Schrauben A9 fe...

Страница 6: ...5 English Deutsch Schritt 6a Schritt 6b TV TV TV TV TV TV M A M B M C M G M H M G M D M E M I M G M D M E M H M G M F M I M G M F M H M G M D M E M H M G M F M I M I M I M H M G M C...

Страница 7: ...Deutsch I Schritt 7 Schritt 8 A12x2 Fertig Wartung Pr fen Sie in regelm igen Abst nden mindestens alle drei Monate ob alle Schrauben an dem Produkt fest angezogen sind Bei Fragen kontaktieren Sie Ihre...

Страница 8: ...VESA Mounting holes This wall mount supports the following distance between holes Horizontally Vertical Perpendicularly min 120mm max 410mm min 50mm max 405mm Display back CAUTION DO NOT EXCEED RATED...

Страница 9: ...ws firmly but do not over tighten Over tightening can cause damage the items this greatly reduces their holding power This product is intended for indoor use only Using this product outdoors could lea...

Страница 10: ...4 x8 M I M6x30 M D x4 M8x30 M E x4 M8x50 M F x4 x8 M H 2 English Deutsch Component Checklist IMPORTANT Ensure that you have received all parts according to the component checklist prior to installatio...

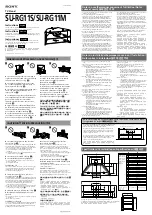
Страница 11: ...3 English Deutsch Step 3 Step 2 Step 1 B1 A1x4 B5 A3x2 A5x2 A2x2 A10 B2...

Страница 12: ...4 B6 A9x2 A7x2 A4 A6x2 Attention make sure the direction of both arrows on A4 and B6 are shown upwards as shown in the picture Firstly tighten the screws A7 strongly and then tighten the A9 screws Ste...

Страница 13: ...5 English Deutsch Step 6a Step 6b TV TV TV TV TV TV M A M B M C M G M H M G M D M E M I M G M D M E M H M G M F M I M G M F M H M G M D M E M H M G M F M I M I M I M H M G M C...

Страница 14: ...ish Deutsch I Step 7 Step 8 A12x2 Maintenance Check that the bracket is secure and safe to use at regular intervals at least every three months Please contact your distributor if you have any question...

Отзывы: